Fuzzing Tinybmp in Rust || From dumb to structure-aware guide
2022-11-16 00:00:00 +0000
Introduction
In this blog post we will play around with some Rust code and fuzz the BMP header parsing methods within the TinyBMP Rust project. According to the project’s description:
A small BMP parser primarily for embedded, no-std environments but usable anywhere. This crate is primarily targeted at drawing BMP images to embedded_graphics DrawTargets, but can also be used to parse BMP files for other applications.
While I’ve been trying to learn Rust and understand a bit more about traits, I found this to be a perfect target as usually anything related to parsing might be prone to vulnerabilities. We will be starting off by reading the documentation of the project, setting up a simple (dumb) fuzzer and then move on to more interesting topic such as creating a structure-aware fuzzer. Hence if you haven’t done any fuzzing in Rust and looking for a beginner tutorial then hopefully this blog is for you! We will also be utilising cargo-fuzz , a cargo subcommand which uses libFuzzer (and needs LLVM sanitizer support). Before we move on, make sure to install it as per project instructions so you can follow along. As such, I will be using Kali 64bit for the rest of this tutorial.
Please note all of the discovered issues/bugs here have been reported already to the project owners and have been fixed!
This blog would also0 have not be possible without Addison’s (@addisoncrump_vr) help, which he provided guidance as well as the harness for the smart/structured-aware section which we will analyse in this blog!
Setting up the project
First things first, in order to be able to run cargo-fuzz you need to install the nightly version of rust (or switch to it):
$ rustup default nightly-x86_64-unknown-linux-gnu
info: using existing install for 'nightly-x86_64-unknown-linux-gnu'
info: default toolchain set to 'nightly-x86_64-unknown-linux-gnu'

  nightly-x86_64-unknown-linux-gnu unchanged - rustc 1.67.0-nightly (73c9eaf21 2022-11-07)

$ rustup show
Default host: x86_64-unknown-linux-gnu
rustup home:  /home/kali/.rustup

installed toolchains
--------------------

stable-x86_64-unknown-linux-gnu
nightly-2022-08-16-x86_64-unknown-linux-gnu
nightly-x86_64-unknown-linux-gnu (default)
Let’s start by cloning the repo and reverting it prior the patches that have been added.
$ git clone https://github.com/embedded-graphics/tinybmp
Cloning into 'tinybmp'...
remote: Enumerating objects: 338, done.
remote: Counting objects: 100% (206/206), done.
remote: Compressing objects: 100% (142/142), done.
remote: Total 338 (delta 121), reused 94 (delta 59), pack-reused 132
Receiving objects: 100% (338/338), 175.67 KiB | 3.03 MiB/s, done.
Resolving deltas: 100% (162/162), done.
Let’s limit the commit entries to 10:
$ git log -n 10
commit 8b4c2ced92a9ff16b5c534ca11c9877ff5d31a8d (HEAD -> master, tag: v0.4.0, origin/master, origin/HEAD)
Author: James Waples <james@wapl.es>
Date:   Fri Sep 30 19:13:03 2022 +0100

    (cargo-release) version 0.4.0

commit 955135693326b133dd6a333b97b4510f8060d4fe
Author: James Waples <james@wapl.es>
Date:   Fri Sep 30 19:12:03 2022 +0100

    Fix warning in release config

commit 132967379a1d16f2741f8dffdf423a21b4f34114
Author: James Waples <james@wapl.es>
Date:   Fri Sep 30 19:10:51 2022 +0100

    Add pixel getter examples (#37)

    * Add pixel getter examples

    * Apply suggestions from code review

    Co-authored-by: Ralf Fuest <mail@rfuest.de>

commit c64e35ae19c8a7175aebcbc9a008d331f72b4d20
Author: Ralf Fuest <mail@rfuest.de>
Date:   Fri Sep 30 17:11:52 2022 +0200

    Check for integer overflows in RawBmp::parse (#32)

    * Check for integer overflows in RawBmp::parse

    * Don't allow images with zero width or height

    * Check for negative width and add tests

    * Reformat code

    ... snip ...

commit 815e9f99aa5ce053b4985572ea145f39758e78a5
Author: James Waples <james@wapl.es>
Date:   Mon Apr 18 20:41:08 2022 +0100

    (cargo-release) version 0.3.3
We’re interested in reverting it to the version 0.3.3 so let’s do that:
┌──(kali㉿kali)-[~/Desktop/tinybmp]
└─$ git checkout -b old-state 815e9f99aa5ce053b4985572ea145f39758e78a5
Switched to a new branch 'old-state'

┌──(kali㉿kali)-[~/Desktop/tinybmp]
└─$ git log
commit 815e9f99aa5ce053b4985572ea145f39758e78a5 (HEAD -> old-state)
Author: James Waples <james@wapl.es>
Date:   Mon Apr 18 20:41:08 2022 +0100

    (cargo-release) version 0.3.3
Creating a dumb fuzzer
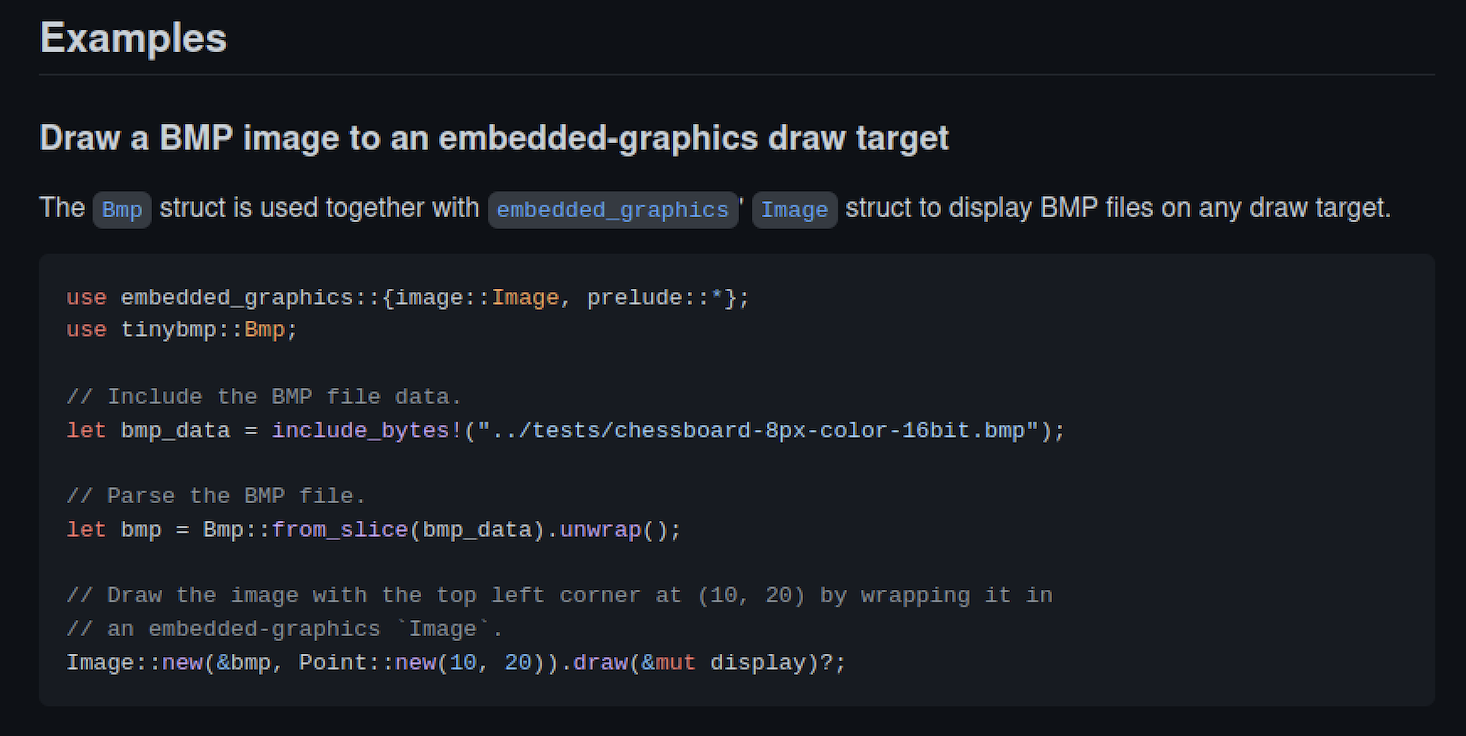
Now that we’ve setup the project it’s time to experiment and play around with the docs. Navigating through the project we can see the following sample code:
If you are coming from a winafl/AFL background naturally you’ll probably think that somehow you’ll need to figure out a way to provide a file input, mutate it and then pass the fuzzed file to the target. However, cargo-fuzz/LLVM works slightly different… remember its API is defined as:
// fuzz_target.cc
extern "C" int LLVMFuzzerTestOneInput(const uint8_t *Data, size_t Size) {
  DoSomethingInterestingWithMyAPI(Data, Size);
  return 0;  // Values other than 0 and -1 are reserved for future use.
}
Let’s compare that to cargo’s fuzz tutorial:
#![no_main]
#[macro_use] extern crate libfuzzer_sys;
extern crate url;

fuzz_target!(|data: &[u8]| {
    if let Ok(s) = std::str::from_utf8(data) {
        let _ = url::Url::parse(s);
    }
});
So the API is pretty much similar, in fact we only need to privide a closure with the parameter data which is going to be what cargo-fuzz will mutate.
Let’s init a new campaign, create a new project and name it dumb:
┌──(kali㉿kali)-[~/Desktop/tinybmp]
└─$ cargo fuzz init
┌──(kali㉿kali)-[~/Desktop/tinybmp]
└─$ cargo fuzz add dumb
┌──(kali㉿kali)-[~/Desktop/tinybmp]
└─$ cat fuzz/fuzz_targets/dumb.rs
#![no_main]
use libfuzzer_sys::fuzz_target;

fuzz_target!(|data: &[u8]| {
    // fuzzed code goes here
});
Cargo-fuzz has created some boilerplate code for us, let’s modify it similar to the provided example:
#![no_main]
use libfuzzer_sys::fuzz_target;
use embedded_graphics::{pixelcolor::Rgb888, prelude::*};
use tinybmp::Bmp;

fuzz_target!(|data: &[u8]| {
    // Note: The color type is specified explicitly to match the format used by the BMP image.
    let bmp = Bmp::<Rgb888>::from_slice(data).unwrap();
});
That looks like it might work, let’s try to run it:
$ cargo fuzz run dumb
    Updating crates.io index
  Downloaded libfuzzer-sys v0.4.5
  Downloaded libc v0.2.137
  Downloaded arbitrary v1.2.0
  Downloaded 3 crates (763.8 KB) in 0.37s
    -- snip --
Compiling tinybmp-fuzz v0.0.0 (/home/kali/Desktop/tinybmp/fuzz)
error[E0433]: failed to resolve: use of undeclared crate or module `embedded_graphics`
 --> fuzz_targets/dumb.rs:3:5
  |
3 | use embedded_graphics::{pixelcolor::Rgb888, prelude::*};
  |     ^^^^^^^^^^^^^^^^^ use of undeclared crate or module `embedded_graphics`

error[E0432]: unresolved import `embedded_graphics::pixelcolor::Rgb888`
 --> fuzz_targets/dumb.rs:3:25
  |
3 | use embedded_graphics::{pixelcolor::Rgb888, prelude::*};
  |                         ^^^^^^^^^^^^^^^^^^

Some errors have detailed explanations: E0432, E0433.
For more information about an error, try `rustc --explain E0432`.
error: could not compile `tinybmp-fuzz` due to 2 previous errors
Error: failed to build fuzz script: "cargo" "build" "--manifest-path" "/home/kali/Desktop/tinybmp/fuzz/Cargo.toml" "--target" "x86_64-unknown-linux-gnu" "--release" "--bin" "dumb"
That command failed, let’s add that crate to Cargo.toml and run it again:
[dependencies]
libfuzzer-sys = "0.4"
embedded-graphics = "0.7.1"└─$ cargo fuzz run dumb
Updating crates.io index
Downloaded libfuzzer-sys v0.4.5
Downloaded libc v0.2.137
Downloaded arbitrary v1.2.0
Downloaded 3 crates (763.8 KB) in 0.27s
Compiling libc v0.2.137
Compiling autocfg v1.1.0
Compiling az v1.2.1
Compiling byteorder v1.4.3
Compiling num-traits v0.2.15
Compiling micromath v1.1.1
Compiling jobserver v0.1.25
Compiling arbitrary v1.2.0
Compiling cc v1.0.73
Compiling libfuzzer-sys v0.4.5
Compiling float-cmp v0.8.0
Compiling embedded-graphics-core v0.3.3
Compiling embedded-graphics v0.7.1
Compiling once_cell v1.15.0
Compiling tinybmp v0.3.3 (/home/kali/Desktop/tinybmp)
Compiling tinybmp-fuzz v0.0.0 (/home/kali/Desktop/tinybmp/fuzz)
....
--> fuzz_targets/dumb.rs:3:45
|
3 | use embedded_graphics::{pixelcolor::Rgb888, prelude::*};
| ^^^^^^^^^^
|
= note: `#[warn(unused_imports)]` on by default
warning: unused variable: `bmp`
--> fuzz_targets/dumb.rs:8:9
|
8 | let bmp = Bmp::<Rgb888>::from_slice(data).unwrap();
| ^^^ help: if this is intentional, prefix it with an underscore: `_bmp`
|
= note: `#[warn(unused_variables)]` on by default
warning: `tinybmp-fuzz` (bin "dumb") generated 2 warnings
Finished release [optimized + debuginfo] target(s) in 0.90s
warning: unused import: `prelude::*`
--> fuzz_targets/dumb.rs:3:45
|
3 | use embedded_graphics::{pixelcolor::Rgb888, prelude::*};
| ^^^^^^^^^^
|
= note: `#[warn(unused_imports)]` on by default
warning: unused variable: `bmp`
--> fuzz_targets/dumb.rs:8:9
|
8 | let bmp = Bmp::<Rgb888>::from_slice(data).unwrap();
| ^^^ help: if this is intentional, prefix it with an underscore: `_bmp`
|
= note: `#[warn(unused_variables)]` on by default
warning: `tinybmp-fuzz` (bin "dumb") generated 2 warnings
Finished release [optimized + debuginfo] target(s) in 0.01s
Running `fuzz/target/x86_64-unknown-linux-gnu/release/dumb -artifact_prefix=/home/kali/Desktop/tinybmp/fuzz/artifacts/dumb/ /home/kali/Desktop/tinybmp/fuzz/corpus/dumb`
INFO: Running with entropic power schedule (0xFF, 100).
INFO: Seed: 485875195
INFO: Loaded 1 modules (11576 inline 8-bit counters): 11576 [0x558fe7ad9c10, 0x558fe7adc948),
INFO: Loaded 1 PC tables (11576 PCs): 11576 [0x558fe7adc948,0x558fe7b09cc8),
INFO: 24 files found in /home/kali/Desktop/tinybmp/fuzz/corpus/dumb
INFO: -max_len is not provided; libFuzzer will not generate inputs larger than 4096 bytes
thread '<unnamed>' panicked at 'called `Result::unwrap()` on an `Err` value: UnexpectedEndOfFile', fuzz_targets/dumb.rs:8:47
note: run with `RUST_BACKTRACE=1` environment variable to display a backtrace
==6168== ERROR: libFuzzer: deadly signal
#0 0x558fe787bfe1 in __sanitizer_print_stack_trace /rustc/llvm/src/llvm-project/compiler-rt/lib/asan/asan_stack.cpp:87:3
#1 0x558fe79593ca in fuzzer::PrintStackTrace() /home/kali/.cargo/registry/src/github.com-1ecc6299db9ec823/libfuzzer-sys-0.4.5/libfuzzer/FuzzerUtil.cpp:210:38
#2 0x558fe7922f15 in fuzzer::Fuzzer::CrashCallback() /home/kali/.cargo/registry/src/github.com-1ecc6299db9ec823/libfuzzer-sys-0.4.5/libfuzzer/FuzzerLoop.cpp:233:18
#3 0x558fe7922f15 in fuzzer::Fuzzer::CrashCallback() /home/kali/.cargo/registry/src/github.com-1ecc6299db9ec823/libfuzzer-sys-0.4.5/libfuzzer/FuzzerLoop.cpp:228:6
#4 0x7f828083da9f (/lib/x86_64-linux-gnu/libc.so.6+0x3da9f) (BuildId: 71a7c7b97bc0b3e349a3d8640252655552082bf5)
#5 0x7f828088957b in __pthread_kill_implementation nptl/./nptl/pthread_kill.c:43:17
#6 0x7f828083da01 in gsignal signal/../sysdeps/posix/raise.c:26:13
#7 0x7f8280828468 in abort stdlib/./stdlib/abort.c:79:7
#8 0x558fe79b4606 in std::sys::unix::abort_internal::h0897be309fb2baa9 /rustc/40336865fe7d4a01139a3336639c6971647e885c/library/std/src/sys/unix/mod.rs:293:14
#9 0x558fe77ee216 in std::process::abort::hc3bb2bc8d10060de /rustc/40336865fe7d4a01139a3336639c6971647e885c/library/std/src/process.rs:2119:5
#10 0x558fe791d2b3 in libfuzzer_sys::initialize::_$u7b$$u7b$closure$u7d$$u7d$::hfbc7451104c5815a /home/kali/.cargo/registry/src/github.com-1ecc6299db9ec823/libfuzzer-sys-0.4.5/src/lib.rs:91:9
#11 0x558fe79a960c in std::panicking::rust_panic_with_hook::h76fd95765866f4c4 /rustc/40336865fe7d4a01139a3336639c6971647e885c/library/std/src/panicking.rs:702:17
#12 0x558fe79a9466 in std::panicking::begin_panic_handler::_$u7b$$u7b$closure$u7d$$u7d$::h60f8b3f90bb7fd93 /rustc/40336865fe7d4a01139a3336639c6971647e885c/library/std/src/panicking.rs:588:13
#13 0x558fe79a667b in std::sys_common::backtrace::__rust_end_short_backtrace::h483cd9e52367386f /rustc/40336865fe7d4a01139a3336639c6971647e885c/library/std/src/sys_common/backtrace.rs:138:18
#14 0x558fe79a9181 in rust_begin_unwind /rustc/40336865fe7d4a01139a3336639c6971647e885c/library/std/src/panicking.rs:584:5
#15 0x558fe77ef5a2 in core::panicking::panic_fmt::h44b4db96b14cf253 /rustc/40336865fe7d4a01139a3336639c6971647e885c/library/core/src/panicking.rs:142:14
#16 0x558fe77ef6f2 in core::result::unwrap_failed::hc10b6a87ebce4f5d /rustc/40336865fe7d4a01139a3336639c6971647e885c/library/core/src/result.rs:1814:5
#17 0x558fe78b5d41 in core::result::Result$LT$T$C$E$GT$::unwrap::h7ffe31d9ddee89b2 /rustc/40336865fe7d4a01139a3336639c6971647e885c/library/core/src/result.rs:1107:23
#18 0x558fe78b5d41 in dumb::_::run::h93074574f0ae19de /home/kali/Desktop/tinybmp/fuzz/fuzz_targets/dumb.rs:8:15
#19 0x558fe78b51d8 in rust_fuzzer_test_input /home/kali/.cargo/registry/src/github.com-1ecc6299db9ec823/libfuzzer-sys-0.4.5/src/lib.rs:224:17
#20 0x558fe791864f in libfuzzer_sys::test_input_wrap::_$u7b$$u7b$closure$u7d$$u7d$::h6b2b51dabd6d08ff /home/kali/.cargo/registry/src/github.com-1ecc6299db9ec823/libfuzzer-sys-0.4.5/src/lib.rs:61:9
#21 0x558fe791864f in std::panicking::try::do_call::h2b6b2fecd8b0ff94 /rustc/40336865fe7d4a01139a3336639c6971647e885c/library/std/src/panicking.rs:492:40
#22 0x558fe791d4e7 in __rust_try libfuzzer_sys.4efe2baf-cgu.0
#23 0x558fe791c868 in std::panicking::try::hf3b7ef749ee396d0 /rustc/40336865fe7d4a01139a3336639c6971647e885c/library/std/src/panicking.rs:456:19
#24 0x558fe791c868 in std::panic::catch_unwind::hef97c053185a011b /rustc/40336865fe7d4a01139a3336639c6971647e885c/library/std/src/panic.rs:137:14
#25 0x558fe791c868 in LLVMFuzzerTestOneInput /home/kali/.cargo/registry/src/github.com-1ecc6299db9ec823/libfuzzer-sys-0.4.5/src/lib.rs:59:22
#26 0x558fe7923449 in fuzzer::Fuzzer::ExecuteCallback(unsigned char const*, unsigned long) /home/kali/.cargo/registry/src/github.com-1ecc6299db9ec823/libfuzzer-sys-0.4.5/libfuzzer/FuzzerLoop.cpp:612:15
#27 0x558fe792bcf2 in fuzzer::Fuzzer::ReadAndExecuteSeedCorpora(std::vector<fuzzer::SizedFile, std::allocator<fuzzer::SizedFile> >&) /home/kali/.cargo/registry/src/github.com-1ecc6299db9ec823/libfuzzer-sys-0.4.5/libfuzzer/FuzzerLoop.cpp:805:18
#28 0x558fe792c2e7 in fuzzer::Fuzzer::Loop(std::vector<fuzzer::SizedFile, std::allocator<fuzzer::SizedFile> >&) /home/kali/.cargo/registry/src/github.com-1ecc6299db9ec823/libfuzzer-sys-0.4.5/libfuzzer/FuzzerLoop.cpp:865:28
#29 0x558fe7942004 in fuzzer::FuzzerDriver(int*, char***, int (*)(unsigned char const*, unsigned long)) /home/kali/.cargo/registry/src/github.com-1ecc6299db9ec823/libfuzzer-sys-0.4.5/libfuzzer/FuzzerDriver.cpp:912:10
#30 0x558fe77ef9d2 in main /home/kali/.cargo/registry/src/github.com-1ecc6299db9ec823/libfuzzer-sys-0.4.5/libfuzzer/FuzzerMain.cpp:20:30
#31 0x7f8280829209 in __libc_start_call_main csu/../sysdeps/nptl/libc_start_call_main.h:58:16
#32 0x7f82808292bb in __libc_start_main csu/../csu/libc-start.c:389:3
#33 0x558fe77efb10 in _start (/home/kali/Desktop/tinybmp/fuzz/target/x86_64-unknown-linux-gnu/release/dumb+0x72b10) (BuildId: efe97053d3a33c625fcf3451ca94dfe7e9bed6b7)
NOTE: libFuzzer has rudimentary signal handlers.
Combine libFuzzer with AddressSanitizer or similar for better crash reports.
SUMMARY: libFuzzer: deadly signal
MS: 0 ; base unit: 0000000000000000000000000000000000000000
artifact_prefix='/home/kali/Desktop/tinybmp/fuzz/artifacts/dumb/'; Test unit written to /home/kali/Desktop/tinybmp/fuzz/artifacts/dumb/crash-da39a3ee5e6b4b0d3255bfef95601890afd80709
Base64:
────────────────────────────────────────────────────────────────────────────────
Failing input:
fuzz/artifacts/dumb/crash-da39a3ee5e6b4b0d3255bfef95601890afd80709
Output of `std::fmt::Debug`:
[]
Reproduce with:
cargo fuzz run dumb fuzz/artifacts/dumb/crash-da39a3ee5e6b4b0d3255bfef95601890afd80709
Minimize test case with:
cargo fuzz tmin dumb fuzz/artifacts/dumb/crash-da39a3ee5e6b4b0d3255bfef95601890afd80709
────────────────────────────────────────────────────────────────────────────────
Error: Fuzz target exited with exit status: 77That doesn’t look good. First things first notice the following two things:
Compiling tinybmp v0.3.3 (/home/kali/Desktop/tinybmp)
You need to make sure you’re compiling this version (the vulnerable one) and not latest one! Furthermore looking at the ASAN’s stack trace looks like the fuzzer is panicking and exiting and sure enough there are no refences to tinybmp code.. bummer. Let’s also see what’s the test case about:
$ hexdump -C fuzz/artifacts/dumb/crash-da39a3ee5e6b4b0d3255bfef95601890afd80709
$
Well that’s a bit sketchy, the test case is empty so something is not quite right here. We need to find another way or even better find another function that does something similar to the example and will allow us to target the same functionality. After spending some time reading the docs/examples and the APIs I came across this very interesting one, the RawBmp:
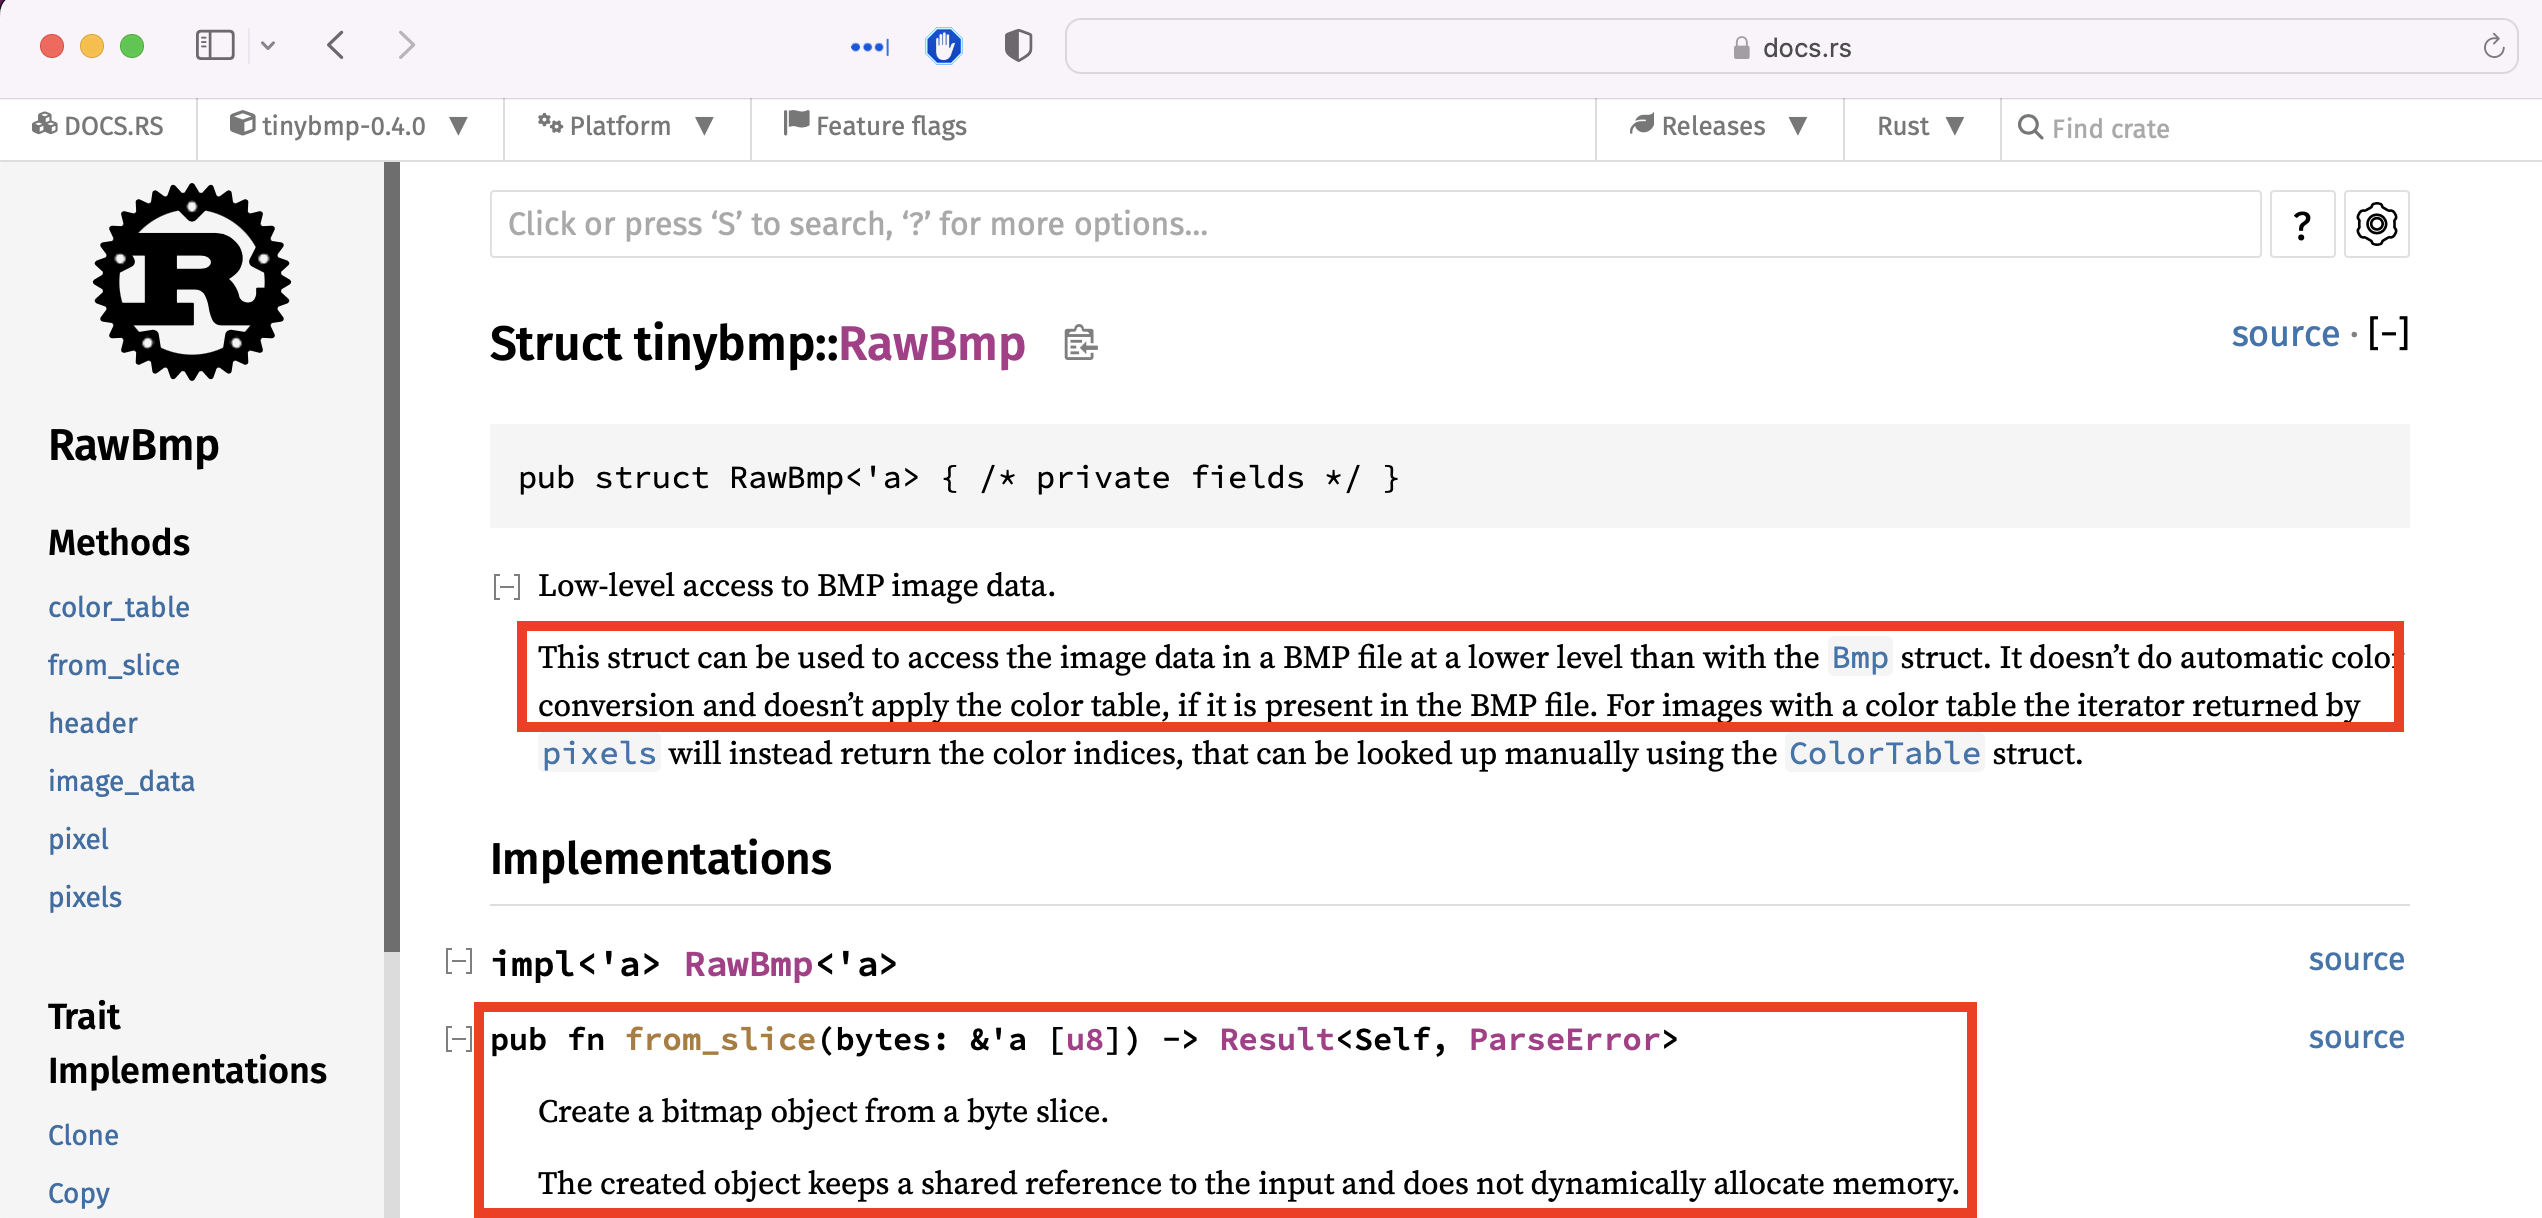
This struct can be used to access the image data in a BMP file at a lower level than with the Bmp struct. It doesn’t do automatic color conversion and doesn’t apply the color table, if it is present in the BMP file.
It even has a method
#![no_main]
use libfuzzer_sys::fuzz_target;
use tinybmp::RawBmp;

fuzz_target!(|data: &[u8]| {
    let bmp = RawBmp::from_slice(data);
});
And run it one more time:
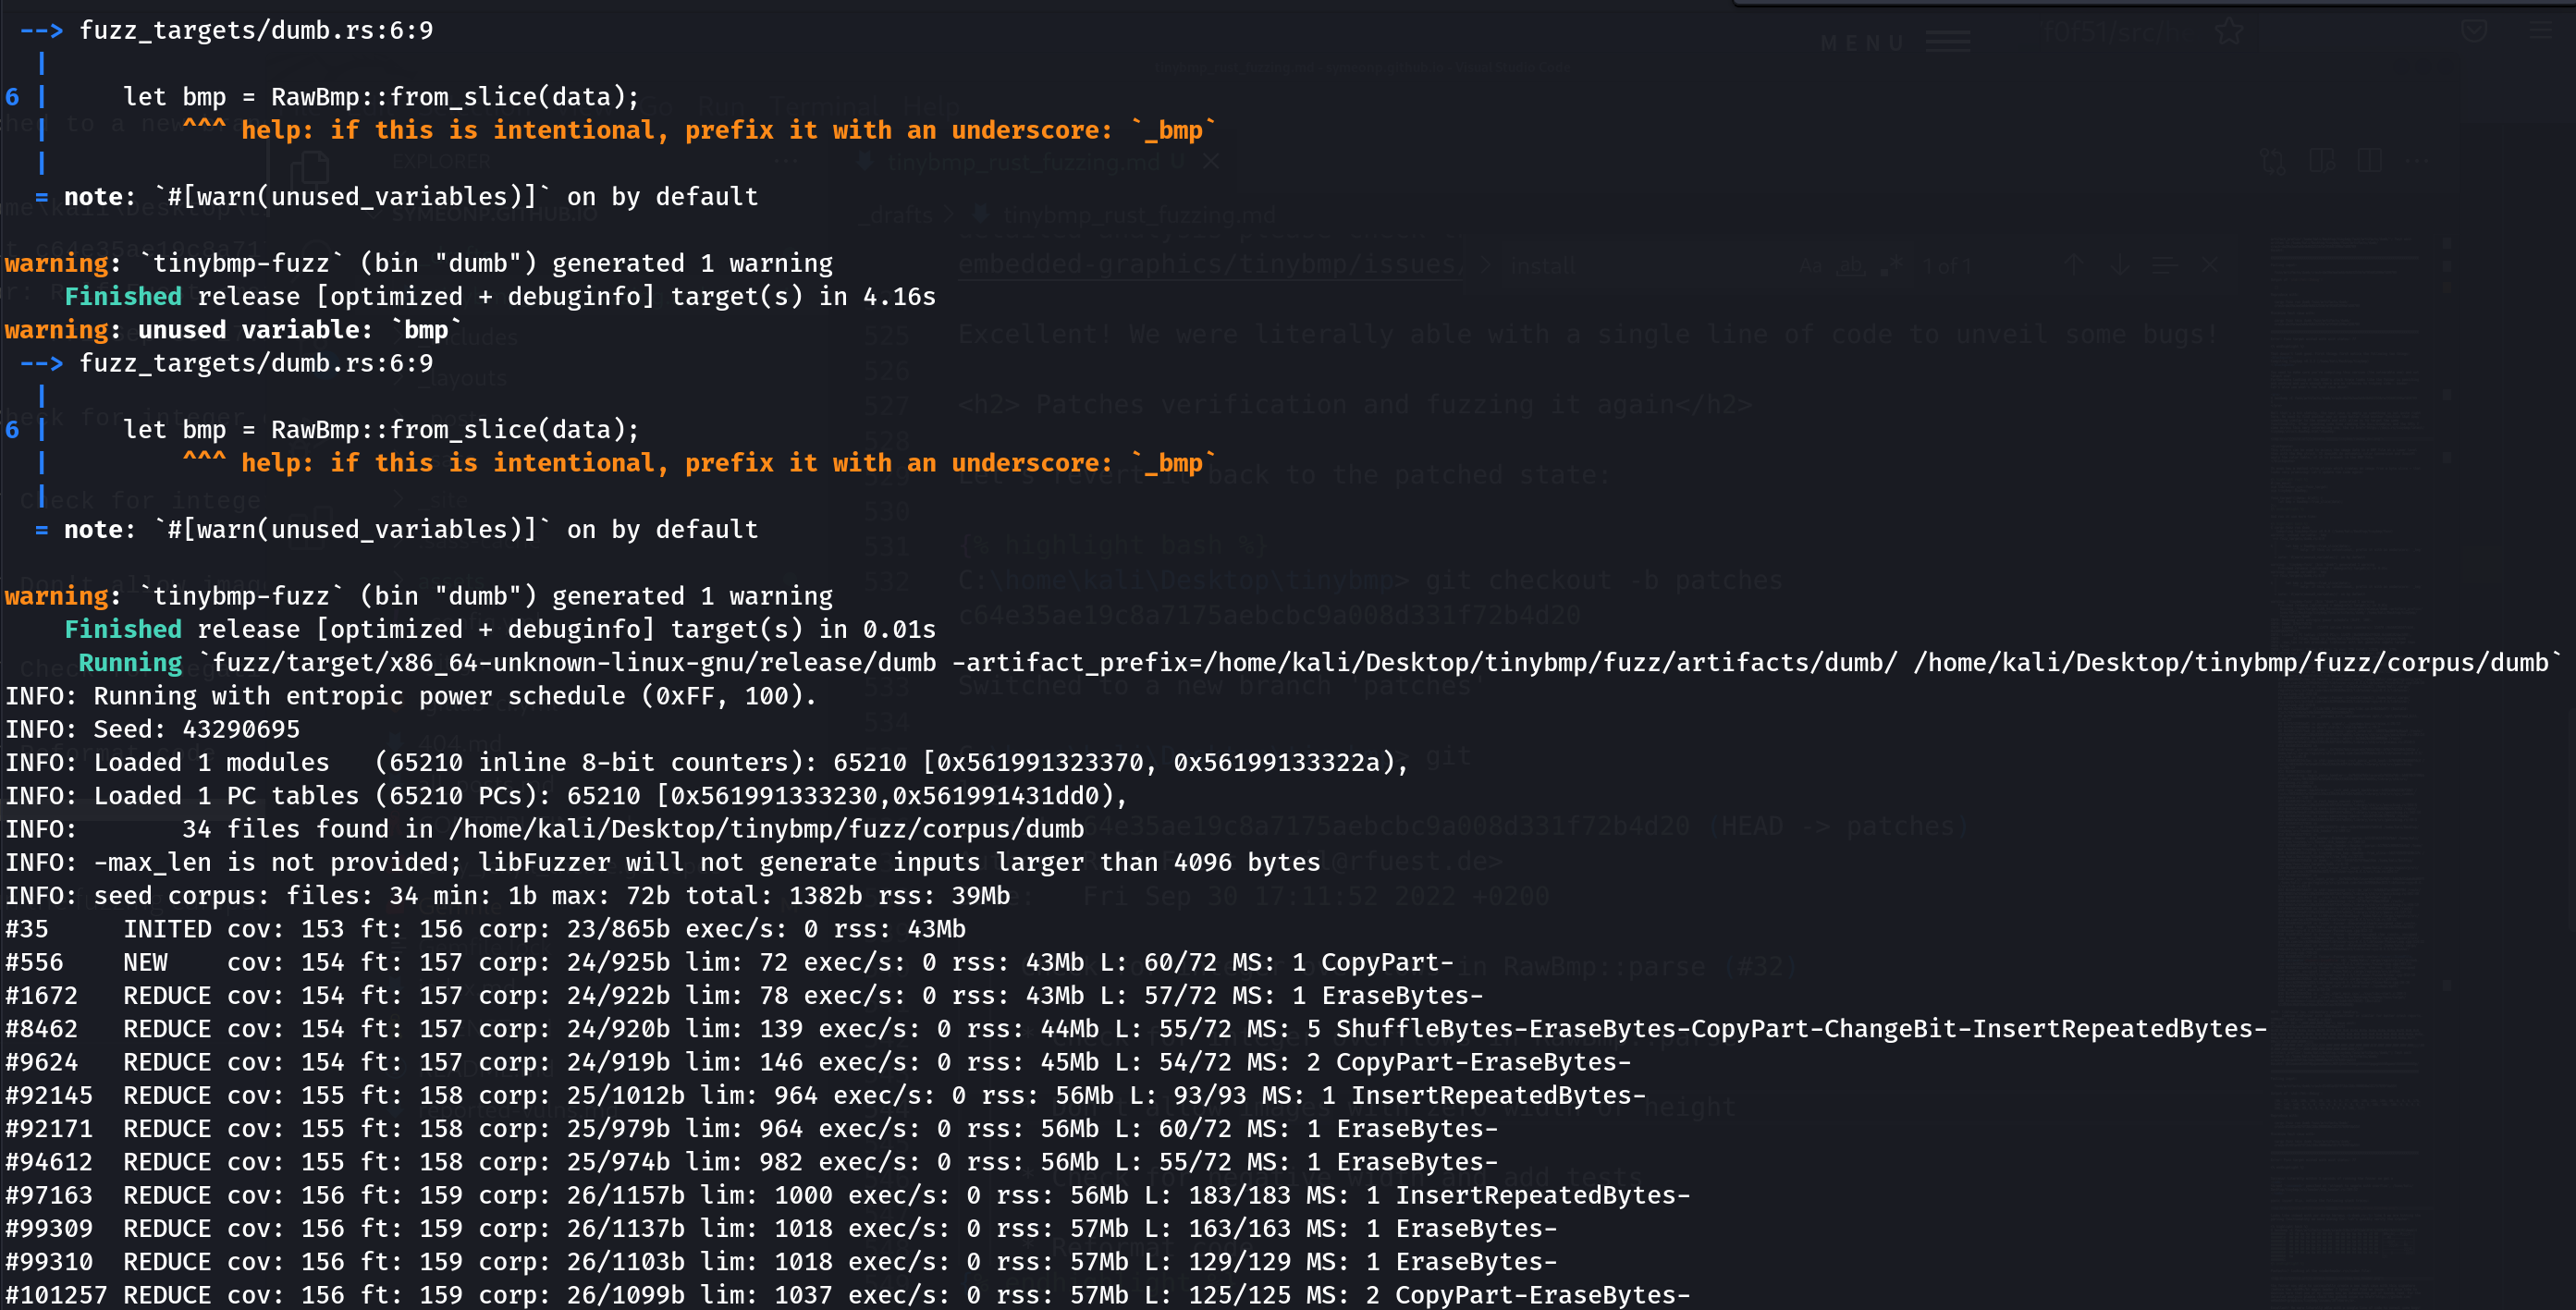
$ cargo fuzz run dumb
   Compiling tinybmp-fuzz v0.0.0 (/home/kali/Desktop/tinybmp/fuzz)
warning: unused variable: `bmp`
 --> fuzz_targets/dumb.rs:6:9
  |
6 |     let bmp = RawBmp::from_slice(data);
  |         ^^^ help: if this is intentional, prefix it with an underscore: `_bmp`
  |
  = note: `#[warn(unused_variables)]` on by default

warning: `tinybmp-fuzz` (bin "dumb") generated 1 warning
    Finished release [optimized + debuginfo] target(s) in 0.85s
warning: unused variable: `bmp`
 --> fuzz_targets/dumb.rs:6:9
  |
6 |     let bmp = RawBmp::from_slice(data);
  |         ^^^ help: if this is intentional, prefix it with an underscore: `_bmp`
  |
  = note: `#[warn(unused_variables)]` on by default

warning: `tinybmp-fuzz` (bin "dumb") generated 1 warning
    Finished release [optimized + debuginfo] target(s) in 0.01s
     Running `fuzz/target/x86_64-unknown-linux-gnu/release/dumb -artifact_prefix=/home/kali/Desktop/tinybmp/fuzz/artifacts/dumb/ /home/kali/Desktop/tinybmp/fuzz/corpus/dumb`
INFO: Running with entropic power schedule (0xFF, 100).
INFO: Seed: 3764774578
INFO: Loaded 1 modules   (11479 inline 8-bit counters): 11479 [0x56019247cb50, 0x56019247f827),
INFO: Loaded 1 PC tables (11479 PCs): 11479 [0x56019247f828,0x5601924ac598),
INFO:       34 files found in /home/kali/Desktop/tinybmp/fuzz/corpus/dumb
INFO: -max_len is not provided; libFuzzer will not generate inputs larger than 4096 bytes
INFO: seed corpus: files: 34 min: 1b max: 72b total: 1382b rss: 37Mb
#35	INITED cov: 183 ft: 186 corp: 23/849b exec/s: 0 rss: 40Mb
thread '<unnamed>' panicked at 'attempt to negate with overflow', /home/kali/Desktop/tinybmp/src/header/dib_header.rs:109:52
note: run with `RUST_BACKTRACE=1` environment variable to display a backtrace
==6871== ERROR: libFuzzer: deadly signal
    #0 0x56019221ffe1 in __sanitizer_print_stack_trace /rustc/llvm/src/llvm-project/compiler-rt/lib/asan/asan_stack.cpp:87:3
    #1 0x5601922fc3aa in fuzzer::PrintStackTrace() /home/kali/.cargo/registry/src/github.com-1ecc6299db9ec823/libfuzzer-sys-0.4.5/libfuzzer/FuzzerUtil.cpp:210:38
    #2 0x5601922c5ef5 in fuzzer::Fuzzer::CrashCallback() /home/kali/.cargo/registry/src/github.com-1ecc6299db9ec823/libfuzzer-sys-0.4.5/libfuzzer/FuzzerLoop.cpp:233:18
    #3 0x5601922c5ef5 in fuzzer::Fuzzer::CrashCallback() /home/kali/.cargo/registry/src/github.com-1ecc6299db9ec823/libfuzzer-sys-0.4.5/libfuzzer/FuzzerLoop.cpp:228:6
    #4 0x7fb12503da9f  (/lib/x86_64-linux-gnu/libc.so.6+0x3da9f) (BuildId: 71a7c7b97bc0b3e349a3d8640252655552082bf5)
    #5 0x7fb12508957b in __pthread_kill_implementation nptl/./nptl/pthread_kill.c:43:17
    #6 0x7fb12503da01 in gsignal signal/../sysdeps/posix/raise.c:26:13
    #7 0x7fb125028468 in abort stdlib/./stdlib/abort.c:79:7
    #8 0x5601923575e6 in std::sys::unix::abort_internal::h0897be309fb2baa9 /rustc/40336865fe7d4a01139a3336639c6971647e885c/library/std/src/sys/unix/mod.rs:293:14
    #9 0x560192192216 in std::process::abort::hc3bb2bc8d10060de /rustc/40336865fe7d4a01139a3336639c6971647e885c/library/std/src/process.rs:2119:5
    #10 0x5601922c0293 in libfuzzer_sys::initialize::_$u7b$$u7b$closure$u7d$$u7d$::hfbc7451104c5815a /home/kali/.cargo/registry/src/github.com-1ecc6299db9ec823/libfuzzer-sys-0.4.5/src/lib.rs:91:9
    #11 0x56019234c5ec in std::panicking::rust_panic_with_hook::h76fd95765866f4c4 /rustc/40336865fe7d4a01139a3336639c6971647e885c/library/std/src/panicking.rs:702:17
    #12 0x56019234c400 in std::panicking::begin_panic_handler::_$u7b$$u7b$closure$u7d$$u7d$::h60f8b3f90bb7fd93 /rustc/40336865fe7d4a01139a3336639c6971647e885c/library/std/src/panicking.rs:586:13
    #13 0x56019234965b in std::sys_common::backtrace::__rust_end_short_backtrace::h483cd9e52367386f /rustc/40336865fe7d4a01139a3336639c6971647e885c/library/std/src/sys_common/backtrace.rs:138:18
    #14 0x56019234c161 in rust_begin_unwind /rustc/40336865fe7d4a01139a3336639c6971647e885c/library/std/src/panicking.rs:584:5
    #15 0x5601921935a2 in core::panicking::panic_fmt::h44b4db96b14cf253 /rustc/40336865fe7d4a01139a3336639c6971647e885c/library/core/src/panicking.rs:142:14
    #16 0x56019219346c in core::panicking::panic::h1cd478110c27042a /rustc/40336865fe7d4a01139a3336639c6971647e885c/library/core/src/panicking.rs:48:5
    #17 0x56019227f035 in core::num::_$LT$impl$u20$i32$GT$::abs::h3b4f60dd81fb0910 /home/kali/Desktop/tinybmp/src/header/dib_header.rs:109:52
    #18 0x56019227f035 in tinybmp::header::dib_header::DibHeader::parse::h11481022451b7bb4 /home/kali/Desktop/tinybmp/src/header/dib_header.rs:109:52
    #19 0x560192280f27 in tinybmp::header::Header::parse::h17662c086025b4a3 /home/kali/Desktop/tinybmp/src/header/mod.rs:119:35
    #20 0x56019228414d in tinybmp::raw_bmp::RawBmp::from_slice::h62745928fd20c17c /home/kali/Desktop/tinybmp/src/raw_bmp.rs:37:51
    #21 0x560192258d16 in dumb::_::run::h93074574f0ae19de /home/kali/Desktop/tinybmp/fuzz/fuzz_targets/dumb.rs:6:15
    #22 0x560192258378 in rust_fuzzer_test_input /home/kali/.cargo/registry/src/github.com-1ecc6299db9ec823/libfuzzer-sys-0.4.5/src/lib.rs:224:17
    #23 0x5601922bb62f in libfuzzer_sys::test_input_wrap::_$u7b$$u7b$closure$u7d$$u7d$::h6b2b51dabd6d08ff /home/kali/.cargo/registry/src/github.com-1ecc6299db9ec823/libfuzzer-sys-0.4.5/src/lib.rs:61:9
    #24 0x5601922bb62f in std::panicking::try::do_call::h2b6b2fecd8b0ff94 /rustc/40336865fe7d4a01139a3336639c6971647e885c/library/std/src/panicking.rs:492:40
    #25 0x5601922c04c7 in __rust_try libfuzzer_sys.4efe2baf-cgu.0
    #26 0x5601922bf848 in std::panicking::try::hf3b7ef749ee396d0 /rustc/40336865fe7d4a01139a3336639c6971647e885c/library/std/src/panicking.rs:456:19
    #27 0x5601922bf848 in std::panic::catch_unwind::hef97c053185a011b /rustc/40336865fe7d4a01139a3336639c6971647e885c/library/std/src/panic.rs:137:14
    #28 0x5601922bf848 in LLVMFuzzerTestOneInput /home/kali/.cargo/registry/src/github.com-1ecc6299db9ec823/libfuzzer-sys-0.4.5/src/lib.rs:59:22
    #29 0x5601922c6429 in fuzzer::Fuzzer::ExecuteCallback(unsigned char const*, unsigned long) /home/kali/.cargo/registry/src/github.com-1ecc6299db9ec823/libfuzzer-sys-0.4.5/libfuzzer/FuzzerLoop.cpp:612:15
    #30 0x5601922cd85f in fuzzer::Fuzzer::RunOne(unsigned char const*, unsigned long, bool, fuzzer::InputInfo*, bool, bool*) /home/kali/.cargo/registry/src/github.com-1ecc6299db9ec823/libfuzzer-sys-0.4.5/libfuzzer/FuzzerLoop.cpp:514:22
    #31 0x5601922ce6b2 in fuzzer::Fuzzer::MutateAndTestOne() /home/kali/.cargo/registry/src/github.com-1ecc6299db9ec823/libfuzzer-sys-0.4.5/libfuzzer/FuzzerLoop.cpp:758:25
    #32 0x5601922cf437 in fuzzer::Fuzzer::Loop(std::vector<fuzzer::SizedFile, std::allocator<fuzzer::SizedFile> >&) /home/kali/.cargo/registry/src/github.com-1ecc6299db9ec823/libfuzzer-sys-0.4.5/libfuzzer/FuzzerLoop.cpp:903:21
    #33 0x5601922e4fe4 in fuzzer::FuzzerDriver(int*, char***, int (*)(unsigned char const*, unsigned long)) /home/kali/.cargo/registry/src/github.com-1ecc6299db9ec823/libfuzzer-sys-0.4.5/libfuzzer/FuzzerDriver.cpp:912:10
    #34 0x5601921939d2 in main /home/kali/.cargo/registry/src/github.com-1ecc6299db9ec823/libfuzzer-sys-0.4.5/libfuzzer/FuzzerMain.cpp:20:30
    #35 0x7fb125029209 in __libc_start_call_main csu/../sysdeps/nptl/libc_start_call_main.h:58:16
    #36 0x7fb1250292bb in __libc_start_main csu/../csu/libc-start.c:389:3
    #37 0x560192193b10 in _start (/home/kali/Desktop/tinybmp/fuzz/target/x86_64-unknown-linux-gnu/release/dumb+0x72b10) (BuildId: b139364c0b8f8dbd36bbe24a5dc1ea26395b8666)

NOTE: libFuzzer has rudimentary signal handlers.
      Combine libFuzzer with AddressSanitizer or similar for better crash reports.
SUMMARY: libFuzzer: deadly signal
MS: 1 CMP- DE: "\000\000\000\200"-; base unit: 3f7608254f3fb2a41b60936bd3b177b690ab1143
0x42,0x4d,0x6e,0x6a,0x6a,0x28,0x10,0x0,0x0,0x4d,0x6a,0x6a,0x6a,0x6a,0x28,0x0,0x0,0x0,0xb0,0x95,0x95,0x95,0x0,0x0,0x0,0x80,0x0,0x0,0x8,0x0,0x0,0x0,0x0,0x0,0x6a,0x6a,0x6a,0x0,0x0,0x0,0x0,0x6a,0x6a,0x6a,0x2d,0x0,0x0,0x0,0x0,0x0,0x0,0x0,0x6a,0x7f,
BMnjj(\020\000\000Mjjjj(\000\000\000\260\225\225\225\000\000\000\200\000\000\010\000\000\000\000\000jjj\000\000\000\000jjj-\000\000\000\000\000\000\000j\177
artifact_prefix='/home/kali/Desktop/tinybmp/fuzz/artifacts/dumb/'; Test unit written to /home/kali/Desktop/tinybmp/fuzz/artifacts/dumb/crash-81481a4874f3dc166c900050e181757698fda554
Base64: Qk1uamooEAAATWpqamooAAAAsJWVlQAAAIAAAAgAAAAAAGpqagAAAABqamotAAAAAAAAAGp/

────────────────────────────────────────────────────────────────────────────────

Failing input:

	fuzz/artifacts/dumb/crash-81481a4874f3dc166c900050e181757698fda554

Output of `std::fmt::Debug`:

	[66, 77, 110, 106, 106, 40, 16, 0, 0, 77, 106, 106, 106, 106, 40, 0, 0, 0, 176, 149, 149, 149, 0, 0, 0, 128, 0, 0, 8, 0, 0, 0, 0, 0, 106, 106, 106, 0, 0, 0, 0, 106, 106, 106, 45, 0, 0, 0, 0, 0, 0, 0, 106, 127]

Reproduce with:

	cargo fuzz run dumb fuzz/artifacts/dumb/crash-81481a4874f3dc166c900050e181757698fda554

Minimize test case with:

	cargo fuzz tmin dumb fuzz/artifacts/dumb/crash-81481a4874f3dc166c900050e181757698fda554

────────────────────────────────────────────────────────────────────────────────

Error: Fuzz target exited with exit status: 77
Success! Literally within 3 seconds of running the fuzzer we get a
thread '
panic issue! Also, notice the following stack traces:

Looks like indeed with our dirty harness dumb.rs line 6 we are hitting the parsing functionality we were aiming for. Let’s quickly verify the crasher:
$ hexdump -C fuzz/artifacts/dumb/crash-53bc3fdf92ab10167c288b0b52b5228361deab14
00000000  42 4d 6e 6a 68 28 00 04  00 4d 6a 6a 6a 4a 28 00  |BMnjh(...MjjjJ(.|
00000010  00 00 4d 38 00 00 00 00  00 80 00 00 18 00 00 00  |..M8............|
00000020  00 00 6a 6a 6a 34 00 00  00 00 1a 6a 01 00 00 00  |..jjj4.....j....|
00000030  00 00 04 6a 6a 6a 4a 28  00 00 00 4d 38 00 00 00  |...jjjJ(...M8...|
00000040  00 00 00 00 00 18 00 00  00 00 00 6a 6a 6a 34 00  |...........jjj4.|
00000050  00 00 00 1a 6a 01 00 00  00 00 00 04 6a 6a 6a 6a  |....j.......jjjj|
00000060  6a                                                |j|
00000061
Fantastic! Looking at the header.rs file:
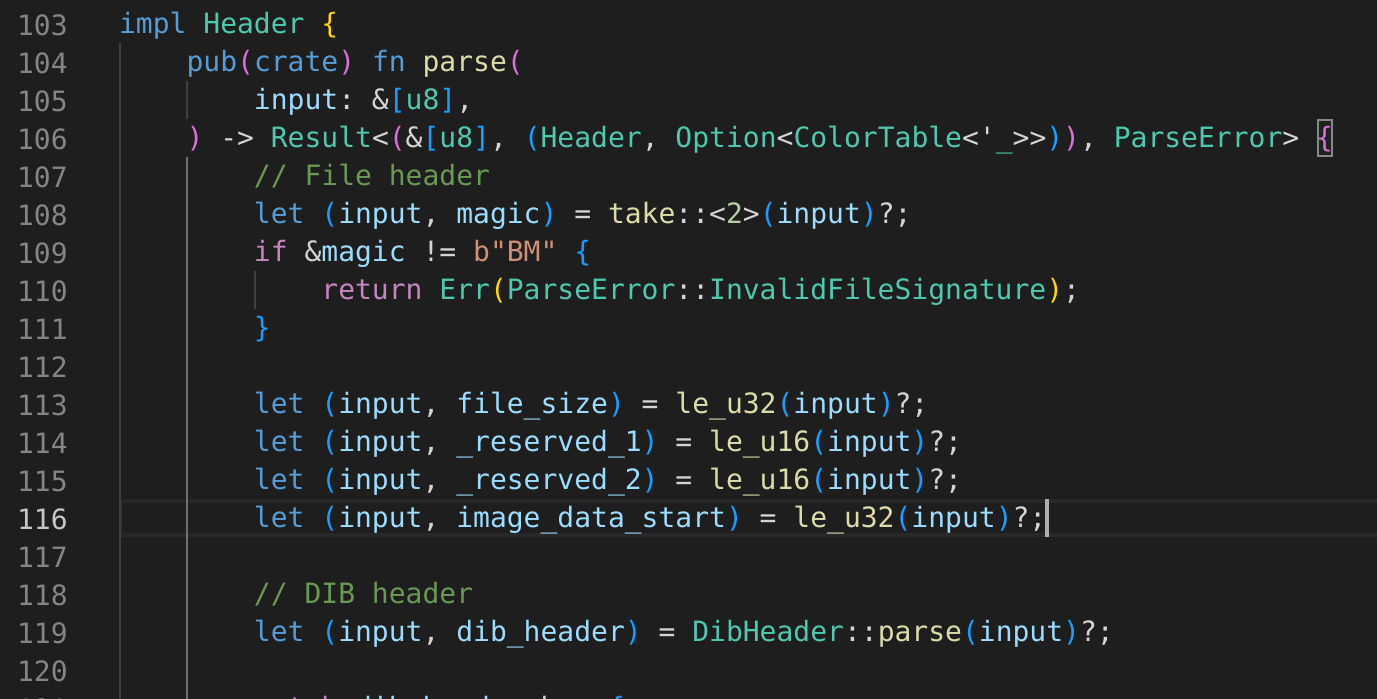
the fuzzer was able to successfully create a new test case with this signature (notice the BM magic header 2 bytes) and find an issue. I’d also like to mention here that one of my issues was an interesting out of bounds read. For the detailed analysis please check the github issue here.
Excellent! We were literally able with a single line of code to unveil some bugs!
Coverage
Remember that it’s very essential to check coverage, so let’s do that. Before proceeding make sure to install the llvm-profdata for the rust toolchain. Let’s run the coverage command:
cargo fuzz coverage dumb
                                    -- snip --
Generating coverage data for "4bc861e1c2b691badd48e0533504794b2364d6ed"
warning: unused variable: `bmp`
 --> fuzz_targets/dumb.rs:6:9
  |
6 |     let bmp = RawBmp::from_slice(data);
  |         ^^^ help: if this is intentional, prefix it with an underscore: `_bmp`
  |
  = note: `#[warn(unused_variables)]` on by default

warning: `tinybmp-fuzz` (bin "dumb") generated 1 warning (run `cargo fix --bin "dumb"` to apply 1 suggestion)
    Finished release [optimized + debuginfo] target(s) in 0.02s
     Running `target/x86_64-unknown-linux-gnu/release/dumb -artifact_prefix=/home/kali/Desktop/tinybmp/fuzz/artifacts/dumb/ /home/kali/Desktop/tinybmp/fuzz/corpus/dumb/4bc861e1c2b691badd48e0533504794b2364d6ed`
INFO: Running with entropic power schedule (0xFF, 100).
INFO: Seed: 4142636592
INFO: Loaded 1 modules   (61528 inline 8-bit counters): 61528 [0x56533c7e85e0, 0x56533c7f7638),
INFO: Loaded 1 PC tables (61528 PCs): 61528 [0x56533c7f7638,0x56533c8e7bb8),
target/x86_64-unknown-linux-gnu/release/dumb: Running 1 inputs 1 time(s) each.
Running: /home/kali/Desktop/tinybmp/fuzz/corpus/dumb/4bc861e1c2b691badd48e0533504794b2364d6ed
Executed /home/kali/Desktop/tinybmp/fuzz/corpus/dumb/4bc861e1c2b691badd48e0533504794b2364d6ed in 0 ms
***
*** NOTE: fuzzing was not performed, you have only
***       executed the target code on a fixed set of inputs.
***
Merging raw coverage data...
Coverage data merged and saved in "/home/kali/Desktop/tinybmp/fuzz/coverage/dumb/coverage.profdata".
Ok, coverage data has been saved, let’s try to convert and view it:
$ cd coverage/dumb
$ ls
coverage.profdata  raw

$ cargo cov -- show -Xdemangler=rustfilt ../../target/x86_64-unknown-linux-gnu/release/dumb \
    --format=html \
    -instr-profile=coverage.profdata  > index.html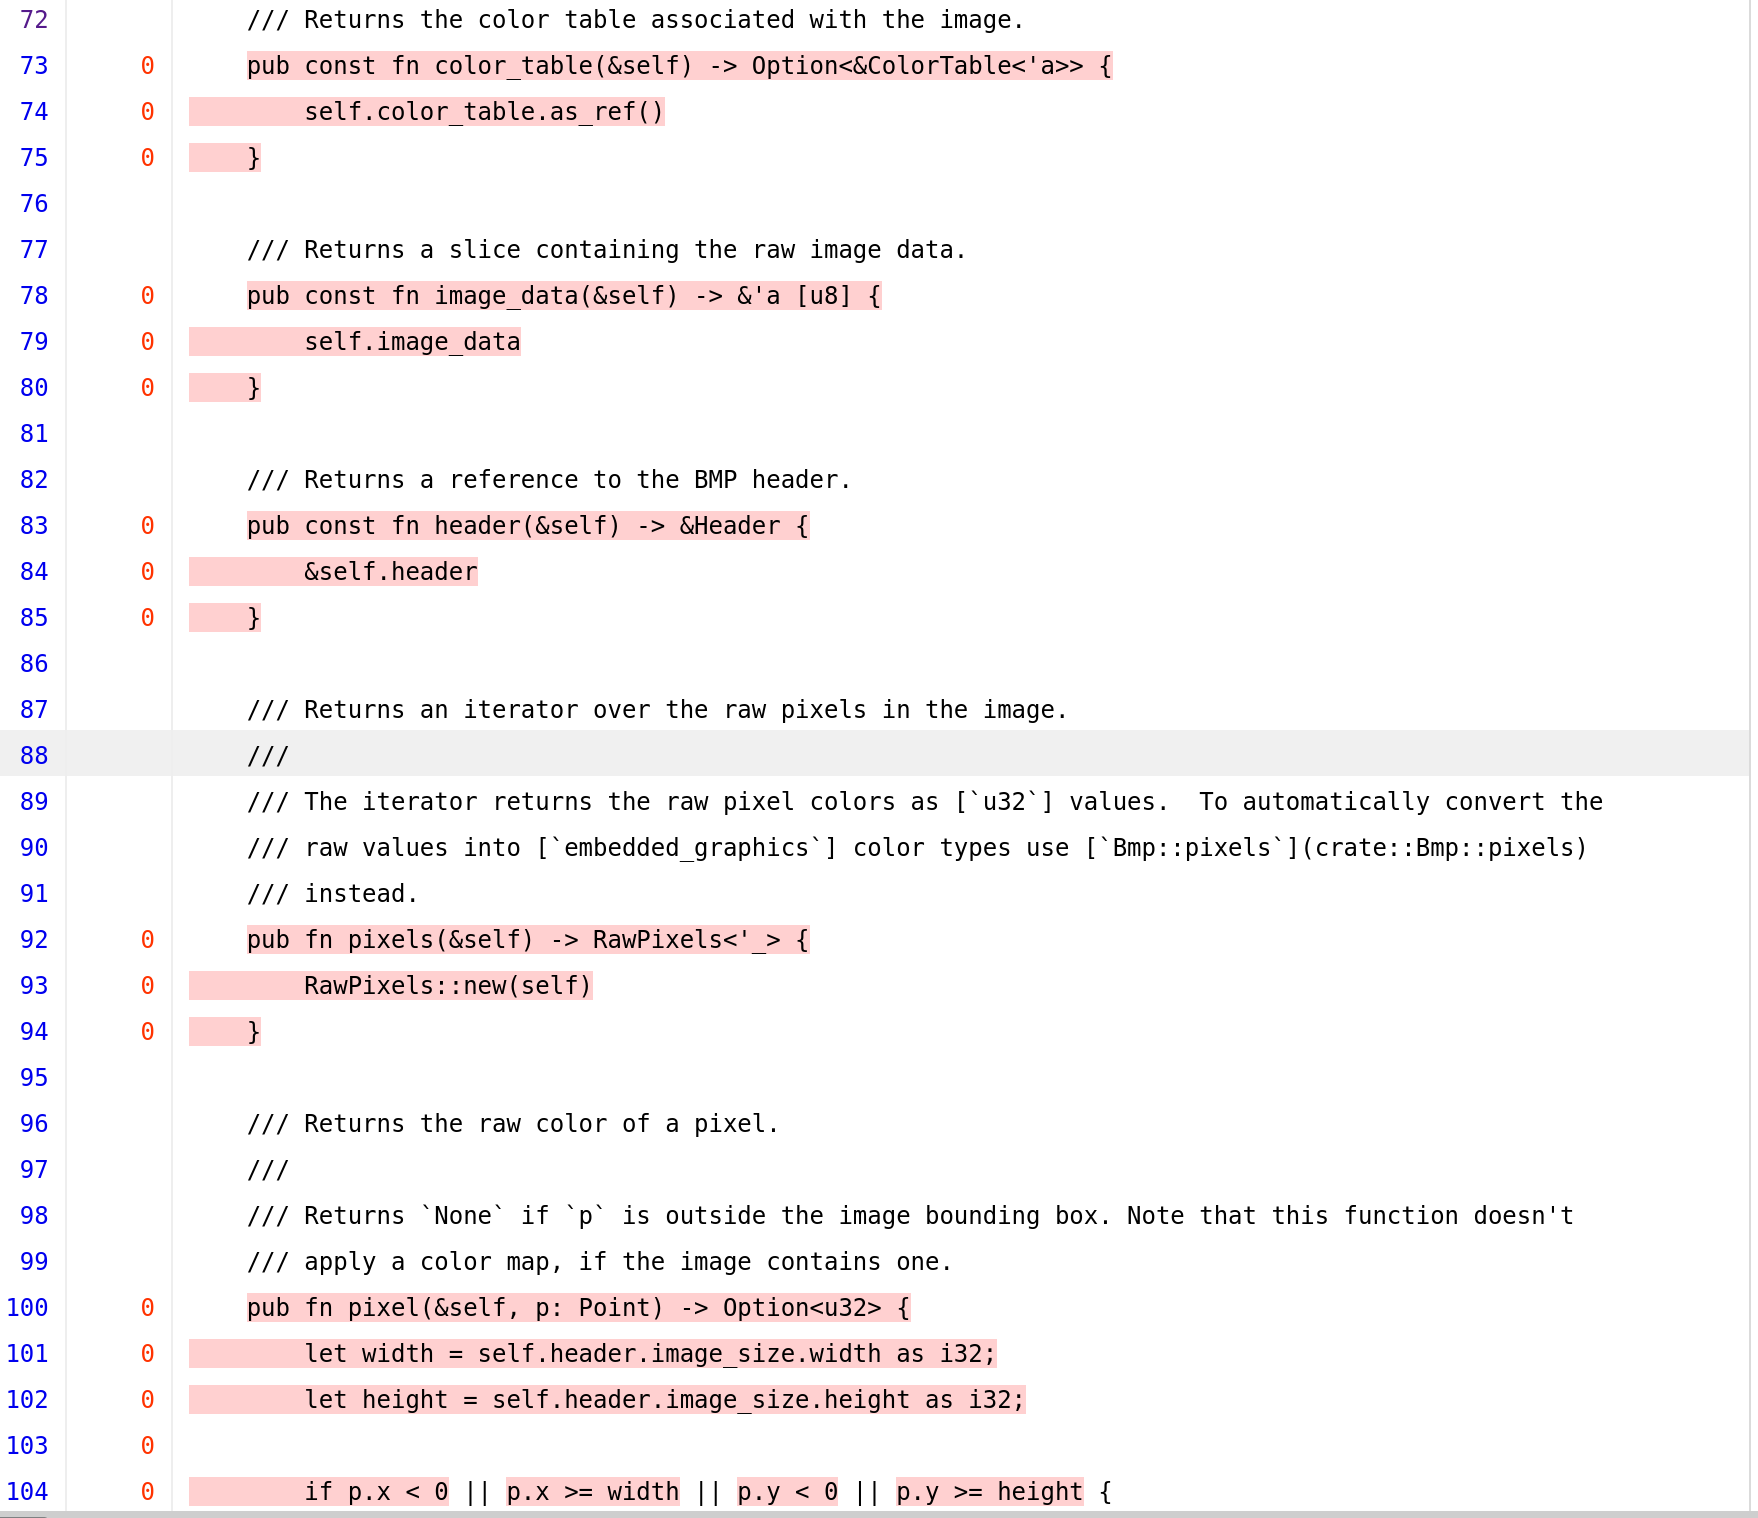
Looking at the raw_bmp.rs reveals that lines 73-104 got never hit. Within the RawBmp trait implemention we can see that ParseError::InvalidImageDimensions got never hit, including all those function in the above image.
Patches verification and 2nd round of fuzzing
Let’s revert it back to the patched state:
C:\home\kali\Desktop\tinybmp> git checkout -b patched c64e35ae19c8a7175aebcbc9a008d331f72b4d20
Switched to a new branch 'patched'

C:\home\kali\Desktop\tinybmp> git log
commit c64e35ae19c8a7175aebcbc9a008d331f72b4d20 (HEAD -> patches)
Author: Ralf Fuest <mail@rfuest.de>
Date:   Fri Sep 30 17:11:52 2022 +0200

    Check for integer overflows in RawBmp::parse (#32)

    * Check for integer overflows in RawBmp::parse

    * Don't allow images with zero width or height

    * Check for negative width and add tests

    * Reformat code
and re-run the fuzzing campaign for five minutes..
cargo fuzz run dumb -- -max_total_time=300

Hmm! As you can see from the above image looks like the project mainteners have done a great job - they’ve added lots of verification and improved header parsing so that dumb fuzzing won’t find any low-hanging fruits..
Time for us to skill up and move to smart fuzzing!
Structured Aware Fuzzing
Now it’s time to invest some time a bit more and get a better understanding of the parsing mechanism. We will be using the harness provided here. Create a new project and paste the harness from the above link:
cargo fuzz add structured
Before starting make sure you add those extra depedencies to your main Cargo.toml:
[dependencies]
libfuzzer-sys = "0.4"
embedded-graphics = "0.7.1"
embedded-graphics-core = "0.3.3"
arbitrary = "1.2.0"
rand = "0.8.5"
Let’s try to break down and understand what this harness does.
Lines 4-16 define our modules. The most interesting one that we will be using is the arbitrary one which as per documentation:
This crate is primarily intended to be combined with a fuzzer like libFuzzer and cargo-fuzz or AFL, and to help you turn the raw, untyped byte buffers that they produce into well-typed, valid, structured values. This allows you to combine structure-aware test case generation with coverage-guided, mutation-based fuzzers.
We will be also importing a few other crates such as the Point and rand::rngs::StdRng because we need them for the harness.
4	use arbitrary::{Arbitrary, Unstructured};
5	use embedded_graphics_core::geometry::Point;
6	use libfuzzer_sys::fuzz_target;
7	use rand::rngs::StdRng;
8	use rand::{RngCore, SeedableRng};
9	use std::num::{NonZeroI8, NonZeroU8};
10	#[cfg(not(fuzzing))]
11	use std::{
12	    fs::{read_dir, File},
13	    io::Read,
14	};
15	use tinybmp::Bpp::*;
16	use tinybmp::{Bpp, RawBmp};
17
18	#[allow(non_camel_case_types)]
19	#[derive(Debug, Copy, Clone, PartialOrd, PartialEq)]
Line 18 #[allow(non_camel_case_types)] disables the camel case warnings.
Lines 21-26 create a new enum type DibType that is required so we can initialise the header size. Notice also how on line 19 we are automatically implementing the #[derive(Debug, Copy, Clone, PartialOrd, PartialEq)] traits for the DibType structure. If we don’t do that, the harness won’t compile:
20	#[repr(u8)]
21	enum DibType {
22	    DIB_INFO_HEADER_SIZE = 40,
23	    DIB_V3_HEADER_SIZE = 56,
24	    DIB_V4_HEADER_SIZE = 108,
25	    DIB_V5_HEADER_SIZE = 124,
26	}
27 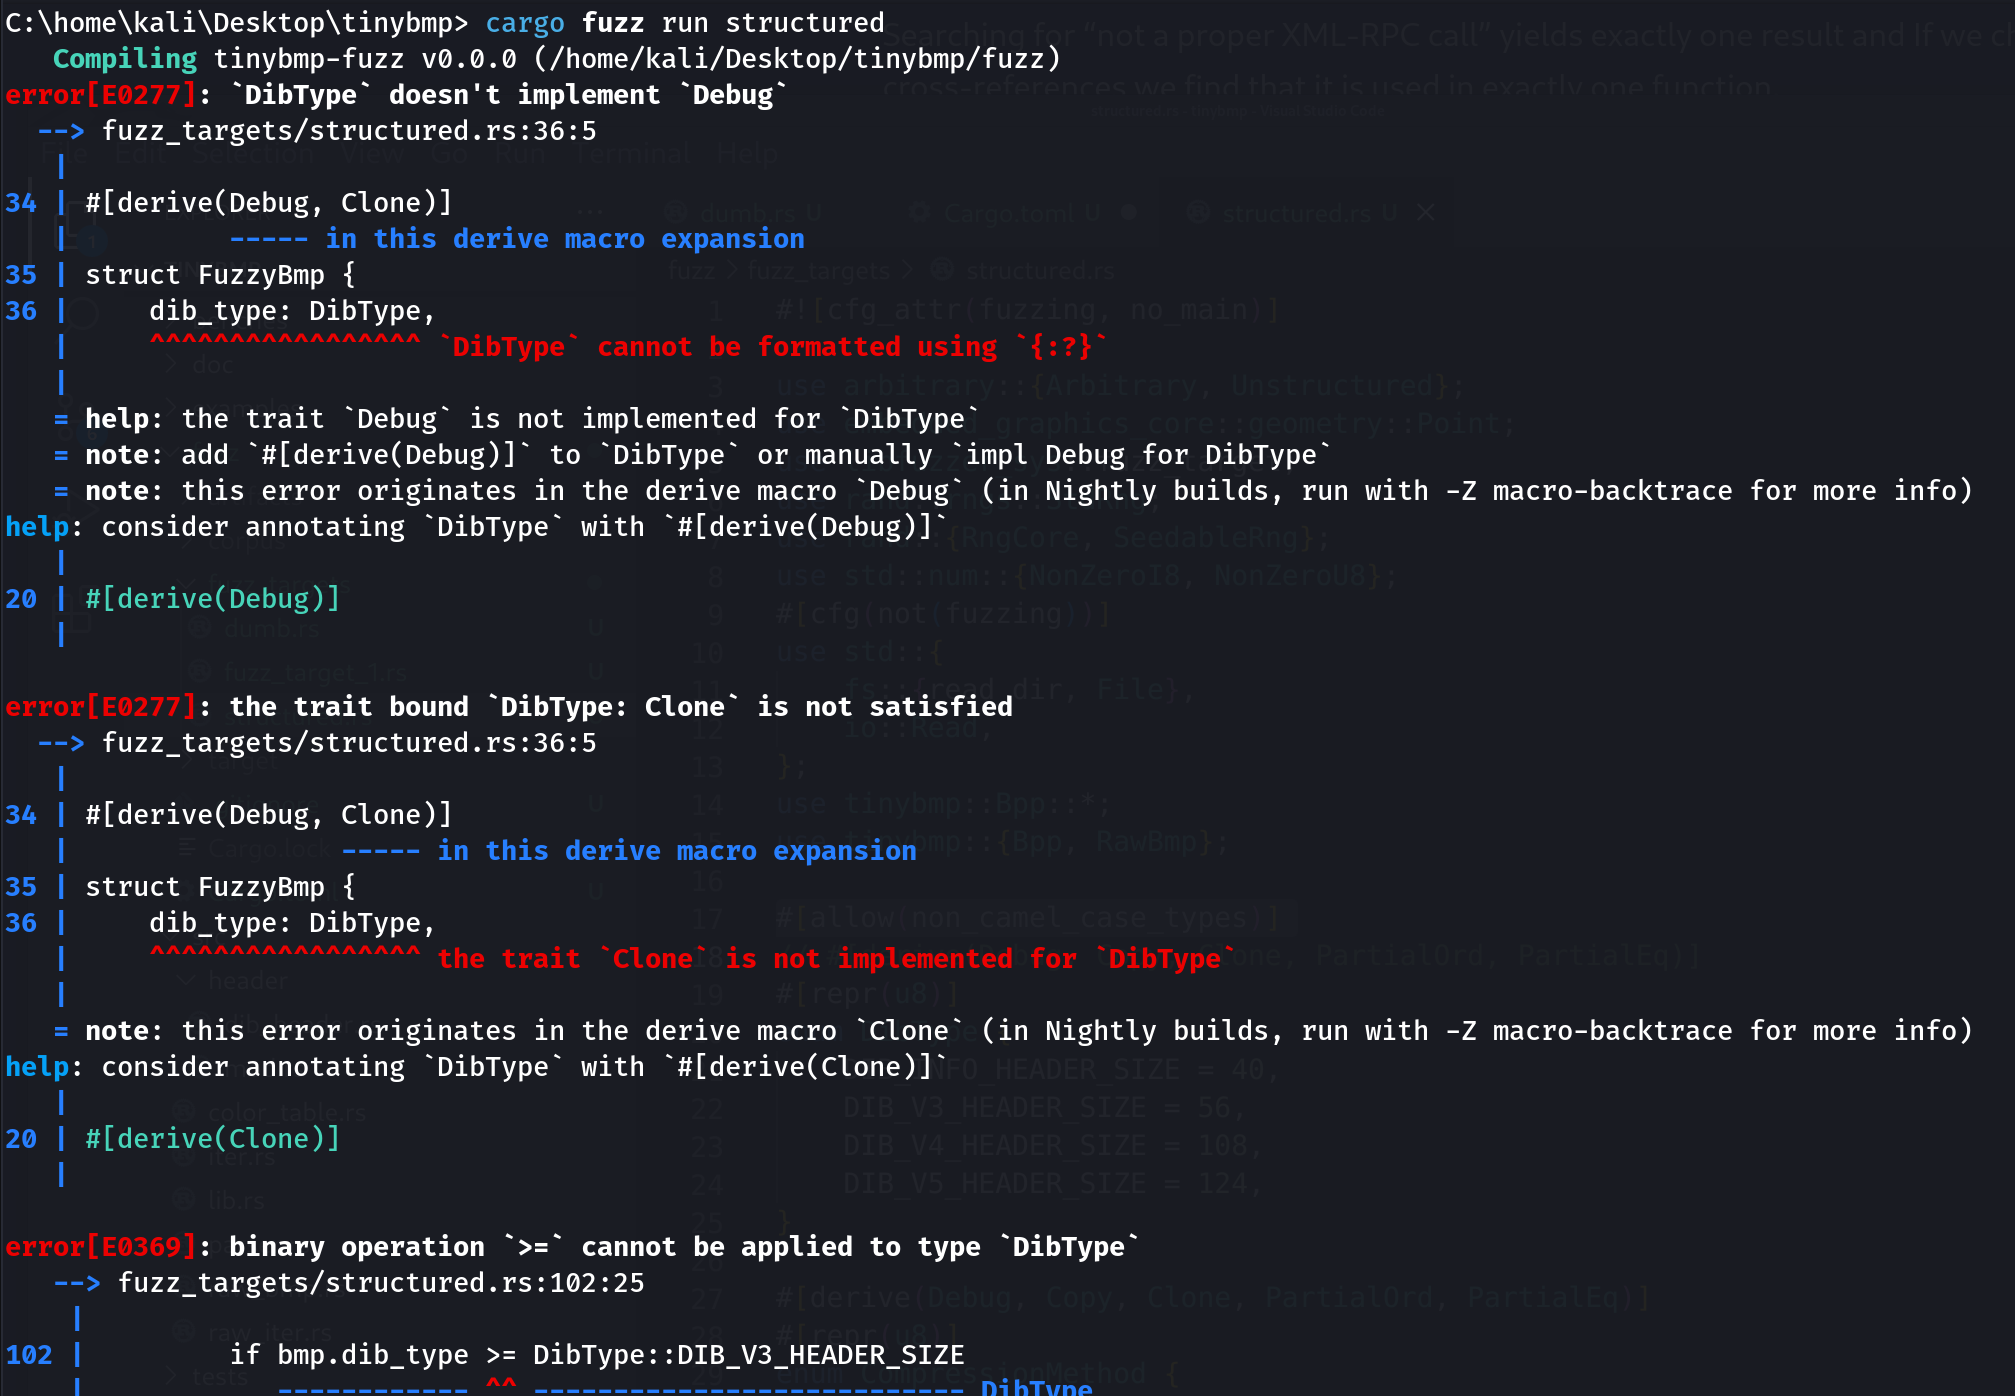
Moving on:
28	#[derive(Debug, Copy, Clone, PartialOrd, PartialEq)]
29	#[repr(u8)]
30	enum CompressionMethod {
31	    Rgb = 0,
32	    Bitfields = 3,
33	}
Simillary to the previous struct we again implement the required traits and initialise the Rgb and Bitfields values. The following lines define a more interesting struct, a FuzzyBmp one.
35	#[derive(Debug, Clone)]
36	struct FuzzyBmp {
37	    dib_type: DibType,
38	    bpp: Bpp,
39	    compress: CompressionMethod,
40	    colours_used: u32,
41	    width: u32,
42	    height: i32,
43	    mask_red: u32,
44	    mask_green: u32,
45	    mask_blue: u32,
46	    mask_alpha: u32,
47	    // TODO compute at arb time
48	    colour_table: Box<[u8]>,
49	    image_data: Box<[u8]>,
50	}
If you’ve previously played with Rust you will immediately recognise the u32 and i32 which stands for unsigned and signed integers. In addition to those, we are using the Box and <u8> types so what are they?
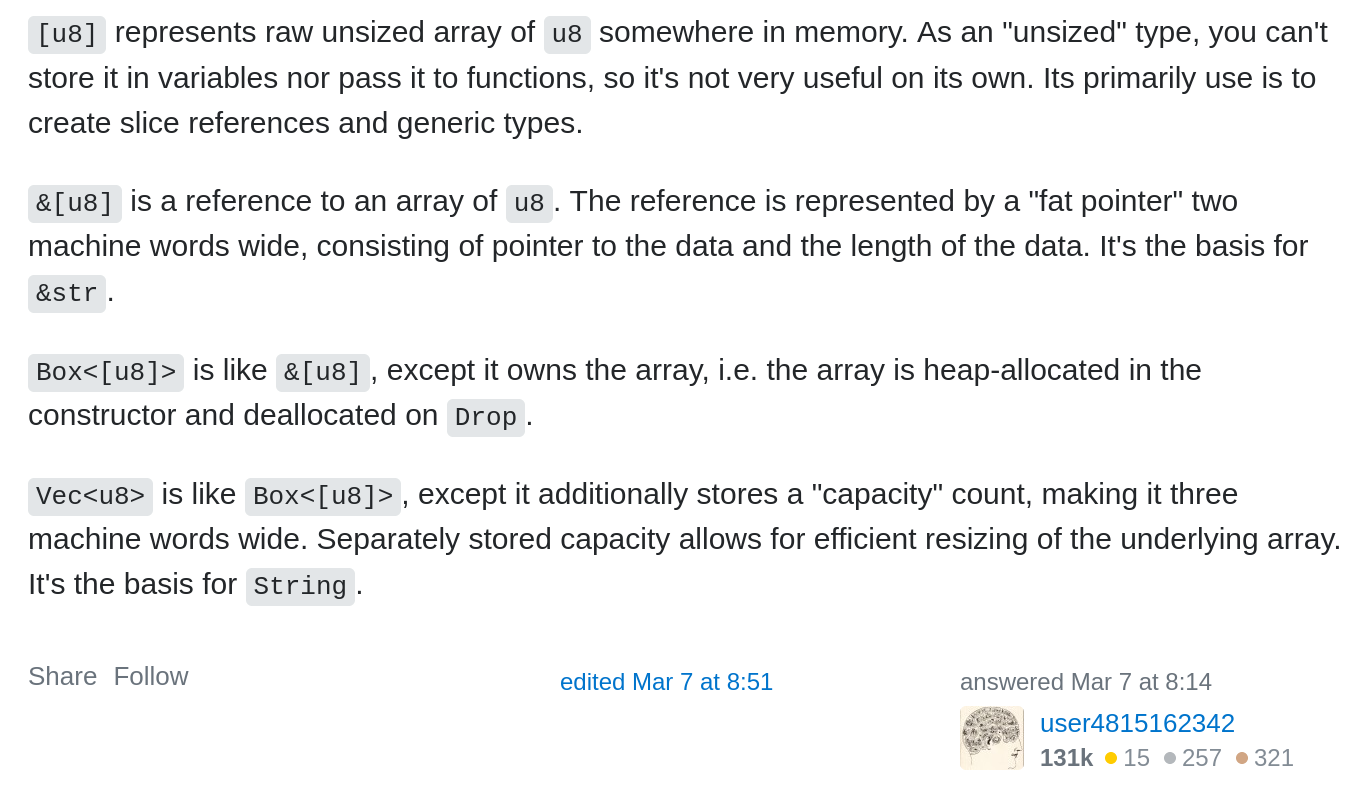
It should be noted that some of these values are taken from the dib_header.rs code which will be used for creating a smart-ish BMP file:
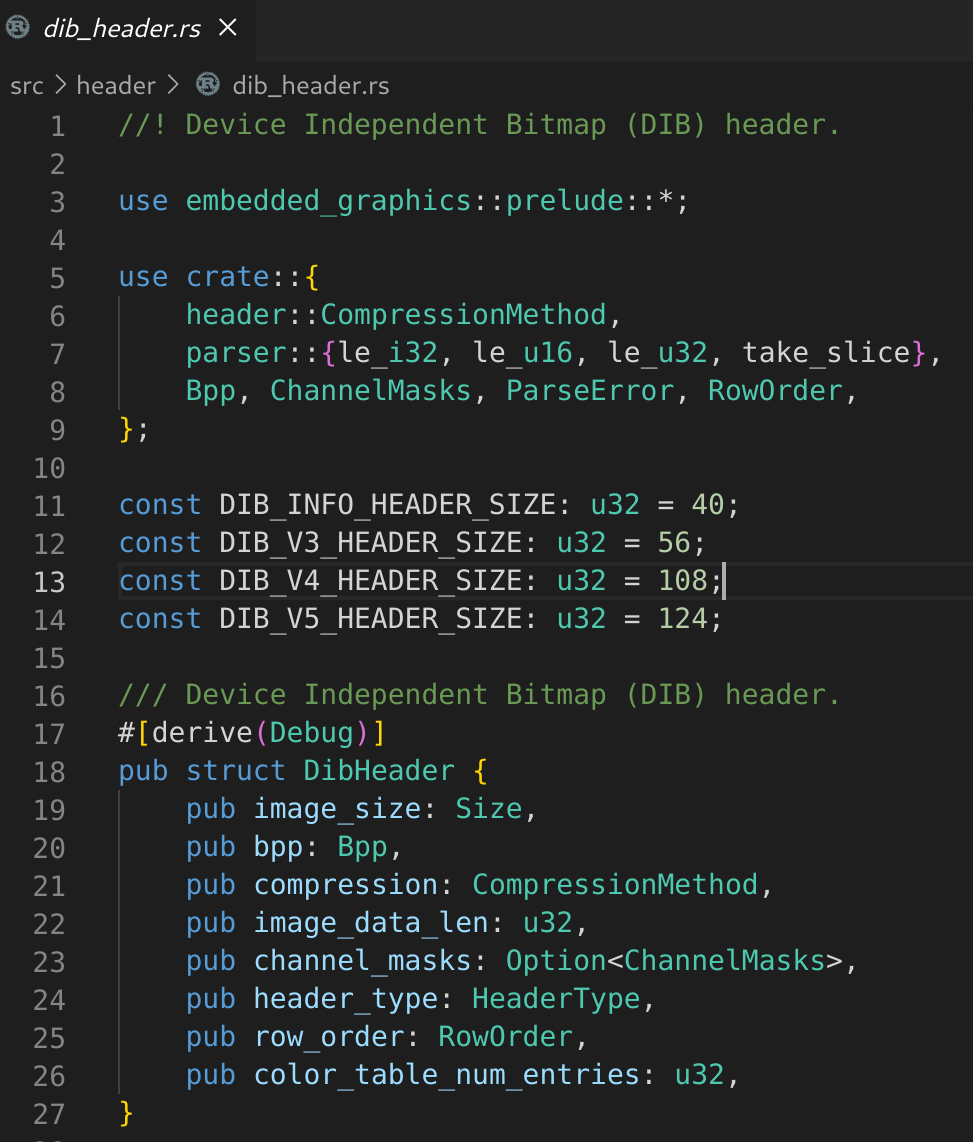
There are a few variables that need our attention here. libFuzzer supports only the primitive variables (signed/unsigned integers such i32/u32) as well as chars. However in this struct we have defined some custom ones such as the DibType and Bpp. Later in this section we will see how we will implement the arbitrary trait in order for libfuzzer to understand these custom variables.
52	impl From<FuzzyBmp> for Vec<u8> {
53	    fn from(bmp: FuzzyBmp) -> Self {
54	        let mut res = Vec::new();
55
56	        // --- HEADER ---
57
58	        // header magic
59	        res.extend_from_slice(b"BM");
60
61	        // size; calculated later
62	        let size_marker = res.len();
63
64	        // reserved data
65	        res.extend_from_slice(&0u16.to_le_bytes());
66	        res.extend_from_slice(&0u16.to_le_bytes());
67
68	        // image data offset; calculated later
69	        let data_ptr_marker = res.len();
70
From Rust’s documentation:
From
The From trait allows for a type to define how to create itself from another type, hence providing a very simple mechanism for converting between several types. There are numerous implementations of this trait within the standard library for conversion of primitive and common types.
In short, on lines 52-53 we are implementing the Vec<u8> vector. Then on line 54, we declare a new mutable vector, and we slowly start filling the values for the BMP file format. Since this is a Vec<u8> we will be using Vec::extend_from_slice to append to the vector.
Then on 59-69 we start crafting the header. Before moving on with the DIB header let’s panic on purpose the fuzzer and print so far the contents so we can verify we are on the right track:
println!("{:?}", res);
panic!("printing contents of res, exiting.");
and running the fuzzer yeilds the following:
Output of `std::fmt::Debug`:

	FuzzyBmp {
	    dib_type: DIB_INFO_HEADER_SIZE,
	    bpp: Bits16,
	    compress: Rgb,
	    colours_used: 0,
	    width: 4,
	    height: 126,
	    mask_red: 4294967295,
	    mask_green: 4286513151,
	    mask_blue: 4294902016,
	    mask_alpha: 65535,
	    colour_table: [],
	    image_data: [.....snip....]
  }
So far, so good. We’ve managed to correctly populate the right values for the image header. Let’s continue with the DIB header:
71	        // --- DIB Header ---
72
73	        // length
74	        res.extend_from_slice(&(bmp.dib_type as u32).to_le_bytes());
75
76	        // width, height
77	        res.extend_from_slice(&bmp.width.to_le_bytes());
78	        res.extend_from_slice(&bmp.height.to_le_bytes());
79
80	        // color planes -- unused
81	        res.extend_from_slice(&0u16.to_le_bytes());
82
83	        // bpp
84	        res.extend_from_slice(&(bmp.bpp.bits()).to_le_bytes());
85
86	        // compression method
87	        res.extend_from_slice(&(bmp.compress as u32).to_le_bytes());
88
89	        // image data len
90	        res.extend_from_slice(&u32::try_from(bmp.image_data.len()).unwrap().to_le_bytes());
91
92	        // pels per meter x + y -- unused
93	        res.extend_from_slice(&0u32.to_le_bytes());
94	        res.extend_from_slice(&0u32.to_le_bytes());
95
96	        // colours used
97	        res.extend_from_slice(&bmp.colours_used.to_le_bytes());
98
99	        // colours important -- unused
100	        res.extend_from_slice(&0u32.to_le_bytes());
101
102	        // channel masks, if we meet the described conditions
103	        if bmp.dib_type >= DibType::DIB_V3_HEADER_SIZE
104	            && bmp.compress == CompressionMethod::Bitfields
105	        {
106	            res.extend_from_slice(&bmp.mask_red.to_le_bytes());
107	            res.extend_from_slice(&bmp.mask_green.to_le_bytes());
108	            res.extend_from_slice(&bmp.mask_blue.to_le_bytes());
109	            res.extend_from_slice(&bmp.mask_alpha.to_le_bytes());
110	        }
111
112	        // colour table
113	        res.extend_from_slice(&bmp.colour_table);
114
115	        // insert data pointer marker, with corrections
116	        res.splice(
117	            data_ptr_marker..data_ptr_marker,
118	            u32::try_from(res.len() + 2 * core::mem::size_of::<u32>())
119	                .unwrap()
120	                .to_le_bytes(),
121	        );
122
123	        // image data
124	        res.extend_from_slice(&bmp.image_data);
125
126	        // insert total length, with corrections
127	        res.splice(
128	            size_marker..size_marker,
129	            u32::try_from(res.len() + core::mem::size_of::<u32>())
130	                .unwrap()
131	                .to_le_bytes(),
132	        );
133
134	        res
135	    }
136	}
Now let’s move on to arbitrary trait implementation.
137
138	impl<'a> Arbitrary<'a> for FuzzyBmp {
139	    fn arbitrary(u: &mut Unstructured<'a>) -> arbitrary::Result<Self> {
140	        let dib_type = match u8::arbitrary(u)? % 4 {
141	            0 => DibType::DIB_INFO_HEADER_SIZE,
142	            1 => DibType::DIB_V3_HEADER_SIZE,
143	            2 => DibType::DIB_V4_HEADER_SIZE,
144	            3 => DibType::DIB_V5_HEADER_SIZE,
145	            _ => unreachable!(),
146	        };
147	        let bpp = match u8::arbitrary(u)? % 6 {
148	            0 => Bits1,
149	            1 => Bits4,
150	            2 => Bits8,
151	            3 => Bits16,
152	            4 => Bits24,
153	            5 => Bits32,
154	            _ => unreachable!(),
155	        };
156	        let compress = match bool::arbitrary(u)? {
157	            false => CompressionMethod::Rgb,
158	            true => CompressionMethod::Bitfields,
159	        };
160
161	        // simply restrict it to 8 bits to keep it within reasonable bounds
162	        let width: u32 = NonZeroU8::arbitrary(u)?.get().into();
163	        let height: i32 = NonZeroI8::arbitrary(u)?.get().into();
164
165	        let mask_red = u.arbitrary()?;
166	        let mask_green = u.arbitrary()?;
167	        let mask_blue = u.arbitrary()?;
168	        let mask_alpha = u.arbitrary()?;
169
170	        let mut colours_used = u8::arbitrary(u)? as u32;
171	        // bias towards special case
172	        let colour_table_num_entries = if colours_used % 4 == 0 && bpp.bits() < 16 {
173	            colours_used = 0;
174	            (1 << bpp.bits()) as usize
175	        } else {
176	            colours_used as usize
177	        };
178
179	        // image data doesn't actually matter; seed and fill
180	        let seed = u64::arbitrary(u)?;
181	        // rows must be a multiple of 4 bytes, so we do some wacky corrections here
182	        let baseline = width * height.unsigned_abs();
183	        let data_len = (match bpp {
184	            Bits1 => baseline / 8,
185	            Bits4 => baseline / 2,
186	            Bits8 => baseline,
187	            Bits16 => baseline * 2,
188	            Bits24 => baseline * 3,
189	            Bits32 => baseline * 4,
190	            _ => unreachable!(),
191	        } as u32
192	            + (width * 4 - 1))
193	            * (width * 4)
194	            / (width * 4);
195	        let mut rng = StdRng::seed_from_u64(seed);
196	        let mut image_data = vec![0u8; data_len as usize];
197	        rng.fill_bytes(image_data.as_mut_slice());
198	        let image_data = image_data.into_boxed_slice();
199
Here we are using arbitrary’s Unstructured data, which as per documentation:
An Unstructured helps Arbitrary implementations interpret raw data (typically provided by a fuzzer) as a “DNA string” that describes how to construct the Arbitrary type. The goal is that a small change to the “DNA string” (the raw data wrapped by an Unstructured) results in a small change to the generated Arbitrary instance. This helps a fuzzer efficiently explore the Arbitrary’s input space. Unstructured is deterministic: given the same raw data, the same series of API calls will return the same results (modulo system resource constraints, like running out of memory). However, Unstructured does not guarantee anything beyond that: it makes not guarantee that it will yield bytes from the underlying data in any particular order. You shouldn’t generally need to use an Unstructured unless you are writing a custom Arbitrary implementation by hand, instead of deriving it. Mostly, you should just be passing it through to nested Arbitrary::arbitrary calls.
We start off with the DibType where one of the DIB_INFO_HEADER_SIZE, DIB_V3_HEADER_SIZE, DIB_V4_HEADER_SIZE, DIB_V5_HEADER_SIZE values are randomly selected. Then the same smart values are generated for the bpp structure.The compress returns just two values: either Rgb or Bitfields. On lines 164-173 we generate more smartish values that make sense for the parsing. Then on lines 185-197 we generate the data_len which was previously hardcoded. Continuing, on line 195 a new random generator is declared where it will be used to fill random data for the image_data variable.
Lines 200-208 will create a vector filled with random colour table values. We are using an iterator to chain the take() method and fill it only with colour_table_num_entries * 4
200	        let colour_table = u
201	            .arbitrary_iter()?
202	            .flatten()
203	            .take(colour_table_num_entries * 4)
204	            .collect::<Vec<_>>()
205	            .into_boxed_slice();
206	        if colour_table.len() != colour_table_num_entries * 4 {
207	            return Err(arbitrary::Error::NotEnoughData);
208	        }
I’ve added a few print methods and here are a few sample examples of the generated data:
println!("{:?}", colour_table);
println!("{:?}", colour_table.len());
Would yield:
[0, 255, 255, 0]
4
[11, 11, 11, 11, 11, 11, 11, 11, 11, 11, 11, 11, 11, 11, 11, 11, 11, 11, 11, 11, 11, 11, 11, 11, 255, 255, 255, 255, 11, 11, 11, 11, 11, 11, 11, 11, 11, 11, 11, 11, 11, 11, 255, 255]
44
[11, 11, 11, 11, 11, 11, 11, 11, 11, 11, 11, 11, 11, 11, 11, 11, 11, 11, 11, 11, 11, 11, 11, 11, 255, 255, 255, 255, 11, 11, 11, 11, 11, 11, 11, 11, 11, 11, 11, 11, 11, 11, 255, 255]
44
[]
0
[]
0
[]
0
[255, 61, 61, 61, 61, 61, 61, 61, 61, 61, 61, 255, 255, 255, 255, 219, 255, 255, 255, 255, 255, 255, 255, 255, 255, 255, 255, 255, 255, 255, 255, 255, 255, 255, 255, 255, 255, 255, 255, 255, 255, 255, 255, 255, 255, 255, 255, 255, 255, 255, 255, 255, 255, 255, 255, 255, 255, 255, 255, 255, 255, 255, 255, 255]
64
Last bits of the arbitrary implementation we’ve got his Ok result since we need to return a result according to the function signature. Finally we implement the size_hint() function which Returns the bounds on the remaining length of the iterator.
209
210	        Ok(Self {
211	            dib_type,
212	            bpp,
213	            compress,
214	            colours_used,
215	            width,
216	            height,
217	            mask_red,
218	            mask_green,
219	            mask_blue,
220	            mask_alpha,
221	            colour_table,
222	            image_data,
223	        })
224	    }
225
226	    fn size_hint(_: usize) -> (usize, Option<usize>) {
227	        (25, Some(65536))
228	    }
229	}
If we run the fuzzer a couple of times we can see that indeed the smart values are properly generated. First run:
FuzzyBmp {
	    dib_type: DIB_V5_HEADER_SIZE,
	    bpp: Bits32,
	    compress: Rgb,
	    colours_used: 0,
	    width: 245,
	    height: -2,
	    mask_red: 4294967295,
	    mask_green: 16711701,
	    mask_blue: 436207360,
	    mask_alpha: 64512,
	    colour_table: [],
	    image_data: [
	        52,
          --snip--
	        181,
	    ],
	}
Second run:
FuzzyBmp {
	    dib_type: DIB_V4_HEADER_SIZE,
	    bpp: Bits16,
	    compress: Rgb,
	    colours_used: 0,
	    width: 86,
	    height: -65,
	    mask_red: 4294967295,
	    mask_green: 65535,
	    mask_blue: 402652928,
	    mask_alpha: 64767,
	    colour_table: [],
	    image_data: [
	        52,
	        175,
	        76,
          --snip--
	        149,
	        114,
	    ],
	}
We’re getting close finishing the harness. Let’s take a look at the last bits:
230	fn do_fuzz(bmp: FuzzyBmp) {
231	    let bmp = Vec::from(bmp);
232	    if let Ok(bmp) = RawBmp::from_slice(bmp.as_slice()) {
233	        bmp.pixels().for_each(|p| drop(p));
234	        for x in 0.. {
235	            if bmp.pixel(Point::new(x, 0)).is_none() {
236	                break;
237	            }
238	            for y in 1.. {
239	                if bmp.pixel(Point::new(x, y)).is_none() {
240	                    break;
241	                }
242	            }
243	        }
244	    }
245	}
On line 231 we create the new bmp Vector (derived from the FuzzyBmp structure) and we use again the familiar RawBmp::from_slice() method (which we used in our dumb fuzzer) but this time we also provide the smart bmp structure. Also notice how looking at the raw_bmp.rs source code the following snippet shows that the pixel() function expects a Point structure as parameter and that’s what we are doing on lines 234-240.
![]()
At this stage let’s print the contents of the FuzzyBmp vector again:
RawBmp { header: Header { file_size: 3233,
                          image_data_start: 54,
                          image_size: Size { width: 159, height: 8 },
                          bpp: Bits16,
                          image_data_len: 3179,
                          channel_masks: None,
                          row_order: BottomUp },
                  color_type: Rgb555,
                  color_table: None,
                  image_data: [226, 81, 8, 28, 132, 44, --snip--]
        }
This looks more complete, we’ve now calculated dynamically the file_size, as well as the image_data_len.
246
247	fuzz_target!(|data: FuzzyBmp| {
248	    do_fuzz(data);
249	});
The above code snippet is the bit where cargo-fuzz uses to start mutating data, it calls the previously defined do_fuzz() function.
250
251	#[cfg(not(fuzzing))]
252	extern "C" {
253	    fn rust_fuzzer_test_input(bytes: &[u8]) -> i32;
254	}
255
256	#[cfg(not(fuzzing))]
257	fn main() {
258	    let dir = std::env::args().skip(1).next().unwrap();
259	    let mut content = Vec::new();
260	    for entry in read_dir(dir).unwrap() {
261	        let entry = entry.unwrap();
262	        if !entry.file_type().unwrap().is_file() {
263	            continue;
264	        }
265	        let mut file = File::open(entry.path()).unwrap();
266	        content.clear();
267	        content.reserve(file.metadata().unwrap().len() as usize);
268	        file.read_to_end(&mut content).unwrap();
269	        unsafe {
270	            rust_fuzzer_test_input(content.as_slice());
271	        }
272	    }
273	}
274
Finally, these last bits will not be used within cargo-fuzz, if we compile the harness and run it we can see that expects a parameter as a dictionary and reads the contents of the (assuming we provided bmp) files. If we print the contents we can see the following:
[255, 64, 8, 253, 122, 200, 200, 200, 255, 255, 1, 0, 0, 0, 0, 0, 0, 4, 107, 0, 0, 0, 255, 255, 0, 0]
[255, 193, 1, 131, 75, 0, 87, 255, 191, 255, 255, 252, 1, 87, 255, 0, 0, 0, 0, 0, 9, 1, 0, 0, 0, 0, 0, 0, 0, 126, 255, 0, 1, 255, 255, 255, 255, 0]
[255, 193, 1, 131, 87, 255, 191, 255, 63, 255, 252, 1, 255, 255, 0, 0, 0, 0, 0, 0, 9, 1, 0, 31, 31, 31, 31, 31, 31, 31, 31, 31, 31, 31, 31, 31, 31, 0, 255, 255]
We are done with our analysis, let’s try to kick in the fuzzer now:
$ cargo fuzz run structured -- -max_total_time=300
   Compiling tinybmp-fuzz v0.0.0 (/home/kali/Desktop/tinybmp/fuzz)
    Finished release [optimized + debuginfo] target(s) in 2.48s
    Finished release [optimized + debuginfo] target(s) in 0.03s
     Running `target/x86_64-unknown-linux-gnu/release/structured -artifact_prefix=/home/kali/Desktop/tinybmp/fuzz/artifacts/structured/ -max_total_time=300 /home/kali/Desktop/tinybmp/fuzz/corpus/structured`
INFO: Running with entropic power schedule (0xFF, 100).
INFO: Seed: 3975089662
INFO: Loaded 1 modules   (79206 inline 8-bit counters): 79206 [0x5600359c55d0, 0x5600359d8b36),
INFO: Loaded 1 PC tables (79206 PCs): 79206 [0x5600359d8b38,0x560035b0e198),
INFO:      416 files found in /home/kali/Desktop/tinybmp/fuzz/corpus/structured
INFO: -max_len is not provided; libFuzzer will not generate inputs larger than 4096 bytes
INFO: seed corpus: files: 416 min: 25b max: 218b total: 18397b rss: 42Mb
#417	INITED cov: 664 ft: 1865 corp: 166/5683b exec/s: 0 rss: 81Mb
#1465	REDUCE cov: 664 ft: 1865 corp: 166/5681b lim: 195 exec/s: 1465 rss: 111Mb L: 37/181 MS: 3 ChangeByte-ChangeBinInt-EraseBytes-
#2436	REDUCE cov: 664 ft: 1865 corp: 166/5679b lim: 202 exec/s: 1218 rss: 138Mb L: 37/181 MS: 1 CrossOver-
#4096	pulse  cov: 664 ft: 1865 corp: 166/5679b lim: 216 exec/s: 1365 rss: 192Mb
                                          --snip--
#311445	REDUCE cov: 664 ft: 1868 corp: 168/5731b lim: 3157 exec/s: 1720 rss: 378Mb L: 37/181 MS: 5 CrossOver-ShuffleBytes-EraseBytes-InsertByte-ChangeBit-
#337091	REDUCE cov: 664 ft: 1868 corp: 168/5730b lim: 3410 exec/s: 1719 rss: 378Mb L: 37/181 MS: 1 EraseBytes-
#419743	REDUCE cov: 664 ft: 1868 corp: 168/5729b lim: 4096 exec/s: 1727 rss: 378Mb L: 37/181 MS: 2 ChangeBinInt-EraseBytes-
#441823	REDUCE cov: 664 ft: 1868 corp: 168/5727b lim: 4096 exec/s: 1725 rss: 382Mb L: 44/181 MS: 5 ChangeBinInt-EraseBytes-ChangeBit-ShuffleBytes-EraseBytes-
#445856	REDUCE cov: 664 ft: 1868 corp: 168/5726b lim: 4096 exec/s: 1728 rss: 382Mb L: 37/181 MS: 3 ChangeBinInt-CrossOver-EraseBytes-
#477133	REDUCE cov: 664 ft: 1868 corp: 168/5722b lim: 4096 exec/s: 1722 rss: 382Mb L: 40/181 MS: 2 ChangeBit-EraseBytes-
#479444	REDUCE cov: 664 ft: 1868 corp: 168/5721b lim: 4096 exec/s: 1724 rss: 382Mb L: 37/181 MS: 1 EraseBytes-
#495684	REDUCE cov: 664 ft: 1868 corp: 168/5718b lim: 4096 exec/s: 1721 rss: 382Mb L: 43/181 MS: 5 ChangeBit-CMP-ChangeBinInt-ShuffleBytes-EraseBytes- DE: "x\000"-
#519634	DONE   cov: 664 ft: 1868 corp: 168/5718b lim: 4096 exec/s: 1726 rss: 382Mb
###### Recommended dictionary. ######
"\001\000\000\000\000\000\000\004" # Uses: 44855
"x\000" # Uses: 1145
###### End of recommended dictionary. ######
Done 519634 runs in 301 second(s)
Unfortunately this improved harness didn’t yield any new bugs!
Coverage round 2
Let’s do this one more time running the smart-ish fuzzer:
cargo fuzz coverage structured
and after converting the data to HTML we get:
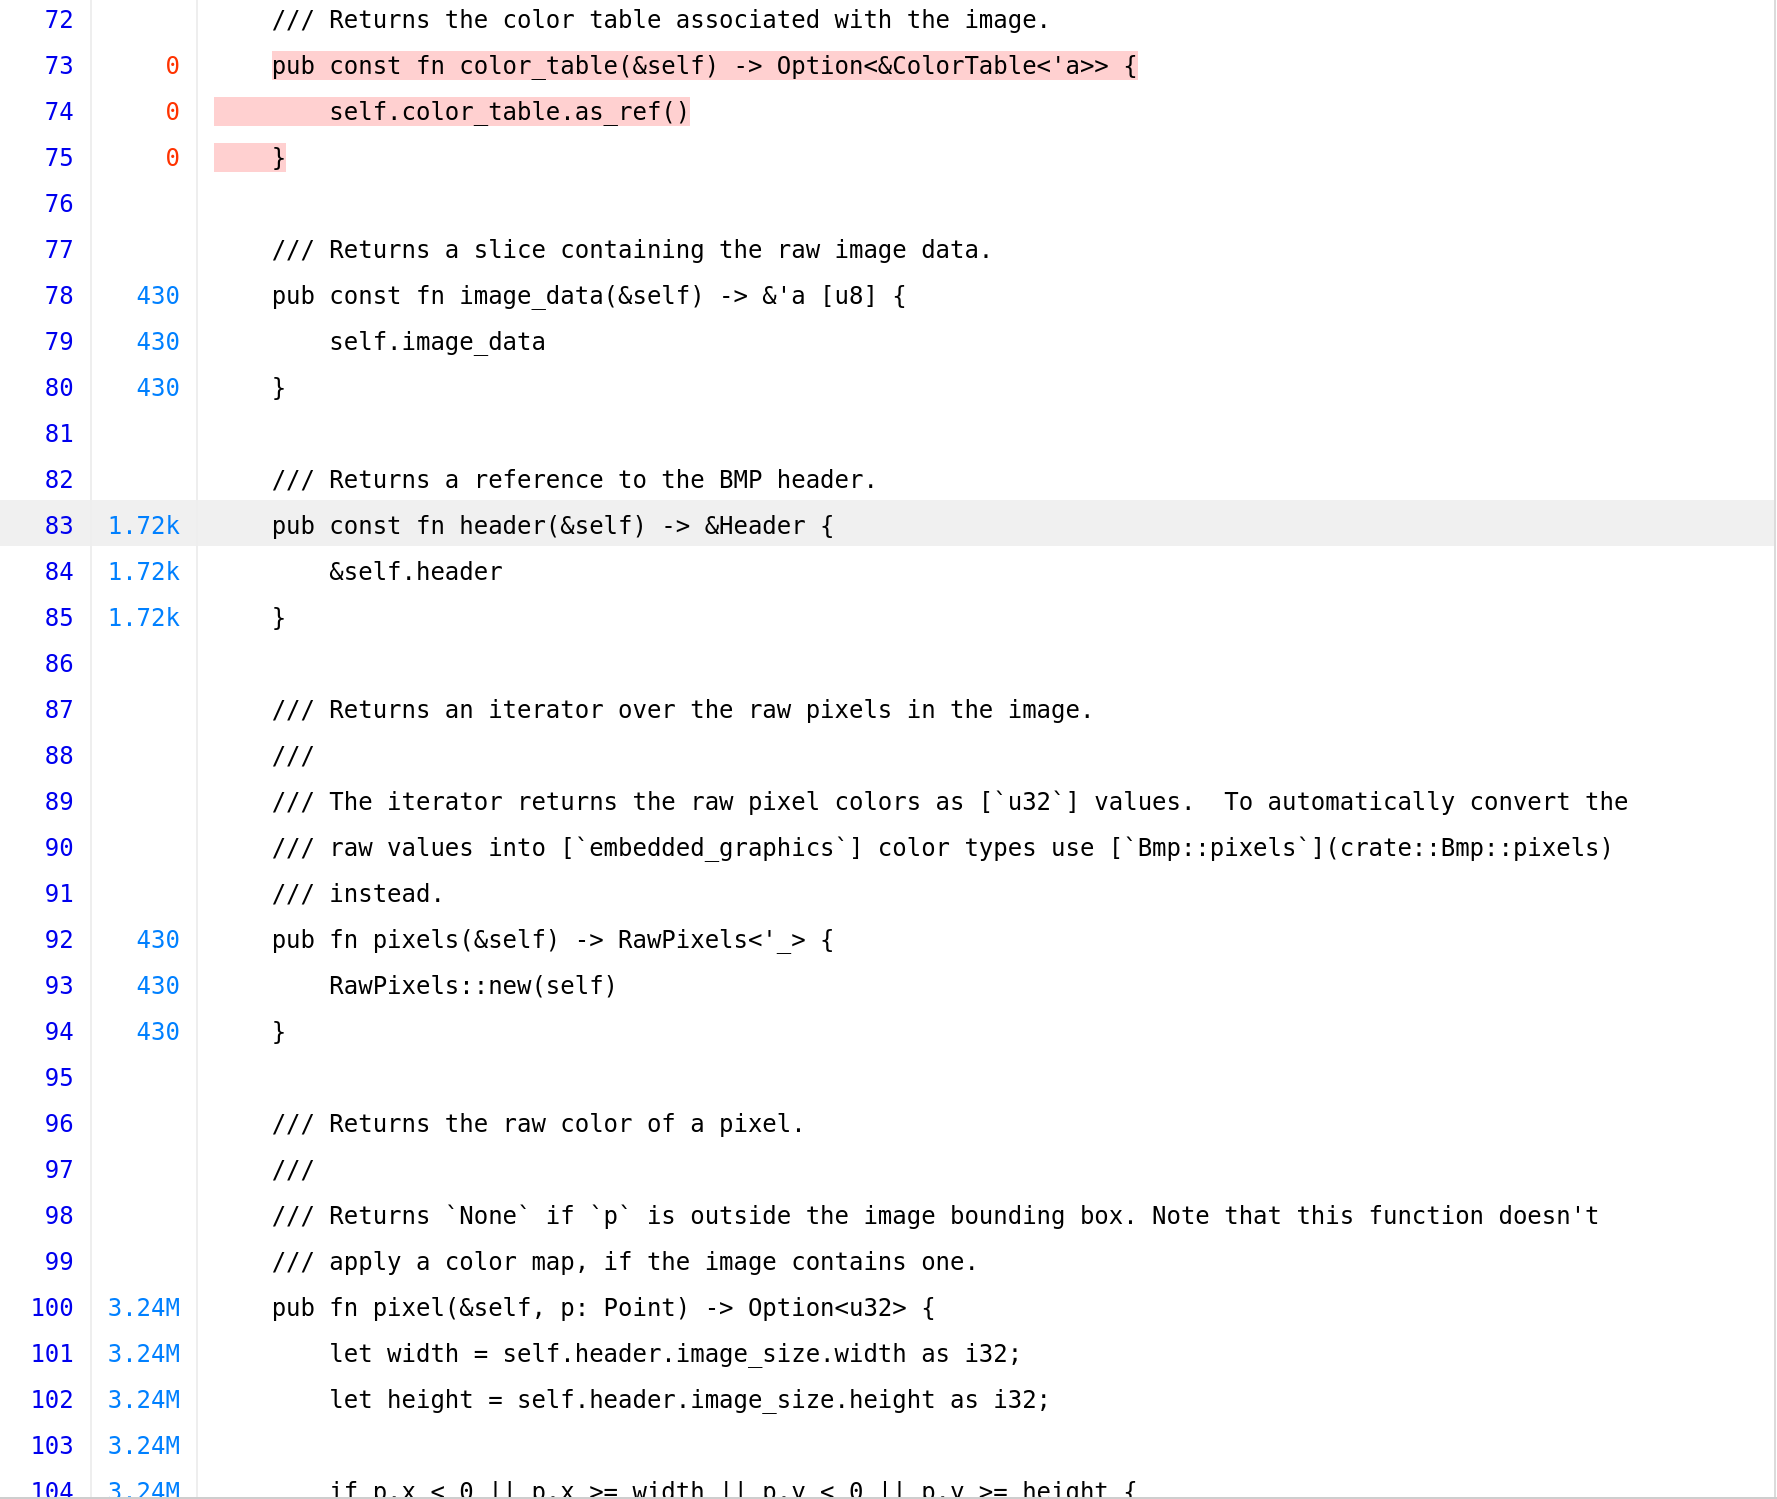
Fantastic! We did a lot of effort but as you can see this time we were able to hit all those functions (1.7k and 3.24 million times!) and get decent coverage.
Conclusion
We started with finding a fun target, created a dumb fuzzer and found some bugs with it. Then, we moved on with a smart-ish/structured aware approach and despite the fact were not able to uncover new bugs, we learnt how to mess around with arbitrary trait, and we dug a bit deeper to the internals of the project. Hope you enjoyed it and learnt something - I definitely did!
References
[1] Earn $200K by fuzzing for a weekend: Part 1
[2] Fuzzing with cargo-fuzz
Discovery and analysis of a Windows PhoneBook Use-After-Free vulnerability (CVE-2020-1530)
2020-12-08 00:00:00 +0000
Introduction
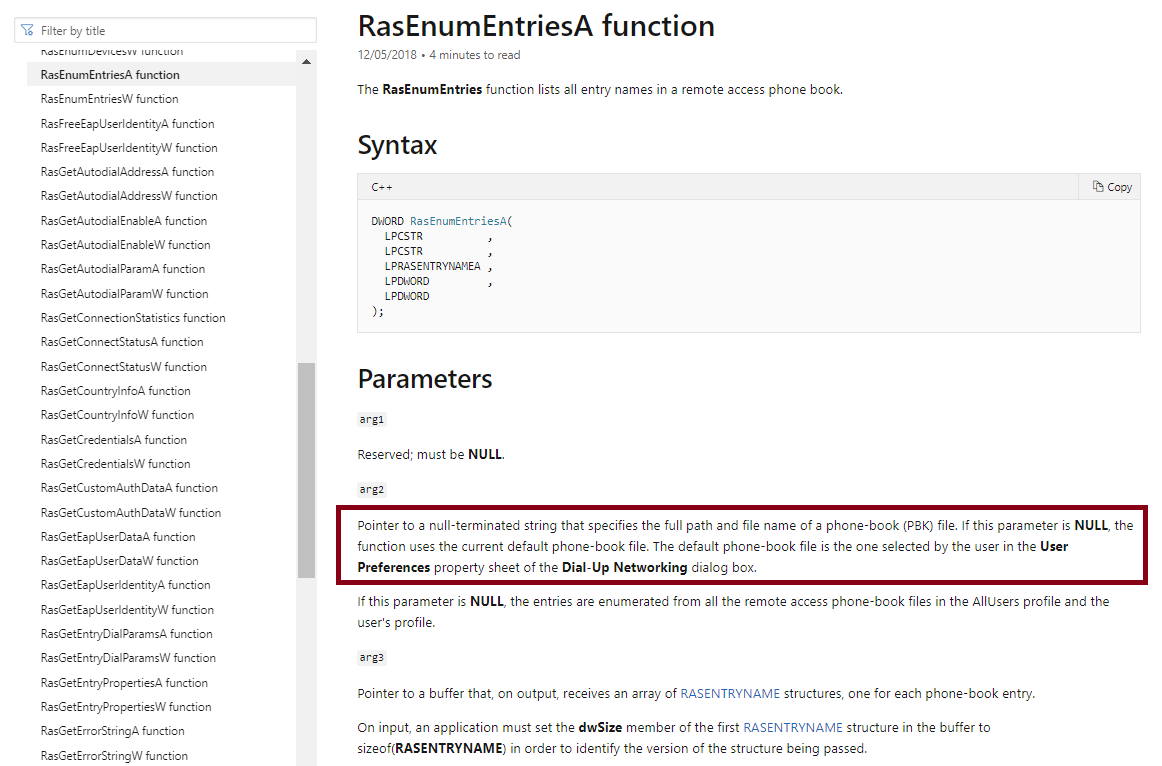
Back in April I started browsing the MSDN with the purpose of finding a file format that it’s not very common, it has not been fuzzed in the past, it is available on every modern Windows version, and thus something that will give me good chances to find a bug. After spending a few hours, I bumped into this lovely RasEnumEntriesA[1] API:
So hold on a minute, what’s a phone-book (pbk) file?!
From here, we can see:
Phone books provide a standard way to collect and specify the information that the Remote Access Connection Manager needs to establish a remote connection. Phone books associate entry names with information such as phone numbers, COM ports, and modem settings. Each phone-book entry contains the information needed to establish a RAS connection. Phone books are stored in phone-book files, which are text files that contain the entry names and associated information. RAS creates a phone-book file called RASPHONE.PBK. The user can use the main Dial-Up Networking dialog box to create personal phone-book files. The RAS API does not currently provide support for creating a phone-book file. Some RAS functions, such as the RasDial function, have a parameter that specifies a phone-book file. If the caller does not specify a phone-book file, the function uses the default phone-book file, which is the one selected by the user in the User Preferences property sheet of the Dial-Up Networking dialog box.
Excellent! That’s exactly what I was looking for. In the rest of this article we will dive into the Windows PhoneBook API and proceed with finding samples, creating a harness, checking coverage and finally fuzz this API in order to discover vulnerabilities.
Getting Samples
Since I wasn’t familiar at all with the phone book file format, a quick search yielded a few sample file formats:

A sample file format looks like that:
[SKU]
Encoding=1
PBVersion=4
Type=2
AutoLogon=0
UseRasCredentials=1
LowDateTime=688779312
HighDateTime=30679678
DialParamsUID=751792375
-- snip --
AuthRestrictions=512
IpPrioritizeRemote=1
IpInterfaceMetric=0
IpHeaderCompression=0
IpAddress=0.0.0.0
IpDnsAddress=0.0.0.0
IpDns2Address=0.0.0.0
IpWinsAddress=0.0.0.0
IpWins2Address=0.0.0.0

NETCOMPONENTS=
ms_msclient=1
ms_server=1

MEDIA=rastapi
Port=VPN1-0
Device=WAN Miniport (PPTP)

DEVICE=vpn
PhoneNumber=vpn.sku.ac.ir
AreaCode=
CountryCode=0
CountryID=0
UseDialingRules=0
Comment=
FriendlyName=
LastSelectedPhone=0
PromoteAlternates=0
TryNextAlternateOnFail=1
Finding attack surface
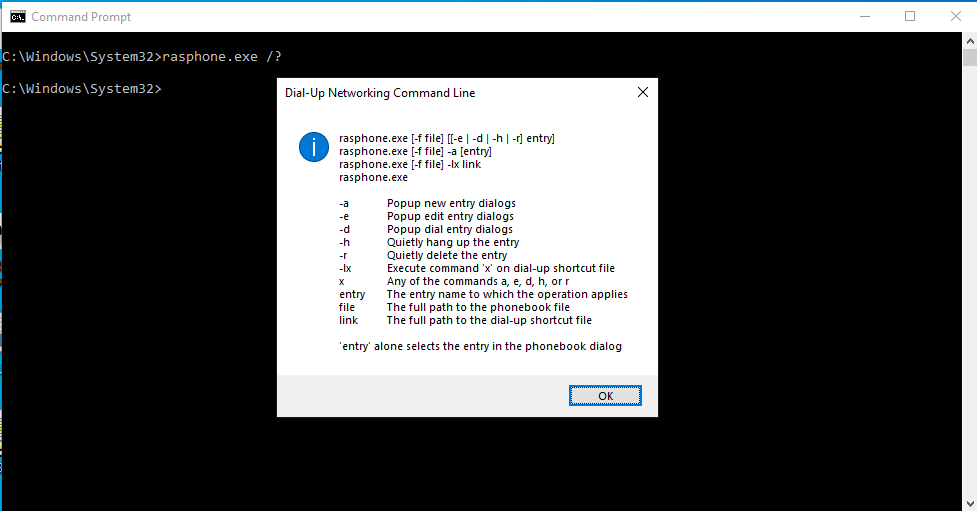
As a second step I’ve quickly grabbed a few samples and experimented a bit. It turns out Windows ships already with an executable living in the system32 directory called rasphone.exe which also gives you a lot of interesting parameters with their description:
Now the next step is to make sure that we are indeed hitting the RasEnumEntries function… You can probably use a few of the Windows API Monitoring tools, I’ll go with classic WinDbg way and just set a breakpoint :)
0:000> bp RASAPI32!RasEnumEntriesA
0:000> bp RASAPI32!RasEnumEntriesW
In case you haven’t noticed there’s a ‘Note’ at the very bottom of the page:
The ras.h header defines RasEnumEntries as an alias which automatically selects the ANSI or Unicode version of this function based on the definition of the UNICODE preprocessor constant. Mixing usage of the encoding-neutral alias with code that not encoding-neutral can lead to mismatches that result in compilation or runtime errors. For more information, see Conventions for Function Prototypes.
In short, the RasEnumEntriesA uses the ANSI version comparing to the RasEnumEntriesW where is using wide strings (Unicode).
After loading the file by running windbg.exe rasphone.exe -f sample.pbk we can observe the following:
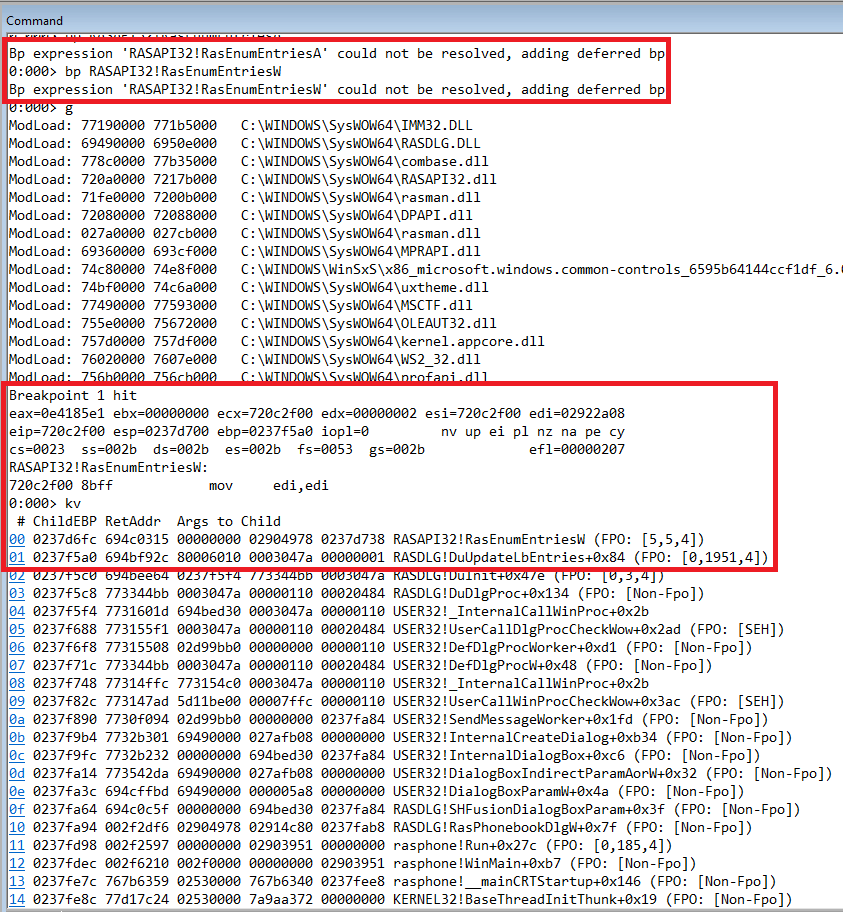
Bingo! Looking at the stack backtrace it is clear that the rasphone binary calls the RASDLG API (a dialog wrapper around the RASAPI32 API) and
then eventually we hit our target (RasEnumEntriesW). So far so good!
Creating the harness
This is the juicy part of this blog post! If you have been watching @gamozolabs’ streams you know that fuzzing is all about creating decent harnesses and exploring the right path codes! Where do we begin then? Well, for our good luck the previous link to RasEnumEntriesA documentation Microsoft provided us with a decent example (MSDN and github can be your friends!). Reading the sample code, we need to call two times the RasEnumEntries function, one to get the required buffer size and another one which actually performs the real call with the right parameters. The sample is also missing a very important argument, the second parameter to the RasEnumEntries function is NULL, and thus “the entries are enumerated from all the remote access phone-book files in the AllUsers profile and the user’s profile”. Let’s fix that:
// RasEntries.cpp : This file contains the 'main' function. Program execution begins and ends there.
//

#include <iostream>
#include <windows.h>
#include <stdio.h>
#include "ras.h"
#include "raserror.h"
#pragma comment(lib, "rasapi32.lib")


int main(int argc, char** argv)
{
    DWORD dwCb = 0;
    DWORD dwRet = ERROR_SUCCESS;
    DWORD dwErr = ERROR_SUCCESS;
    DWORD dwEntries = 0;
    LPRASENTRYNAME lpRasEntryName = NULL;
    DWORD rc;
    DWORD dwSize = 0;
    LPCSTR lpszPhonebook = argv[1];
    DWORD dwRasEntryInfoSize = 0;

    RASENTRY* RasEntry = NULL;      // Ras Entry structure
    BOOL bResult = TRUE;    // return for the function
    RasEntry = (RASENTRY*)HeapAlloc(GetProcessHeap(), HEAP_ZERO_MEMORY,
        sizeof(RASENTRY));

    printf("main: %p\n", (void*)main);

    if (argc < 2) {
        printf("Usage: %s <bpk file>\n", argv[0]);
        return 0;
    }

    // Call RasEnumEntries with lpRasEntryName = NULL. dwCb is returned with the required buffer size and
    // a return code of ERROR_BUFFER_TOO_SMALL
    dwRet = RasEnumEntriesA(NULL, lpszPhonebook, lpRasEntryName, &dwCb, &dwEntries);

    if (dwRet == ERROR_BUFFER_TOO_SMALL) {
        // Allocate the memory needed for the array of RAS entry names.
        lpRasEntryName = (LPRASENTRYNAME)HeapAlloc(GetProcessHeap(), HEAP_ZERO_MEMORY, dwCb);
        if (lpRasEntryName == NULL) {
            wprintf(L"HeapAlloc failed!\n");
            return 0;
        }
        // The first RASENTRYNAME structure in the array must contain the structure size
        lpRasEntryName[0].dwSize = sizeof(RASENTRYNAME);

        // Call RasEnumEntries to enumerate all RAS entry names
        dwRet = RasEnumEntries(NULL, lpszPhonebook, lpRasEntryName, &dwCb, &dwEntries);

        // If successful, print the RAS entry names
        if (ERROR_SUCCESS == dwRet) {

            printf("Number of Entries %d\n", dwEntries);
            wprintf(L"The following RAS entry names were found:\n");

            for (DWORD i = 0; i < dwEntries; i++) {
                printf("%s\n", lpRasEntryName[i].szEntryName);
            }

        }
        //Deallocate memory for the connection buffer
        HeapFree(GetProcessHeap(), 0, lpRasEntryName);
        lpRasEntryName = NULL;
    }


    return 0;
}
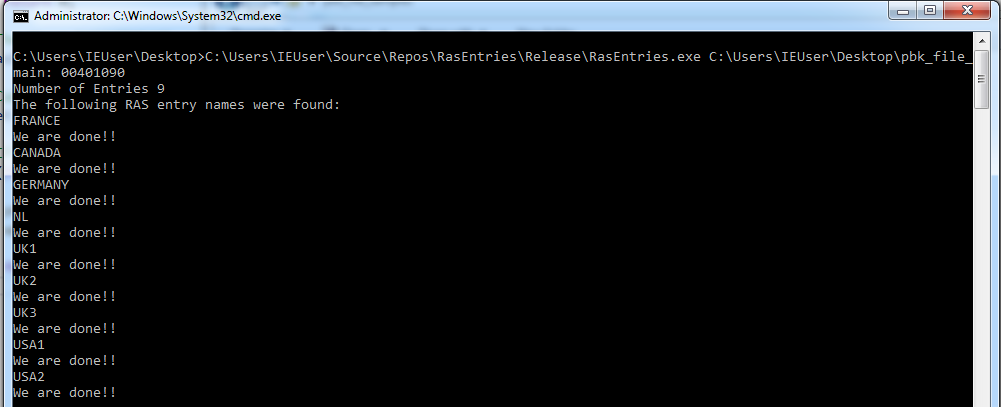
Let’s compile the above code and run it with our sample file:

Excellent! I’ve gone ahead and measured the code coverage (see next section) with this initial harness which unfortunately it’s not very impressive. As such, the next step was to slight try to add 1-2 more functions within the RASAPI32 API as to increase code coverage as well as the chances to discover a bug! After a lot of trial and error and looking at the github repos the final harness looks like this:
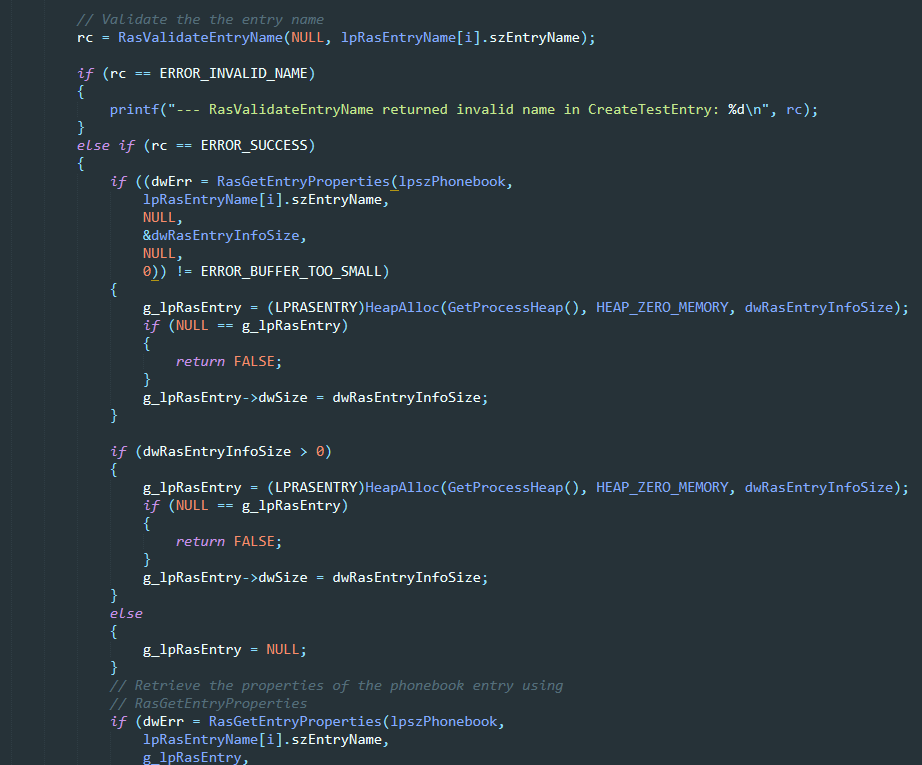
Here, I have added the RasValidateEntryName and the RasGetEntryProperties functions. Running the final version with another file sample resulted in the following screenshot:
Exploring Code Coverage
With the harness ready and with our samples lying around, I quickly coded this python snippet to automate the process of getting the DynamoRIO files via drcov:
import subprocess
import glob

samples = glob.glob("C:\\Users\\simos\\Desktop\\pbk_samples\\*")

for sample in samples:
	harness = "C:\\pbk_fuzz\\RasEntries.exe %s test" % sample
	command = "C:\\DRIO79\\bin32\\drrun.exe -t drcov -- %s" % harness
	print "[*] Running harness %s with sample %s" % (harness, command)
	p = subprocess.Popen(command, stdout=subprocess.PIPE, stderr=subprocess.PIPE)
	out, err = p.communicate()
	print out
	print err
The above simple script gave me the following output:
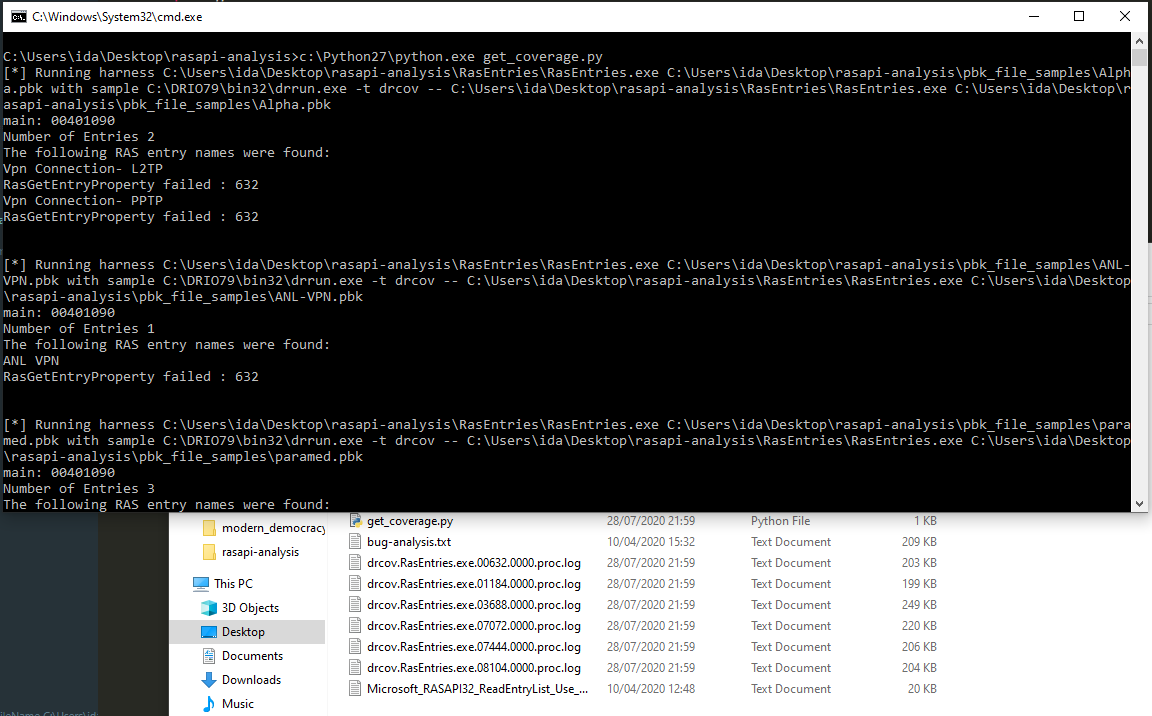
Notice the drcov *.log files produced by DynamoRIO. I’ve simply loaded the RASAPI32.dll within BinaryNinja and used the lightouse plugin (for more information please see my previous tutorial)
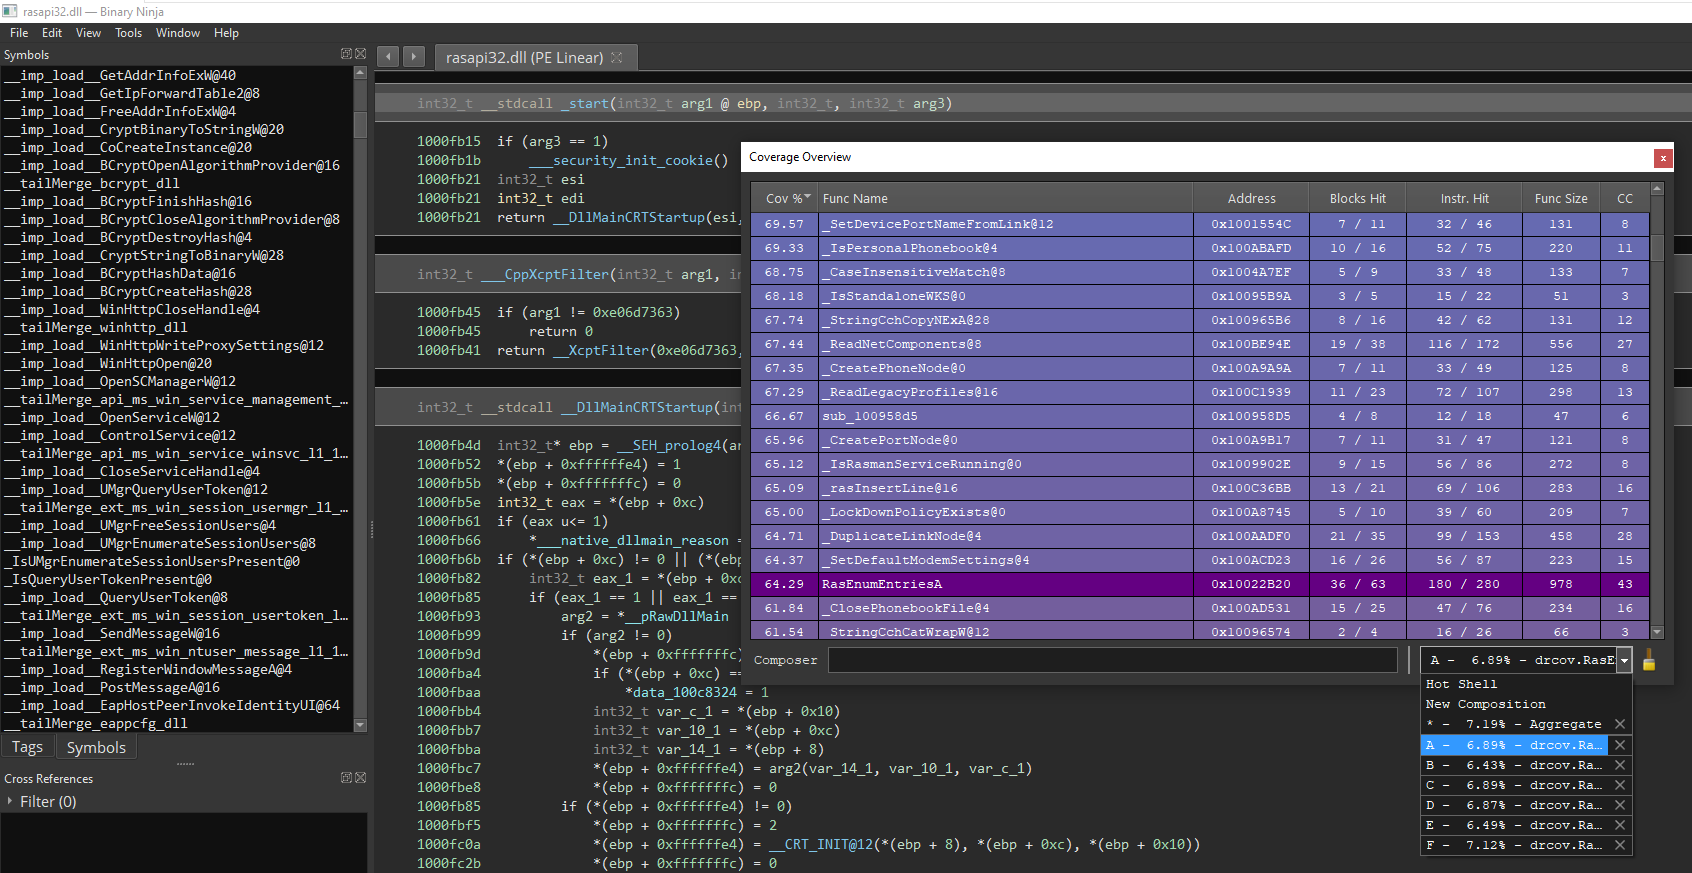
From the screenshot above it can be observed that the coverage is only less than 10%. Ideally, you’d expect the file samples to at least be able to exercise 20% of the module. Nevertheless I decided to move on and see if I get lucky.
Fuzzing it
With the final harness and our samples together and having measured some basic code coverage now it’s the time to actually go ahead and fuzz it. For this compaign I’ve used two different techniques, one was winafl and the other one was a very simple fuzzing framework I have coded which is simply a wrapper around radamsa and winappdbg to monitor and save the crashes. I have had really success in the past with winafl, however when it comes to targets such as text-based format parsing, winafl unfortunately is not very effective.
For this campaign I’ve used a fully updated Windows 7 x64 VM (from Microsoft Dev before they change it to Windows 10 only versions) as many times I encountered few issues with DynamoRIO not being able to get proper coverage from miscellaneous Windows DLLs (even though I had recompiled winafl with latest DynamoRIO myself). While we are here, I can’t emphasise how this trick has saved me so many times:
Disable ASLR!
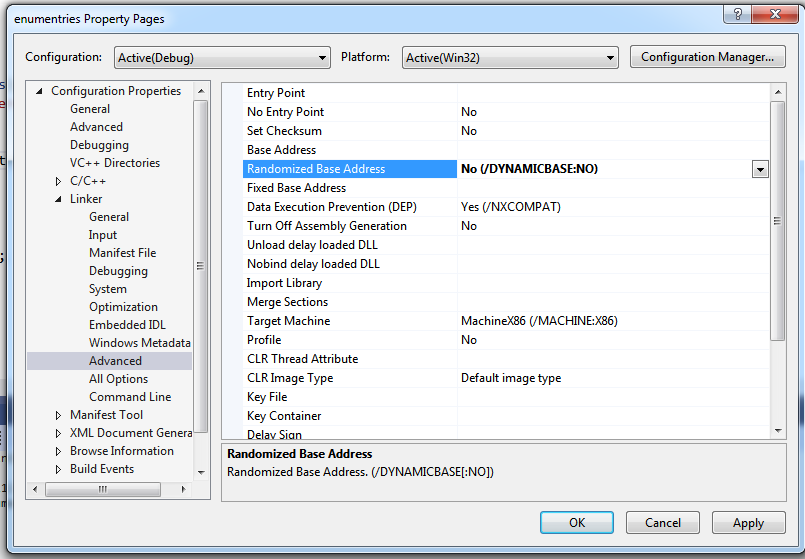
main() or my_target().
Next let’s quickly run winafl with the previously obtained address:
afl-fuzz.exe -i Y:\samples -o Y:\pbk_fuzz -D Y:\DRIO7\bin32\ -t 20000 -- -target_module RasEntries.exe -coverage_module RASAPI32.dll -target_offset 0x01090 -fuzz_iterations 2000 -nargs 2 -- Y:\RasEntries.exe @@
.. and let winafl do it all for you! Here, I simply instrumented winafl to target my harness (RasEntries.exe) and for coverage use the RASAPI32.dll DLL. Here are the results after just three days of fuzzing:
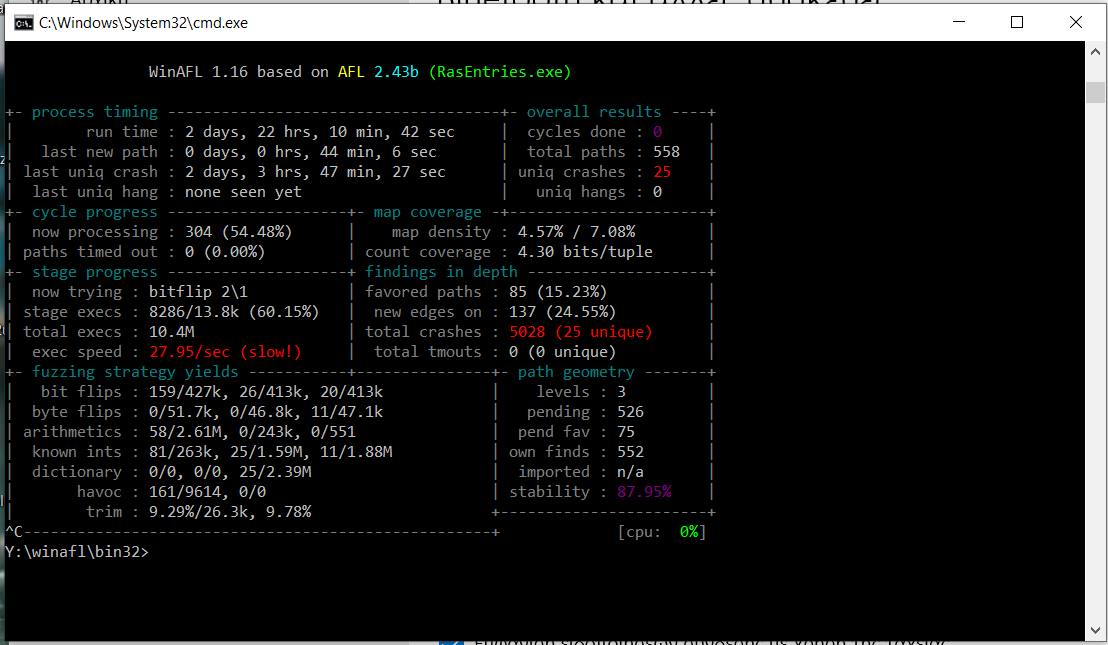
W00t! Quite a lot of crashes with 25 being “unique”! It should be noted here that I managed to pretty much get the first crash within half an hour of fuzzing…few interesting observations:
- I stopped the fuzzer while it was still finding new paths due to the fact it kept hitting the same bug again and again.
- The speed was pretty much decent in the beginning (> 100 exec/s) which however dropped during more path discovery.
- Stability is < 90%. Perhaps the consumed memory is not properly cleaned up?
At this phase I’d also like to mention that running a simple fuzzer such as radamsa I was literally able to get crashes within seconds:
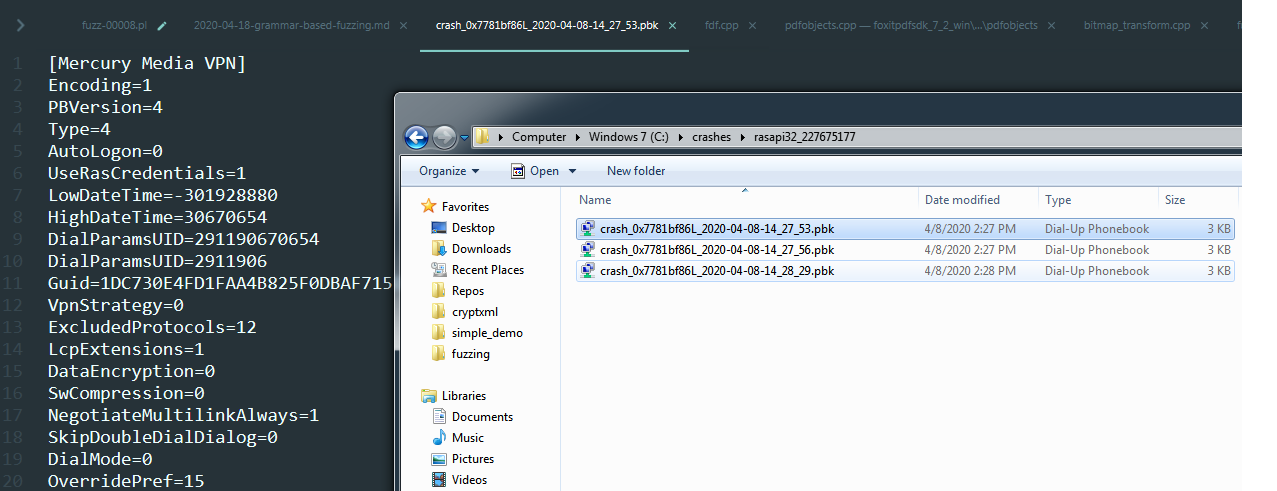
Crash triage
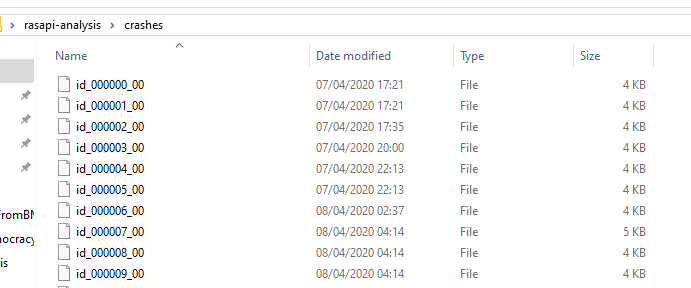
As you can see from the screenshot above the crashers’ size is pretty much the same which indicates that we might be hitting the same bug again and again. After automating the process with BugId, it turns that the 25 “unique” bugs were actually the same case!
Vulnerability Analysis
With the harness ready and our crasher alive and kicking let’s run it under the debugger:
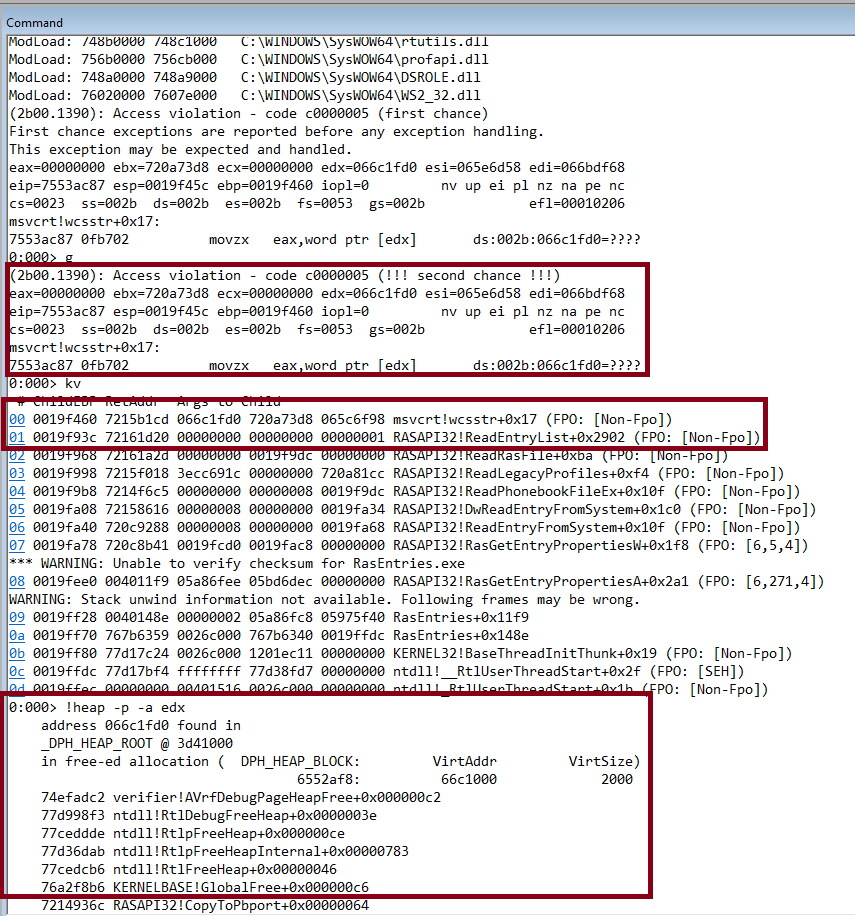
With page heap enabled and stack trace (gflags.exe /i binary +hpa +ust), notice how we’re hitting a second chance crash.
The crash occured in the wcsstr function:
Returns a pointer to the first occurrence of strSearch in str, or NULL if strSearch does not appear in str. If strSearch points to a string of zero length, the function returns str.
which was also called within RASAPI32’s ReadEntryList function. We are trying to dereference the value pointed by edx which according to page verification is invalid.
In fact, trying to get more information regarding the memory address stored in the edx register we can indeed see that is value has been previously freed! Wonderful! This clearly is the case of a use-after-free vulnerability, as somehow this memory has been freed, yet the wcsstr
function tried to access that part of memory. Now let’s try to actually pinpoint the issue!
For this step I had to switch between the old windbg and the new preview (since the preview was not very reliable when I wanted to examine the free’d memory). Let’s start by examining the free’d allocation:
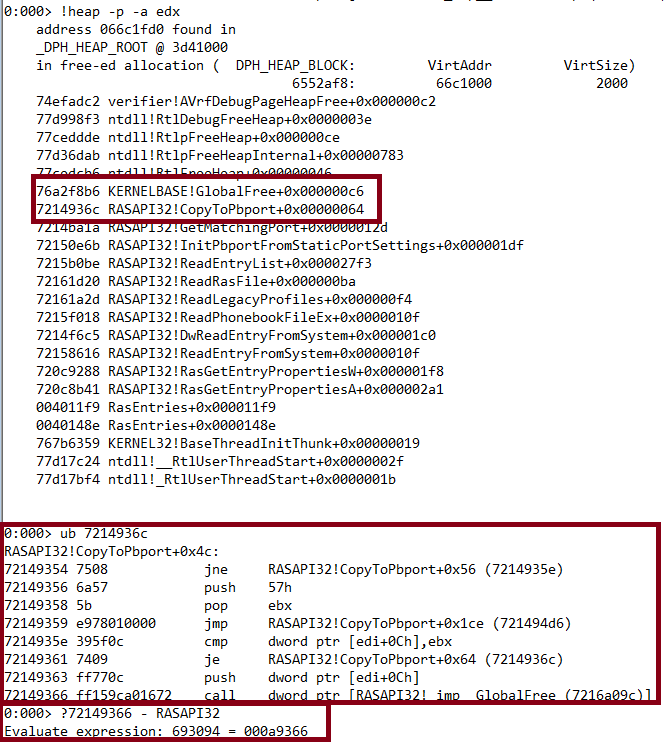
We can derive from above that at 0x7214936c the RASAPI32!CopyToPbport+0x00000064 is responsible for freeing the memory. After doing an Unassemble (ub), the instructions look as follows:
72149361 7409            je      RASAPI32!CopyToPbport+0x64 (7214936c)
72149363 ff770c          push    dword ptr [edi+0Ch]
72149366 ff159ca01672    call    dword ptr [RASAPI32!_imp__GlobalFree (7216a09c)]
Let’s restart windbg and set up a breakpoint:
0:000> ?72149366 - RASAPI32
Evaluate expression: 693094 = 000a9366
0:000> bp RASAPI32+000a9366
Here I’m calculating the offset from RASAPI32’s base module (we won’t be able to hit exact offset since it gets rebased due to ASLR)
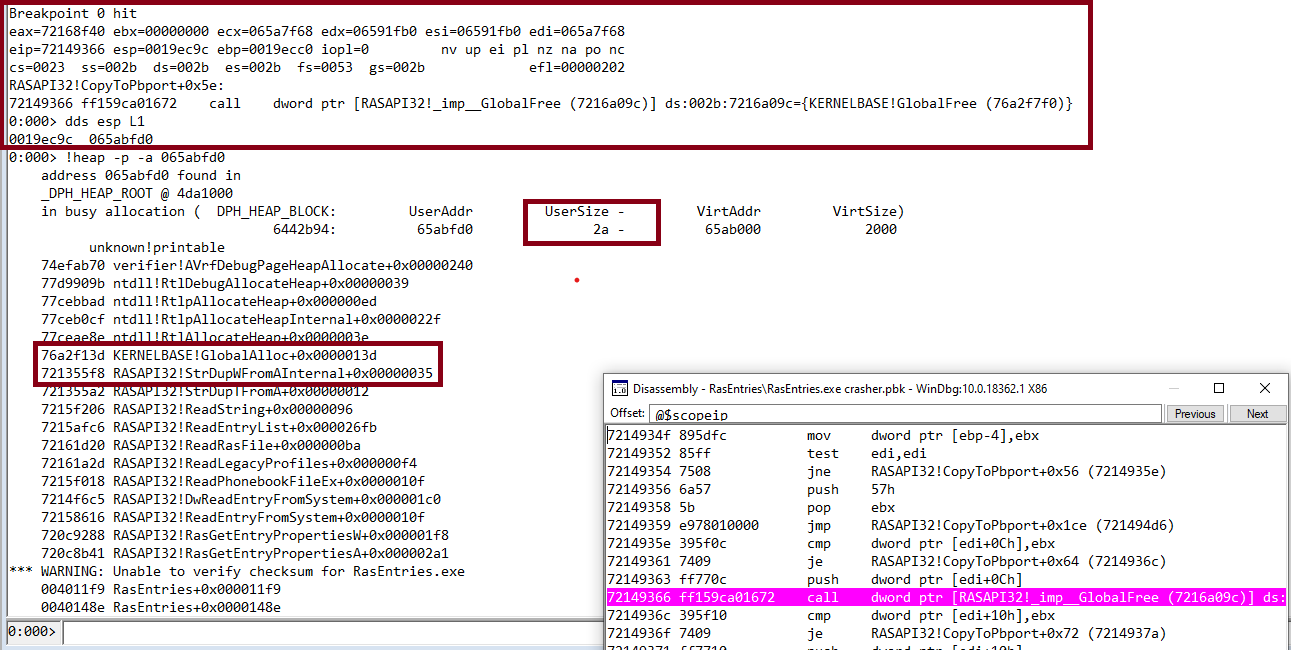
As expected the memory breakpoint was hit. We are just before free’ing that memory, and from the disassembly we can see the KERNELBASE!GlobalFree function gets only one parameter:
push dword ptr [edi+0Ch]
To double confirm it we can check the available MSDN documentation from here:
HGLOBAL GlobalFree( _Frees_ptr_opt_ HGLOBAL hMem );
There are a few more interesting bits to notice here, the value of the allocated buffer is 0x2a. This is very important as we need to know whether is value is user controlled or not. How many bytes is this one?
0:000> ?2a
Evaluate expression: 42 = 0000002a
So the initial allocated buffer is 42 bytes. Moving on, which function called this allocation?
0:000> ub 721355f8
RASAPI32!StrDupWFromAInternal+0x1a:
721355dd 50              push    eax
721355de 53              push    ebx
721355df ff15bca11672    call    dword ptr [RASAPI32!_imp__MultiByteToWideChar (7216a1bc)]
721355e5 8945fc          mov     dword ptr [ebp-4],eax
721355e8 8d044502000000  lea     eax,[eax*2+2]
721355ef 50              push    eax
721355f0 6a40            push    40h
721355f2 ff15a4a01672    call    dword ptr [RASAPI32!_imp__GlobalAlloc (7216a0a4)]
After doing some basic reverse engineering, we can see that within RASAPI32’s StrDupWFromAInternal function, the MultiByteToWideChar is initially called, and then depending on the length of the string, GlobalAlloc is called with the following two parameters:
DECLSPEC_ALLOCATOR HGLOBAL GlobalAlloc(
  UINT   uFlags,
  SIZE_T dwBytes
);
The first one is the static value 0x40 which is uFlags, which according to the documentation:
| GMEM_ZEROINIT 0x0040 |
Initializes memory contents to zero |
The second parameter is the previously calculated string length:
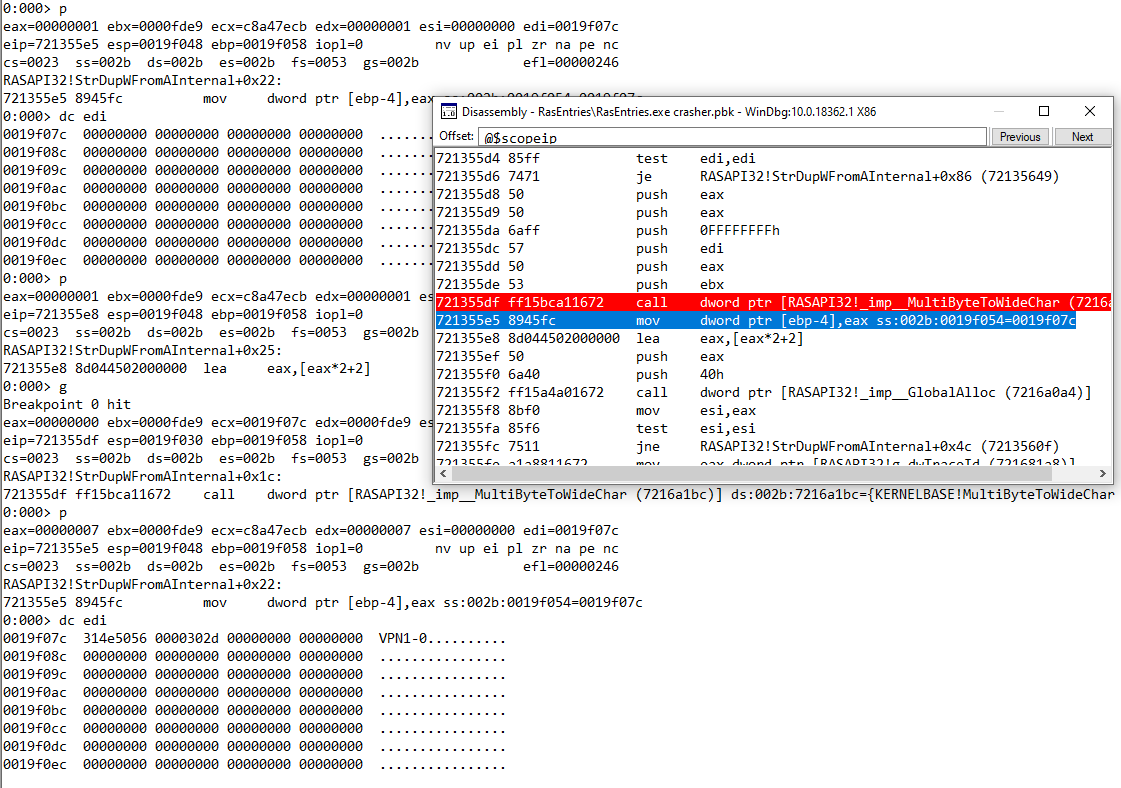
Let’s have a closer look right before the allocation:
0:000> dc edi
0019f07c  314e5056 0000302d 00000000 00000000  VPN1-0..........
0019f08c  00000000 00000000 00000000 00000000  ................
0019f09c  00000000 00000000 00000000 00000000  ................
0019f0ac  00000000 00000000 00000000 00000000  ................
0019f0bc  00000000 00000000 00000000 00000000  ................
0019f0cc  00000000 00000000 00000000 00000000  ................
0019f0dc  00000000 00000000 00000000 00000000  ................
0019f0ec  00000000 00000000 00000000 00000000  ................
0:000> p
eax=00000007 ebx=0000fde9 ecx=c8a47ecb edx=00000007 esi=00000000 edi=0019f07c
eip=721355e8 esp=0019f048 ebp=0019f058 iopl=0         nv up ei pl zr na pe nc
cs=0023  ss=002b  ds=002b  es=002b  fs=0053  gs=002b             efl=00000246
RASAPI32!StrDupWFromAInternal+0x25:
721355e8 8d044502000000  lea     eax,[eax*2+2]
0:000>
eax=00000010 ebx=0000fde9 ecx=c8a47ecb edx=00000007 esi=00000000 edi=0019f07c
eip=721355ef esp=0019f048 ebp=0019f058 iopl=0         nv up ei pl zr na pe nc
cs=0023  ss=002b  ds=002b  es=002b  fs=0053  gs=002b             efl=00000246
RASAPI32!StrDupWFromAInternal+0x2c:
721355ef 50              push    eax
0:000>
eax=00000010 ebx=0000fde9 ecx=c8a47ecb edx=00000007 esi=00000000 edi=0019f07c
eip=721355f0 esp=0019f044 ebp=0019f058 iopl=0         nv up ei pl zr na pe nc
cs=0023  ss=002b  ds=002b  es=002b  fs=0053  gs=002b             efl=00000246
RASAPI32!StrDupWFromAInternal+0x2d:
721355f0 6a40            push    40h
0:000>
eax=00000010 ebx=0000fde9 ecx=c8a47ecb edx=00000007 esi=00000000 edi=0019f07c
eip=721355f2 esp=0019f040 ebp=0019f058 iopl=0         nv up ei pl zr na pe nc
cs=0023  ss=002b  ds=002b  es=002b  fs=0053  gs=002b             efl=00000246
RASAPI32!StrDupWFromAInternal+0x2f:
721355f2 ff15a4a01672    call    dword ptr [RASAPI32!_imp__GlobalAlloc (7216a0a4)] ds:002b:7216a0a4={KERNELBASE!GlobalAlloc (76a2f000)}
0:000> dds esp L2
0019f040  00000040   <== uFlags
0019f044  00000010   <== dwBytes
So as seen above the length of the “VPN1-0” phone book entry is 6+1, which is user controlled, and once it gets multiplied times two and gets added with two, it’s then used as a parameter to the GlobalAlloc method. So brilliant, we definitely control this one!
However, what caused the free? After spending some time, I figured out that the issue was this entry within the phonebook:
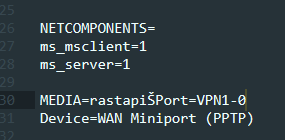
Aha! So a malformed entry causes the StrDupWFromAInternal to bail out and free the memory!
Exploitation
Now that we have a basic understanding of the vulnerability here are my thoughts regarding exploitation of this issue - take it with a grain of salt! Let’s start with the following minimised PoC:
[CRASH]
Encoding=1
PBVersion=4
Type=2

MEDIA=rastapiPort=VPN1
Device=AAAAAAAABBBBBBBBCCCCCCCCDDDDDDDD

DEVICE=vpn
PhoneNumber=localhost
AreaCode=
CountryCode=0
CountryID=0
UseDialingRules=0
Comment=
FriendlyName=
LastSelectedPhone=0
PromoteAlternates=0
TryNextAlternateOnFail=1
Based on our previous analysis we expect to see eax having the length of the device input “AAAAAAAABBBBBBBBCCCCCCCCDDDDDDDD”+1 = 33 (0x21) bytes:
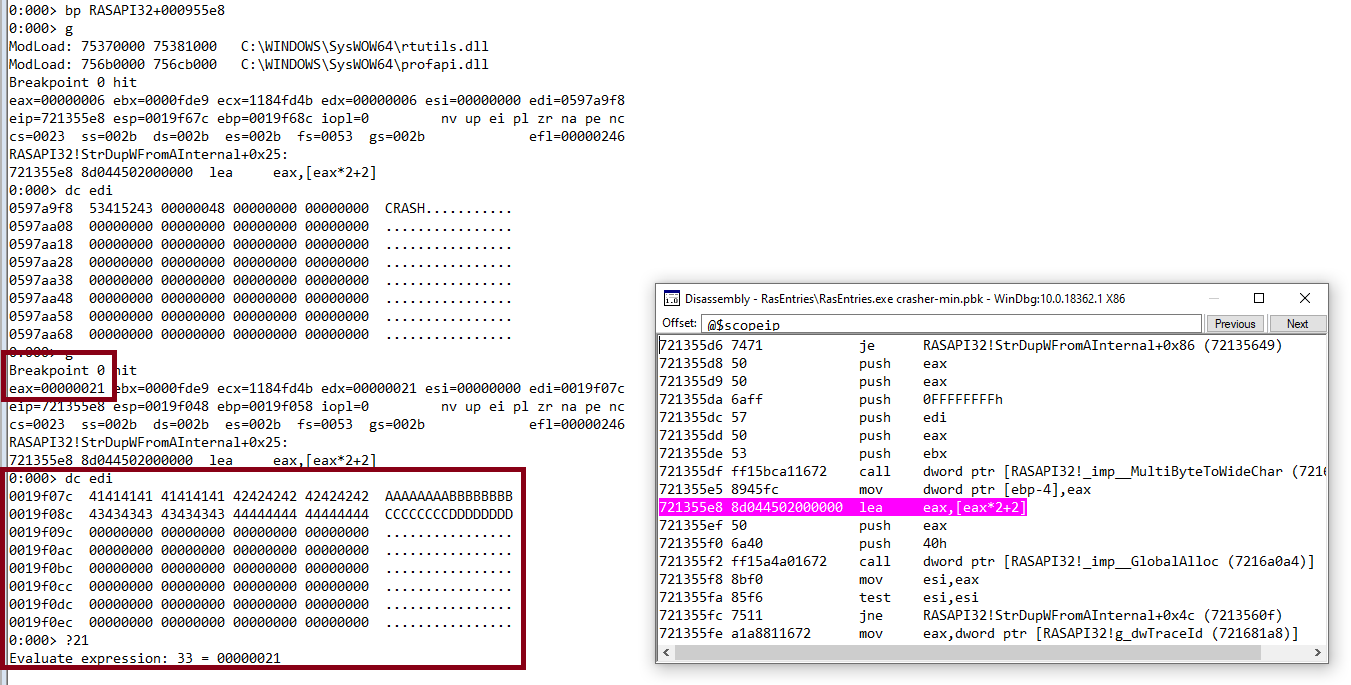
Fantastic, our assumption is correct! And what about the actual allocation?
eax=00000021 ebx=0000fde9 ecx=1184fd4b edx=00000021 esi=00000000 edi=0019f07c
eip=721355e8 esp=0019f048 ebp=0019f058 iopl=0         nv up ei pl zr na pe nc
cs=0023  ss=002b  ds=002b  es=002b  fs=0053  gs=002b             efl=00000246
RASAPI32!StrDupWFromAInternal+0x25:
721355e8 8d044502000000  lea     eax,[eax*2+2]
0:000> p
eax=00000044 ebx=0000fde9 ecx=1184fd4b edx=00000021 esi=00000000 edi=0019f07c
eip=721355ef esp=0019f048 ebp=0019f058 iopl=0         nv up ei pl zr na pe nc
cs=0023  ss=002b  ds=002b  es=002b  fs=0053  gs=002b             efl=00000246
As seen previously the final value would be eax*2+2 meaning: 0x44 bytes.
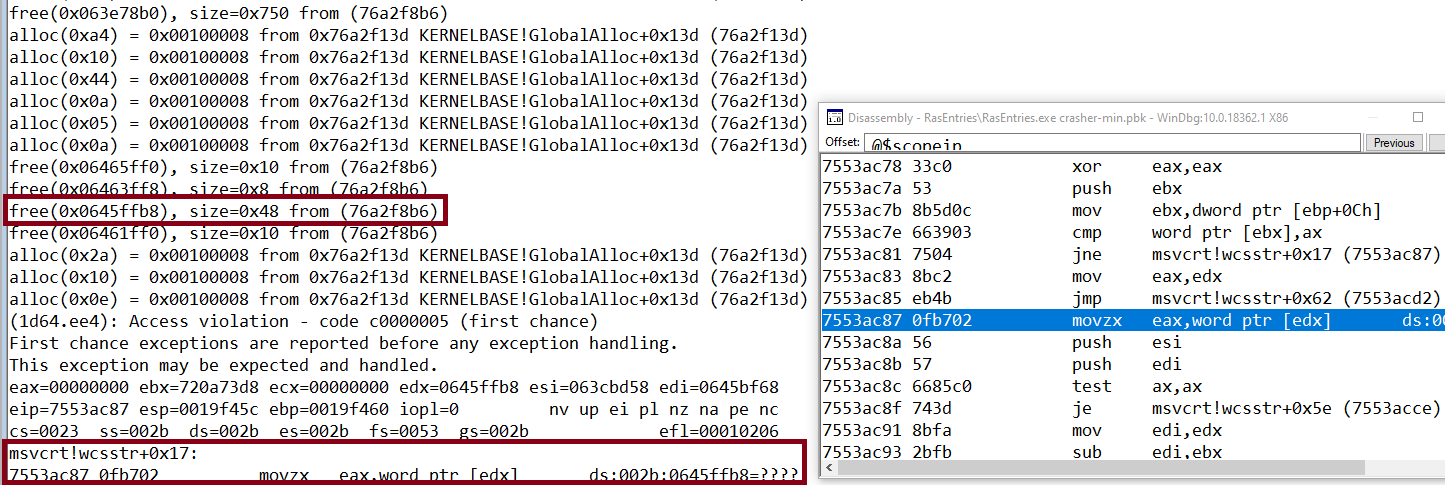
Notice above that after monitoring the allocs/frees, we can see that the memory allocator rounded the initial value to 0x48, then three more allocs are happening and then eventually the address is being reused.
Ultimately, we need to find out a way to somehow replace the freed object with something with same size.
Conclusion
Although we do have a usually exploitable primitive such as a use-after-free, unfortunately in reality the lack of a scripting environment makes it very difficult - feel free to prove me wrong! I don’t think there’s an easy method to manipulate the objects, nor mess with the allocators/deallocators. Nevertheless, perhaps someone with more skills is able to find a way to accomplish that.
I hope you enjoyed this article and learnt something - I certainly did!
Disclosure Timeline
| 27 April 2020 | Initial report to Microsoft. |
| 11 August 2020 | Microsoft issued CVE-2020-1530 for this vulnerability. |
| 11 August 2020 | Microsoft acknowledged this issue as Elevation of Privilege Vulnerability with a CVSS score of 7.8 |
| 11 August 2020 | Microsoft released a fix (Patch Tuesday). |
References
- RasEnumEntries Documentation: https://docs.microsoft.com/en-us/windows/win32/api/ras/nf-ras-rasenumentriesa
- Sample Phonebook File for a Demand-dial Connection documentation: https://docs.microsoft.com/en-us/openspecs/windows_protocols/ms-rrasm/65a59781-dfc5-4e9c-a422-3738d1fc3252
Grammar based fuzzing PDFs with Domato

2020-04-18 00:00:00 +0000
Introduction
Welcome back to another fuzzing blog post. This time let’s talk about grammar based fuzzing! I will be writing about how I tried to fuzz a few PDF software such as Foxit and Adobe.
In order to do that, I used the following tools:
-
domato, grab it from its repo while it’s fresh!
-
Debenu Quick PDF Library, for my campaign the current version as of writing this is 17.11 but YMMV, please note that you need to register in order to request a trial.
-
BugId to help us triage any crashes/save crashers.
-
Your favourite PDF parser/software!
So here’s the idea: We will be installing the Debenu Quick PDF library and taking advantage of its SDK and functions. Why grammar based on a massive complex format such as a PDF you say? Remember that the PDF file format includes text, images, multimedia, JavaScript and has very complex parsing code. As such, although a smart guided fuzzer such as Checkpoint’s research can be used, we can take advantage of this library which provides a ton of features from messing with HTML objects to adding images, fonts, or even adding custom javascript!
Grammar Based Fuzzing
From the wiki: A smart (model-based, grammar-based,or protocol-based fuzzer leverages the input model to generate a greater proportion of valid inputs. For instance, if the input can be modelled as an abstract syntax tree, then a smart mutation-based fuzzer would employ random transformations to move complete subtrees from one node to another. If the input can be modelled by a formal grammar, a smart generation-based fuzzer would instantiate the production rules to generate inputs that are valid with respect to the grammar. However, generally the input model must be explicitly provided, which is difficult to do when the model is proprietary, unknown, or very complex.
In short, grammar based is aware of input structure, and instead of dumb fuzzing where we simply mutate bytes without having any knowledge of the target/file/network protocol specification we do have knowledge of the structure (such as the API presented here) and we will be generating test cases based on that specification.
There are many tutorials out there, but I recommend having a look at domato’s page, where you can fully understand how it works. As mentioned earlier, we will be creating a grammar so the function
int DPLDrawHTMLText(int InstanceID, double Left, double Top, double Width, wchar_t * HTMLText)
can be called with bogus; yet valid input such as the following:
DrawHTMLText(1,2,1,"AAAAAAAAAAAAAAAAAAAAAAAAAAAAAAAAAAA");
DrawHTMLText(0.285839975231,4.0,10000000.0,"AAAAAAAAAAAAAAAAAAAAAAAAAAAAAAAAAAA");
DrawHTMLText(5.0,4294967295.0,2147483647.0,"AAAAAAAAAAAAAAAAAAAAAAAAAAAAAAAAAAA");
DrawHTMLText(65.862385207,9.2399248386,8.01963632388,"AAAAAAAAAAAAAAAAAAAAAAAAAAAAAAAAAAA");
Getting started with Debenu Quick PDF Library
Once you obtain your trial and install it, you need to register the ActiveX DLL.
This can be done by either running %systemroot%\System32\regsvr32.exe targeting the 64-bit version of the DLL
(DebenuPDFLibrary64AX1711.dll) or %systemroot%\SysWoW64\regsvr32.exe to register the 32-bit version (DebenuPDFLibraryAX1711.dll)
While you are there make sure to note down the TRIAL_LICENSE_KEY.TXT as you’ll need it later for generating the files.
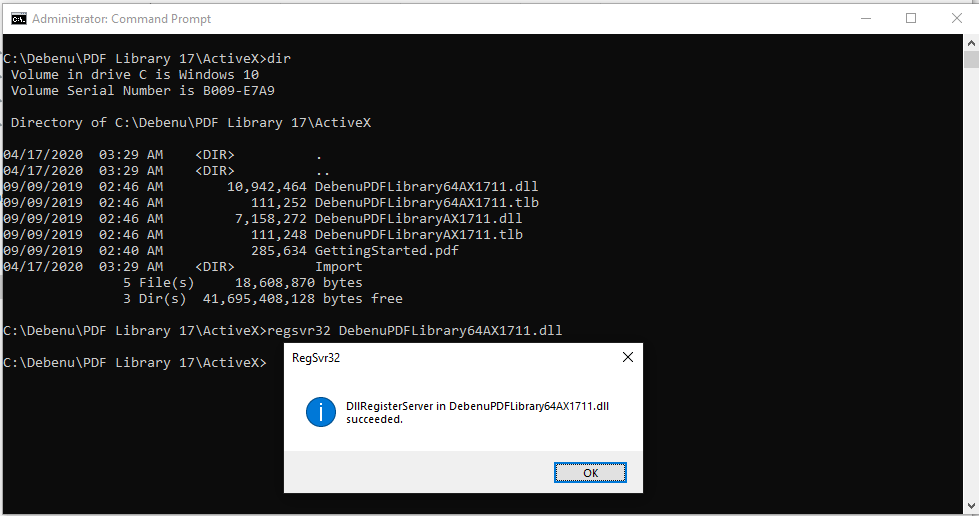
Exploring the library and reading the documenation we can see that the library offers a variety of bindings: From C#, C++, Delphi, Objective-C to Perl, PHP, VB6, VBScript and Visual Basic (.NET). If you want to experiment, go ahead and check this page! The library moreover, provides many function groups that can be targeted:
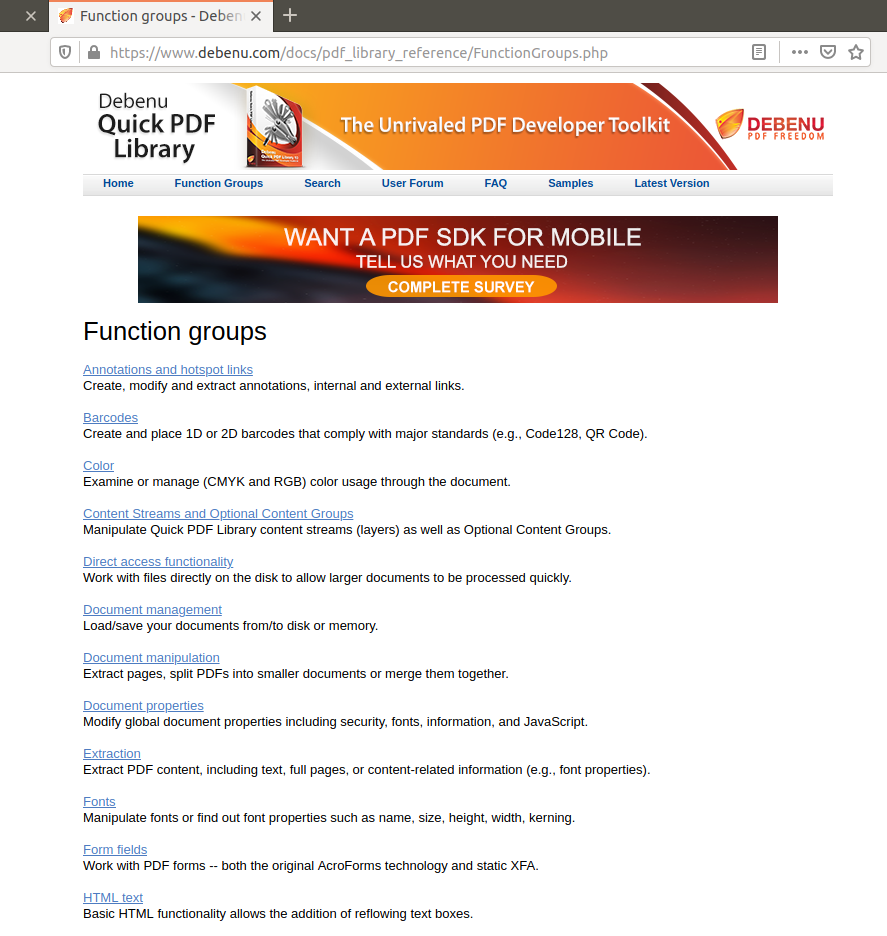
For my case, I ended up using the Visual Basic and Perl bindings. Once you create a grammar it’s very easy to modify the template and use another language, and that’s they beauty of grammar based fuzzing!
Let’s use this following Visual Basic example:
' Debenu Quick PDF Library Sample

' * Remember to set your license key below
' * This sample shows how to unlock the library, draw some
'   simple text onto the page and save the PDF
' * A file called hello-world.pdf is written to disk

WScript.Echo("Hello World - Debenu Quick PDF Library Sample")

Dim ClassName
Dim LicenseKey
Dim FileName

ClassName = "DebenuPDFLibraryAX1711.PDFLibrary"
LicenseKey = "" ' INSERT LICENSE KEY HERE
FileName = "hello-world.pdf"

Dim DPL
Dim Result

Set DPL = CreateObject(ClassName)
WScript.Echo("Library version: " + DPL.LibraryVersion)
Result = DPL.UnlockKey(LicenseKey)
If Result = 1 Then
  WScript.Echo("Valid license key: " + DPL.LicenseInfo)
  Call DPL.DrawText(100, 500, "Hello world from VBScript")
  If DPL.SaveToFile(FileName) = 1 Then
    WScript.Echo("File " + FileName + " written successfully")
  Else
    WScript.Echo("Error, file could not be written")
  End If
Else
  WScript.Echo("- Invalid license key -")
  WScript.Echo("Please set your license key by editing this file")
End If

Set DPL = Nothing
Executing it with the 32-bit version of the DLL yields the following output:
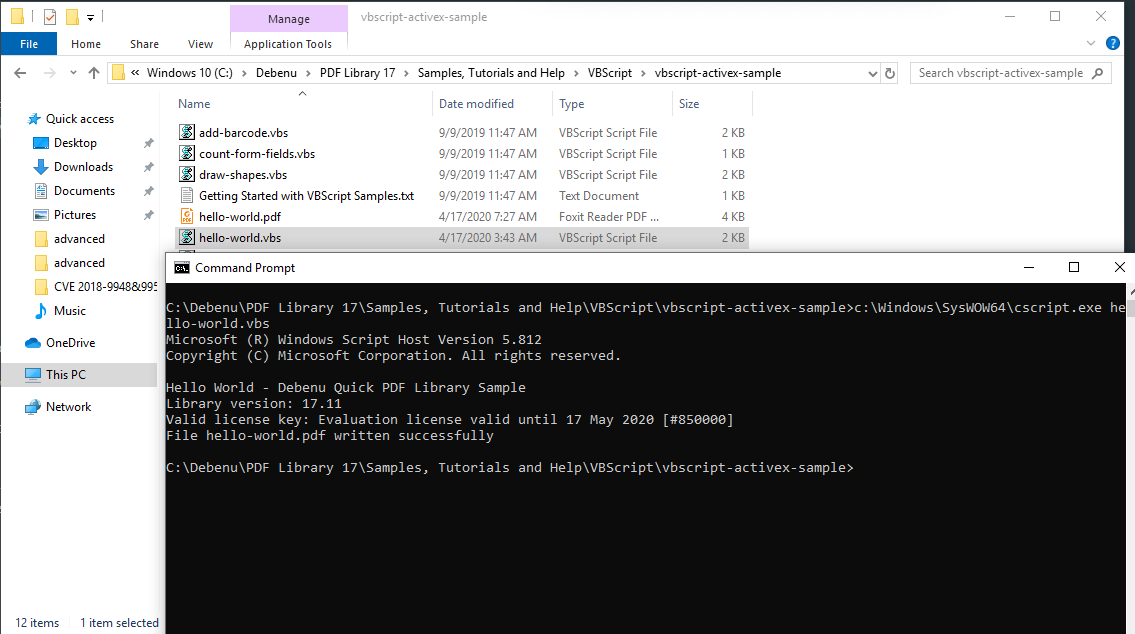
Opening it with Foxit we can confirm that our file has been generated!

Success! Within few minutes, we managed to set up the library, get some sample code and generate a valid PDF. Let’s move on!
Creating the grammar
To demonstrate domato’s capabilities, let’s target the following sample function:
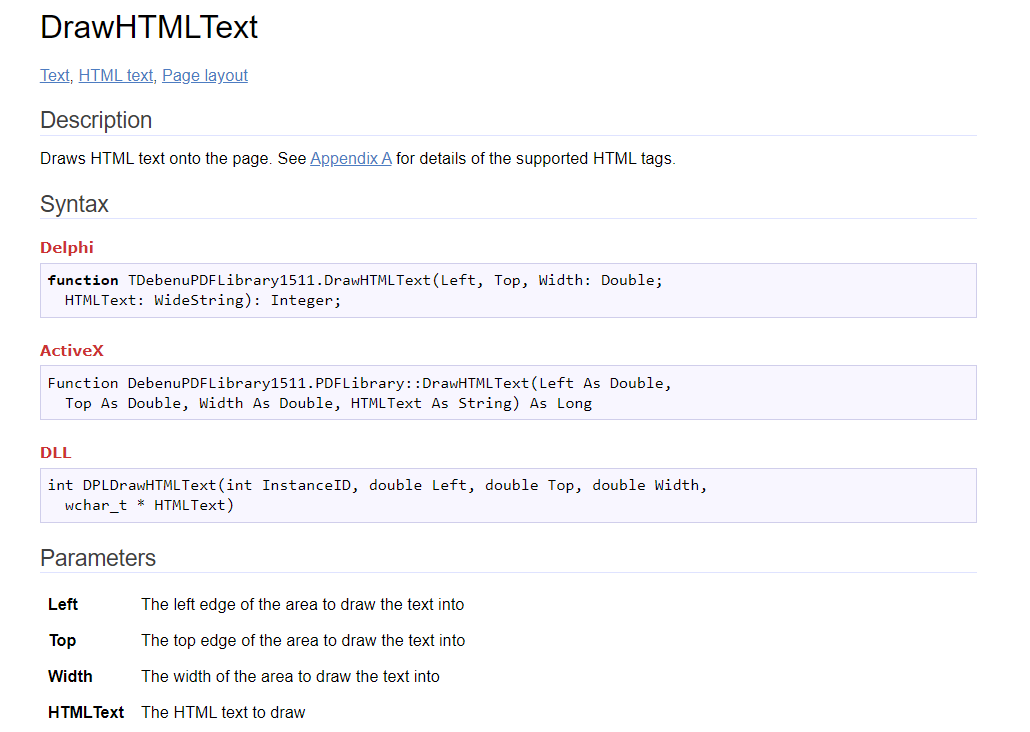
As you can see, this function expects four parameters: double Left, double Top, double Width,
wchar_t * HTMLText)
As such, the SDK expects the following call:
DrawHTML(200.0, 400.0, 800.0,"my text")
Forming the above function call with domato and creating a grammar is straightforward, we simply need to define a symbol and assign its corresponding value.
The value can be something like MAX_INT or MIN_INT interesting values, common values that they may lead to common signed/unsigned integer overflows/underflows or undefined behaviour.
<fuzzstring> = "AAAAAAAAAAAAAAAAAAAAAAAAAAAAAAAAAAA"

<interestingint> = 32768
<interestingint> = 65535
<interestingint> = 65536
<interestingint> = 1073741824
<interestingint> = 536870912
<interestingint> = 268435456
<interestingint> = 4294967295
<interestingint> = 2147483648
<interestingint> = 2147483647
<interestingint> = -2147483648
<interestingint> = -1073741824
<interestingint> = -32769

<fuzzdouble> = -1.0
<fuzzdouble> = 0.0
<fuzzdouble> = 1.0
<fuzzdouble> = 2.0
<fuzzdouble> = 3.0
<fuzzdouble> = 4.0
<fuzzdouble> = 5.0
<fuzzdouble> = 10.0
<fuzzdouble> = 1000.0
<fuzzdouble> = 10000.0
<fuzzdouble> = 10000000.0
<fuzzdouble> = <double min=0 max=10>
<fuzzdouble> = <double min=0 max=100>
<fuzzdouble> = <largedouble>
<fuzzdouble> = <interestingint>

<LeftTopWidth> = <fuzzdouble>,<fuzzdouble>,<fuzzdouble>


<HTMLText> = DrawHTMLText(<LeftTopWidth>,<fuzzstring>)
Continuing, since we will be generating programming language code we have to include the !begin lines and !end lines keywords:
!begin lines

$QP-><HTMLText>;

!end lines
Following the API specification and creating the HTMLText method can be formed within literally a few lines:
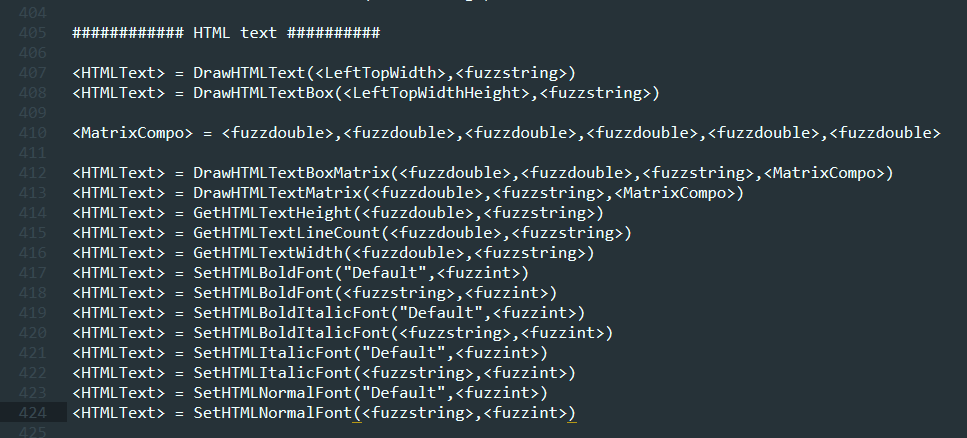
Creating the template.pl
Once you have the basic grammar, how are we going to call these functions within our binding? In fact, looking at previous github code, we simply need to provide the sample code we were given with slightly modifications as seen below:

From the screenshot above, you can see that the code within the <DPLFuzz> will get substituted with the
$QP-><HTMLText> generated cases! Here’s a sample of how it looks like once domato has done its magic:
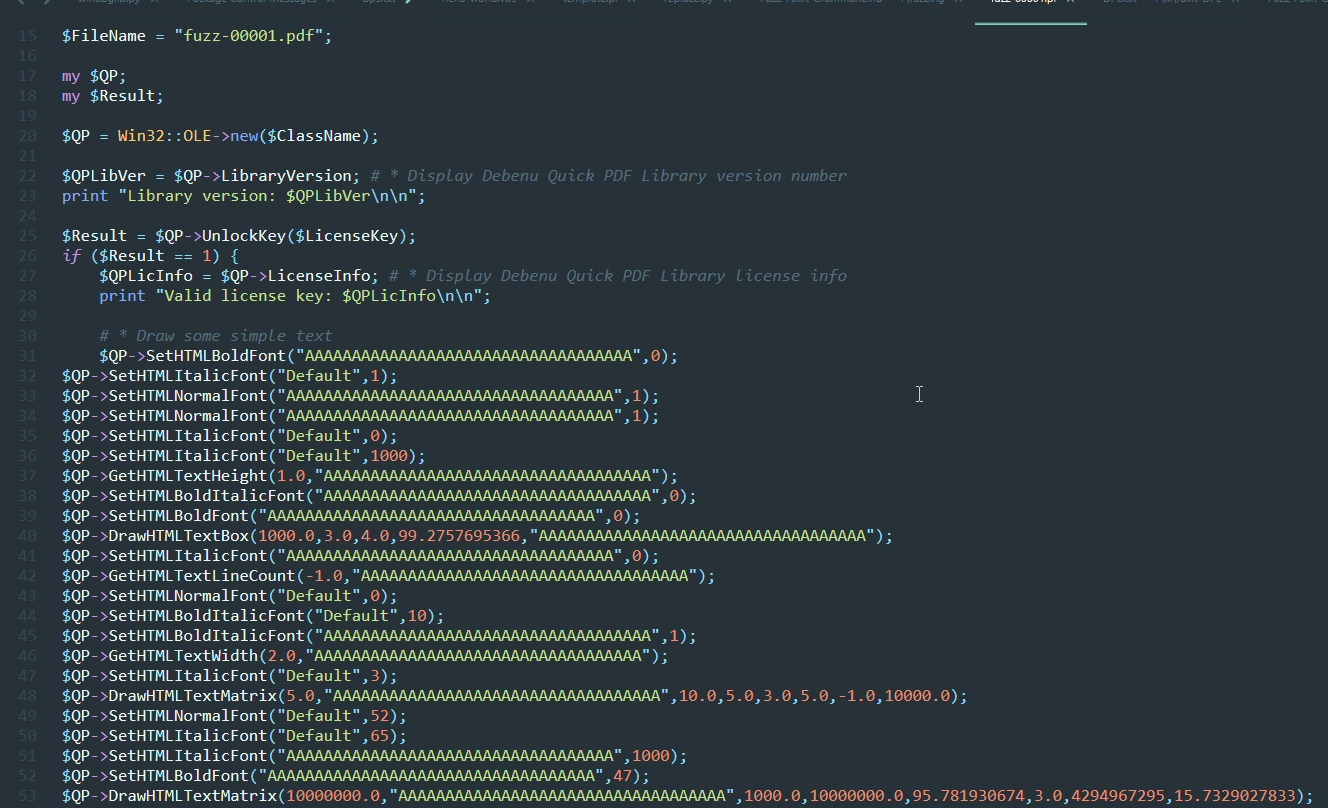
Now our next step is to create a file where it actually generates this grammar (called a generator). This can be achieved by using the already existing ones, such as Ivan’s generator.py, with a few modifications:
#   Domato - main generator script
#   -------------------------------
#
#   Written and maintained by Ivan Fratric <ifratric@google.com>
#
#   Copyright 2017 Google Inc. All Rights Reserved.
#   Licensed under the Apache License, Version 2.0 (the "License");
#   you may not use this file except in compliance with the License.
#   You may obtain a copy of the License at
#
#       http://www.apache.org/licenses/LICENSE-2.0
#
#   Unless required by applicable law or agreed to in writing, software
#   distributed under the License is distributed on an "AS IS" BASIS,
#   WITHOUT WARRANTIES OR CONDITIONS OF ANY KIND, either express or implied.
#   See the License for the specific language governing permissions and
#   limitations under the License.


from __future__ import print_function
import os
import re
import random
import sys

parent_dir = os.path.abspath(os.path.join(os.path.dirname(__file__), os.pardir))
sys.path.append(parent_dir)
from grammar import Grammar

_N_MAIN_LINES = 50
_N_EVENTHANDLER_LINES = 25

def generate_function_body(jsgrammar, num_lines):
    js = jsgrammar._generate_code(num_lines)
    return js

def GenerateNewSample(template, jsgrammar):
    """Parses grammar rules from string.
    Args:
      template: A template string.
      htmlgrammar: Grammar for generating HTML code.
      cssgrammar: Grammar for generating CSS code.
      jsgrammar: Grammar for generating JS code.
    Returns:
      A string containing sample data.
    """

    result = template

    handlers = False
    while '<DPLFuzz>' in result:
        numlines = _N_MAIN_LINES
        if handlers:
            numlines = _N_EVENTHANDLER_LINES
        else:
            handlers = True
        result = result.replace(
            '<DPLFuzz>',
            generate_function_body(jsgrammar, numlines),
            1
        )

    return result


def generate_samples(grammar_dir, outfiles):
    """Generates a set of samples and writes them to the output files.
    Args:
      grammar_dir: directory to load grammar files from.
      outfiles: A list of output filenames.
    """

    f = open(os.path.join(grammar_dir, 'template.pl'))
    template = f.read()
    f.close()

    jsgrammar = Grammar()
    err = jsgrammar.parse_from_file(os.path.join(grammar_dir, 'DPL.txt'))
    if err > 0:
        print('There were errors parsing grammar')
        return

    for outfile in outfiles:
        result = GenerateNewSample(template, jsgrammar)

        if result is not None:
            print('Writing a sample to ' + outfile)
            try:
                f = open(outfile, 'w')
                f.write(result)
                f.close()
            except IOError:
                print('Error writing to output')


def get_option(option_name):
    for i in range(len(sys.argv)):
        if (sys.argv[i] == option_name) and ((i + 1) < len(sys.argv)):
            return sys.argv[i + 1]
        elif sys.argv[i].startswith(option_name + '='):
            return sys.argv[i][len(option_name) + 1:]
    return None


def main():
    fuzzer_dir = os.path.dirname(__file__)

    multiple_samples = False

    for a in sys.argv:
        if a.startswith('--output_dir='):
            multiple_samples = True
    if '--output_dir' in sys.argv:
        multiple_samples = True

    if multiple_samples:
        print('Running on ClusterFuzz')
        out_dir = get_option('--output_dir')
        nsamples = int(get_option('--no_of_files'))
        print('Output directory: ' + out_dir)
        print('Number of samples: ' + str(nsamples))

        if not os.path.exists(out_dir):
            os.mkdir(out_dir)

        outfiles = []
        for i in range(nsamples):
            outfiles.append(os.path.join(out_dir, 'fuzz-' + str(i).zfill(5) + '.pl'))

        generate_samples(fuzzer_dir, outfiles)

    elif len(sys.argv) > 1:
        outfile = sys.argv[1]
        generate_samples(fuzzer_dir, [outfile])

    else:
        print('Arguments missing')
        print("Usage:")
        print("\tpython generator.py <output file>")
        print("\tpython generator.py --output_dir <output directory> --no_of_files <number of output files>")

if __name__ == '__main__':
    main()
Saving the actual test cases
Before we continue, notice how on the provided sample code (hello-world.vbs) this line was responsible for saving the file name:
FileName = "hello-world.pdf". This one is hardcoded and certainly does not suit us.
In order to solve this issue, I’ve coded something very simple, a python script which finds the “placeholder” which
is the hardcoded value XXX, and replaces it with fuzz-<num>.pdf:

BugId and you!
If you haven’t read already the Fuzz in sixty seconds article blog, please spend some time and see how BugId can be integrated into your fuzzing workflow. The idea is very similar, but instead of fuzzing browsers, we are looping through the generated cases one by one; I have modified some parts to reflect those changes as seen below:
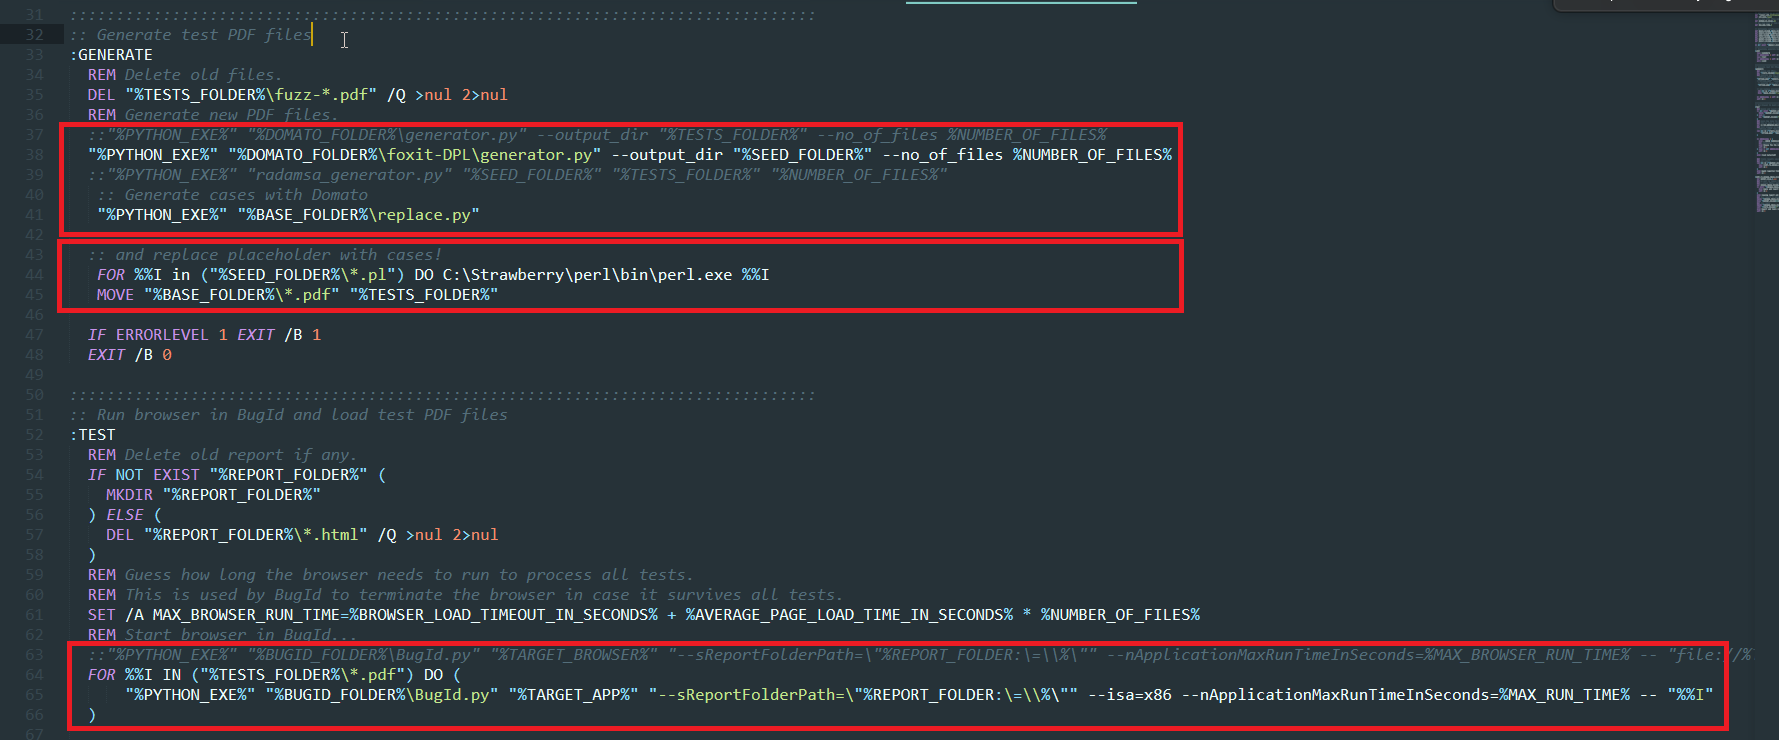
Essentially, here we are executing Domato’s generator, replacing the XXX marker with the actual filename, executing the perl generated cases from domato, and finally saving the generated PDFs to our test folder.
With the above modifications, once the BAT file is executed, it gives us the following screenshot:
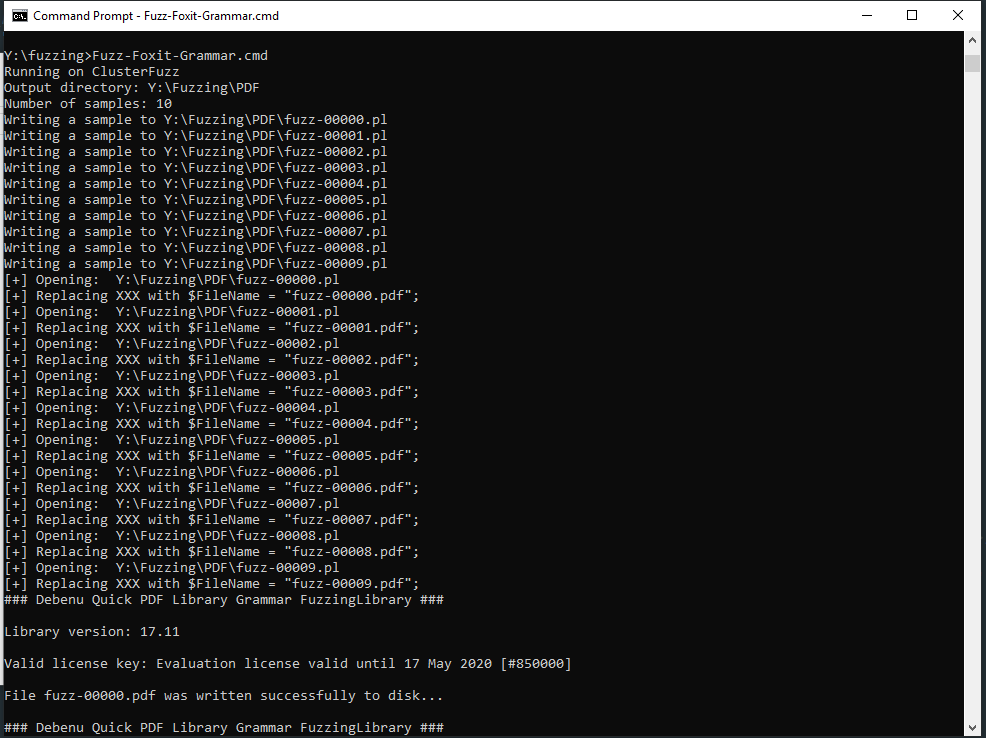
Putting it all together
With all these steps combined, let’s run the cmd file, and see how this goes:
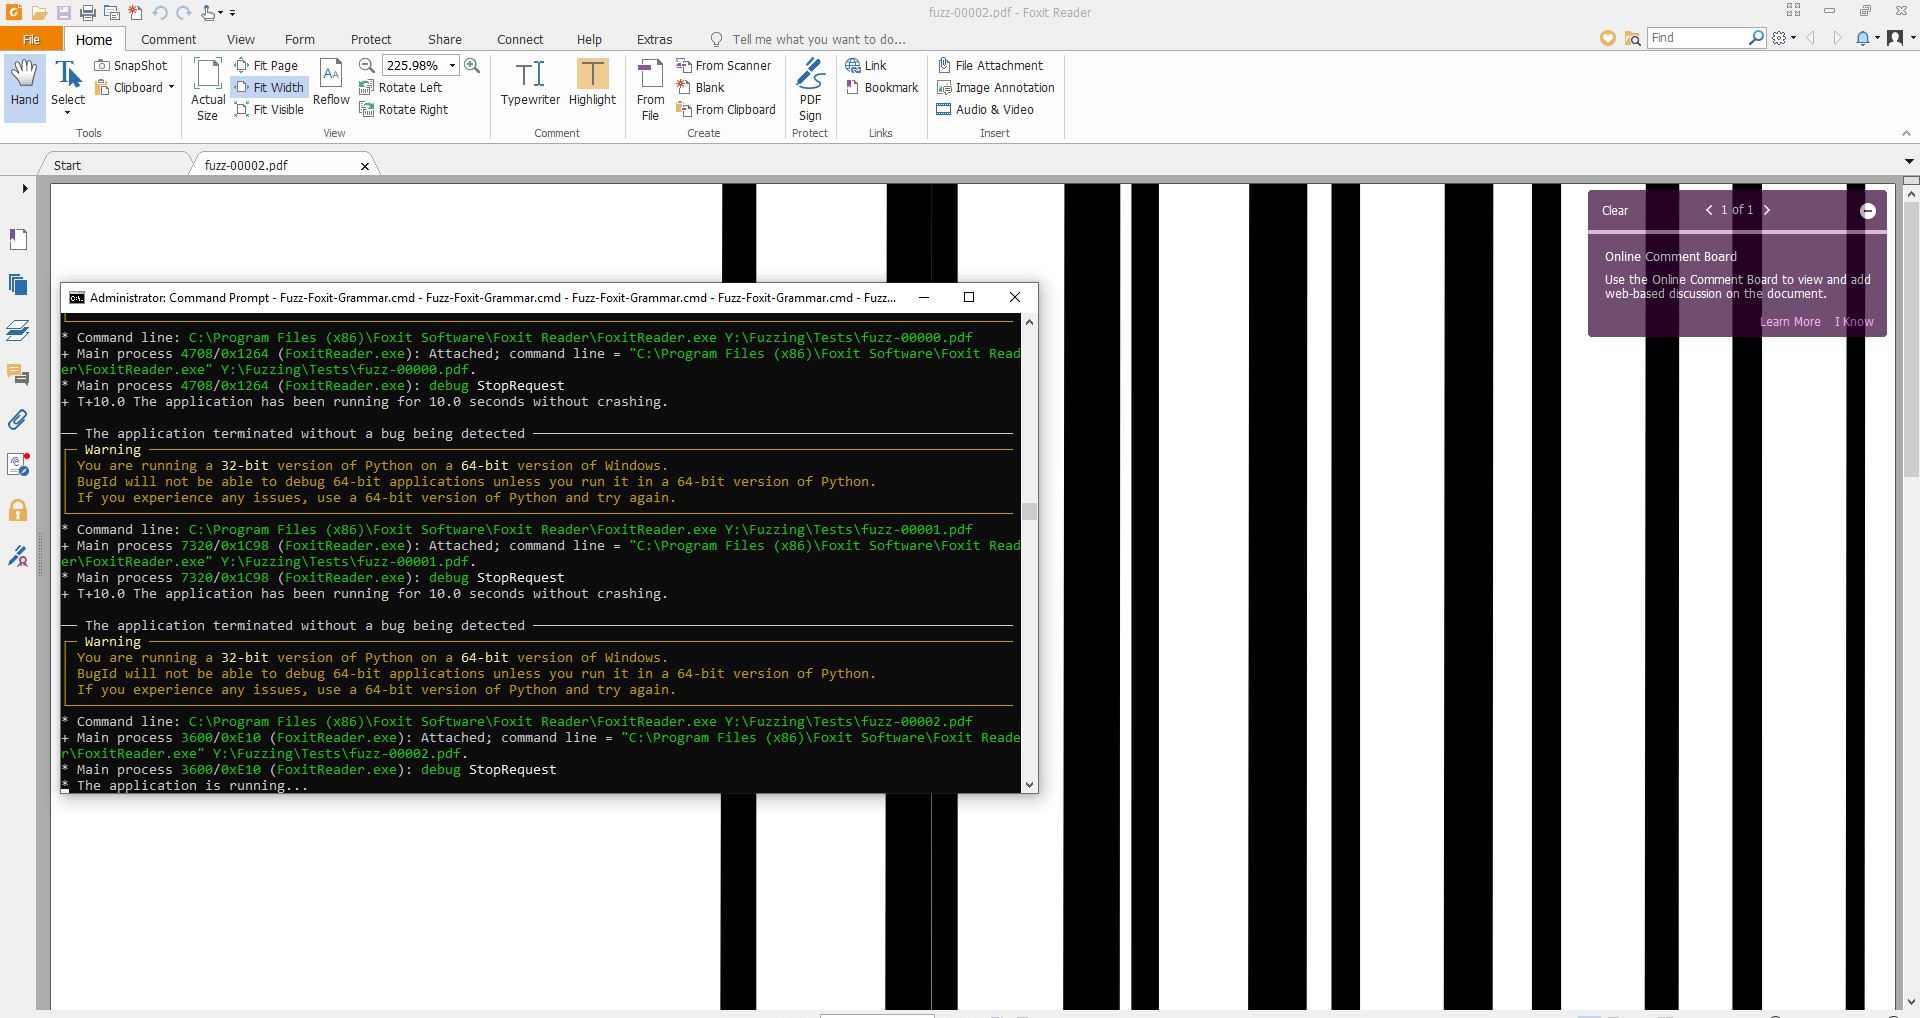
Et voila! By using open source tools, and with some effort we are now able to fuzz not only Foxit software, but pretty much any PDF parser out there!
The results
Surprisingly, although I put in a lot of effort from creating the grammar to modifying BugId, unfortunately the only crashes I managed to get were some meaningless NULL pointer dereferences. You’d expect that such software has been fuzzed to death, however as j00ru once said according to the bug hunter’s law… there is always one more bug :)
Caveats
Interestingly, I initially used the Visual Basic bindings, however once a very large integer was passed to these methods, Visual Basic would complain and fail to generate the case as seen below:
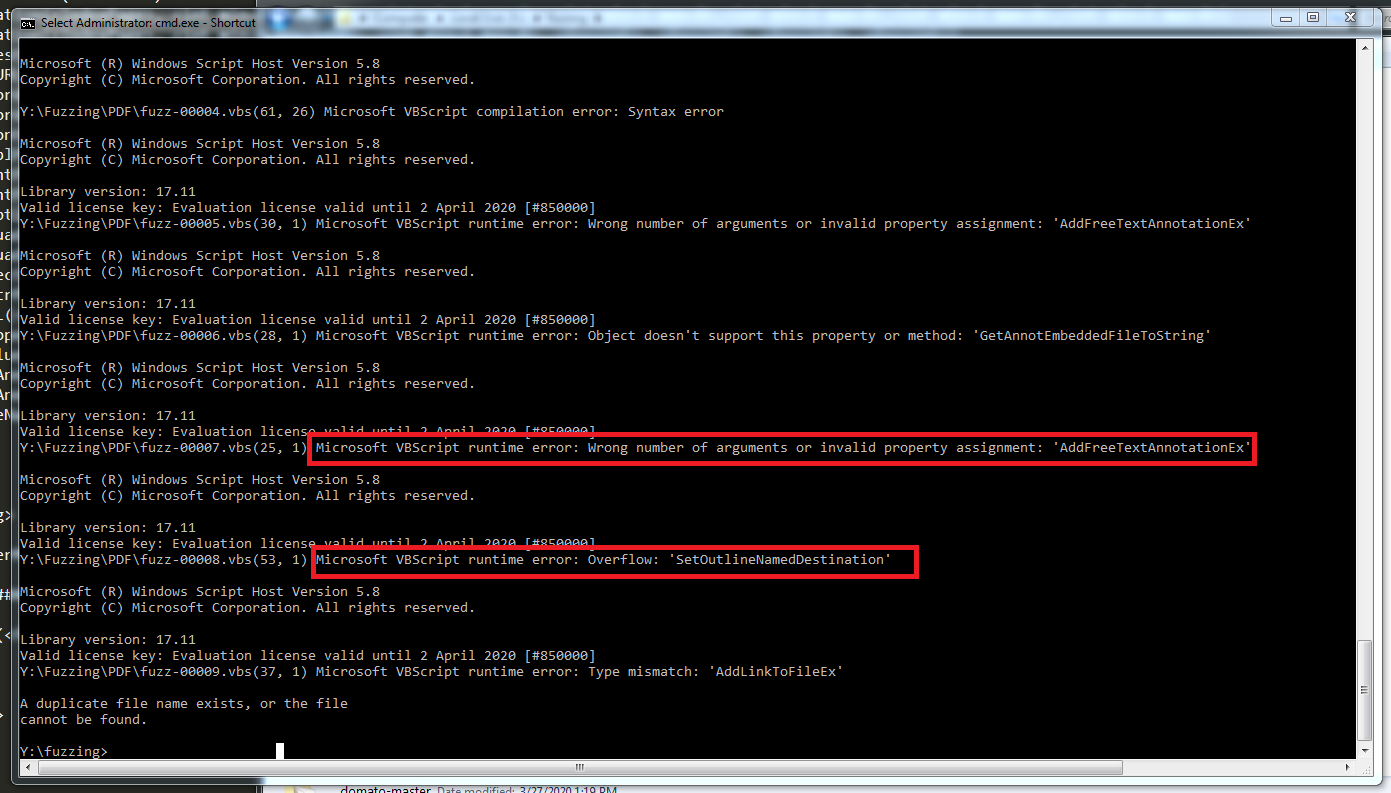
Please note how it also informs the user in case the parameters or the assignments are wrong. That’s very handy and can be used to your advantage!
Conclusion
In this blog post we’ve covered a very brief introduction to grammar based fuzzing. We have used the Quick PDF library where we could apply this knowledge and have demonstrated how we can create a grammar from scratch. We have also fuzzed a sample function within the API generating structure aware test cases. Finally, we’ve used BugId to iterate over our cases in case any crashes were found. The sky is the limit, this type of fuzzing can be used not only for this specific library, but for every file format which is text based or even programming languages!
I hope you enjoyed as much as I did! As always, any ideas, comments, feedback is welcome!
Fuzzing the MSXML6 library with WinAFL

2017-09-17 00:00:00 +0000
Introduction
In this blog post, I’ll write about how I tried to fuzz the MSXML library using the WinAFL fuzzer.
If you haven’t played around with WinAFL, it’s a massive fuzzer created by Ivan Fratric based on the lcumtuf’s AFL which uses DynamoRIO to measure code coverage and the Windows API for memory and process creation. Axel Souchet has been actively contributing features such as corpus minimization, latest afl stable builds, persistent execution mode which will cover on the next blog post and the finally the afl-tmin tool.
We will start by creating a test harness which will allow us to fuzz some parsing functionality within the library, calculate the coverage, minimise the test cases and finish by kicking off the fuzzer and triage the findings. Lastly, thanks to Mitja Kolsek from 0patch for providing the patch which will see how one can use the 0patch to patch this issue!
Using the above steps, I’ve managed to find a NULL pointer dereference on the msxml6!DTD::findEntityGeneral function,
which I reported to Microsoft but got rejected as this is not a security issue. Fair enough, indeed the crash is crap, yet
hopefully somebody might find interesting the techniques I followed!
The Harness
While doing some research I ended up on this page which Microsoft has kindly provided a sample C++ code which allows us to feed some XML files and validate its structure. I am going to use Visual Studio 2015 to build the following program but before I do that, I am slightly going to modify it and use Ivan’s charToWChar method so as to accept an argument as a file:
// xmlvalidate_fuzz.cpp : Defines the entry point for the console application.
//

#include "stdafx.h"
#include <stdio.h>
#include <tchar.h>
#include <windows.h>
#import <msxml6.dll>
extern "C" __declspec(dllexport)  int main(int argc, char** argv);

// Macro that calls a COM method returning HRESULT value.
#define CHK_HR(stmt)        do { hr=(stmt); if (FAILED(hr)) goto CleanUp; } while(0)

void dump_com_error(_com_error &e)
{
    _bstr_t bstrSource(e.Source());
    _bstr_t bstrDescription(e.Description());

    printf("Error\n");
    printf("\a\tCode = %08lx\n", e.Error());
    printf("\a\tCode meaning = %s", e.ErrorMessage());
    printf("\a\tSource = %s\n", (LPCSTR)bstrSource);
    printf("\a\tDescription = %s\n", (LPCSTR)bstrDescription);
}

_bstr_t validateFile(_bstr_t bstrFile)
{
    // Initialize objects and variables.
    MSXML2::IXMLDOMDocument2Ptr pXMLDoc;
    MSXML2::IXMLDOMParseErrorPtr pError;
    _bstr_t bstrResult = L"";
    HRESULT hr = S_OK;

    // Create a DOMDocument and set its properties.
    CHK_HR(pXMLDoc.CreateInstance(__uuidof(MSXML2::DOMDocument60), NULL, CLSCTX_INPROC_SERVER));

    pXMLDoc->async = VARIANT_FALSE;
    pXMLDoc->validateOnParse = VARIANT_TRUE;
    pXMLDoc->resolveExternals = VARIANT_TRUE;

    // Load and validate the specified file into the DOM.
    // And return validation results in message to the user.
    if (pXMLDoc->load(bstrFile) != VARIANT_TRUE)
    {
        pError = pXMLDoc->parseError;

        bstrResult = _bstr_t(L"Validation failed on ") + bstrFile +
            _bstr_t(L"\n=====================") +
            _bstr_t(L"\nReason: ") + _bstr_t(pError->Getreason()) +
            _bstr_t(L"\nSource: ") + _bstr_t(pError->GetsrcText()) +
            _bstr_t(L"\nLine: ") + _bstr_t(pError->Getline()) +
            _bstr_t(L"\n");
    }
    else
    {
        bstrResult = _bstr_t(L"Validation succeeded for ") + bstrFile +
            _bstr_t(L"\n======================\n") +
            _bstr_t(pXMLDoc->xml) + _bstr_t(L"\n");
    }

CleanUp:
    return bstrResult;
}

wchar_t* charToWChar(const char* text)
{
    size_t size = strlen(text) + 1;
    wchar_t* wa = new wchar_t[size];
    mbstowcs(wa, text, size);
    return wa;
}

int main(int argc, char** argv)
{
    if (argc < 2) {
        printf("Usage: %s <xml file>\n", argv[0]);
        return 0;
    }

    HRESULT hr = CoInitialize(NULL);
    if (SUCCEEDED(hr))
    {
        try
        {
            _bstr_t bstrOutput = validateFile(charToWChar(argv[1]));
            MessageBoxW(NULL, bstrOutput, L"noNamespace", MB_OK);
        }
        catch (_com_error &e)
        {
            dump_com_error(e);
        }
        CoUninitialize();
    }

    return 0;

}
Notice also the following snippet:
extern "C" __declspec(dllexport) int main(int argc, char** argv);
Essentially, this allows us to use target_method argument which DynamoRIO will try to retrieve the address for a given symbol name as seen here.
I could use the offsets method as per README, but due to ASLR and all that stuff, we want to scale a bit the fuzzing and spread the binary to many
Virtual Machines and use the same commands to fuzz it. The extern "C" directive will unmangle the function name and will make it look prettier.
To confirm that indeed DynamoRIO can use this method the following command can be used:
dumpbin /EXPORTS xmlvalidate_fuzz.exe
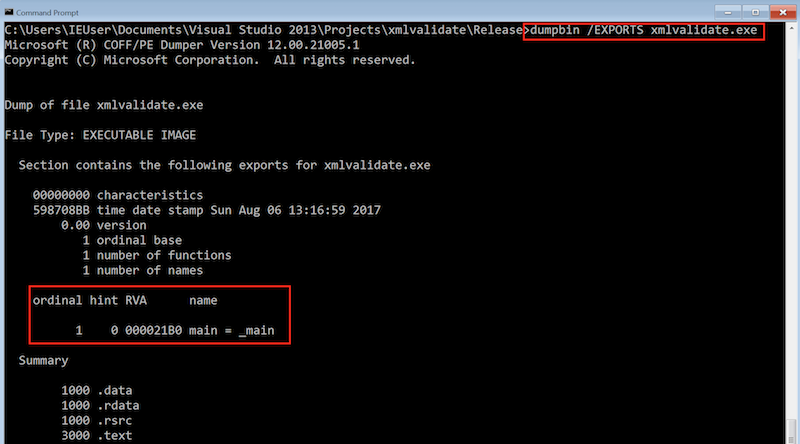
Now let’s quickly run the binary and observe the output. You should get the following output:
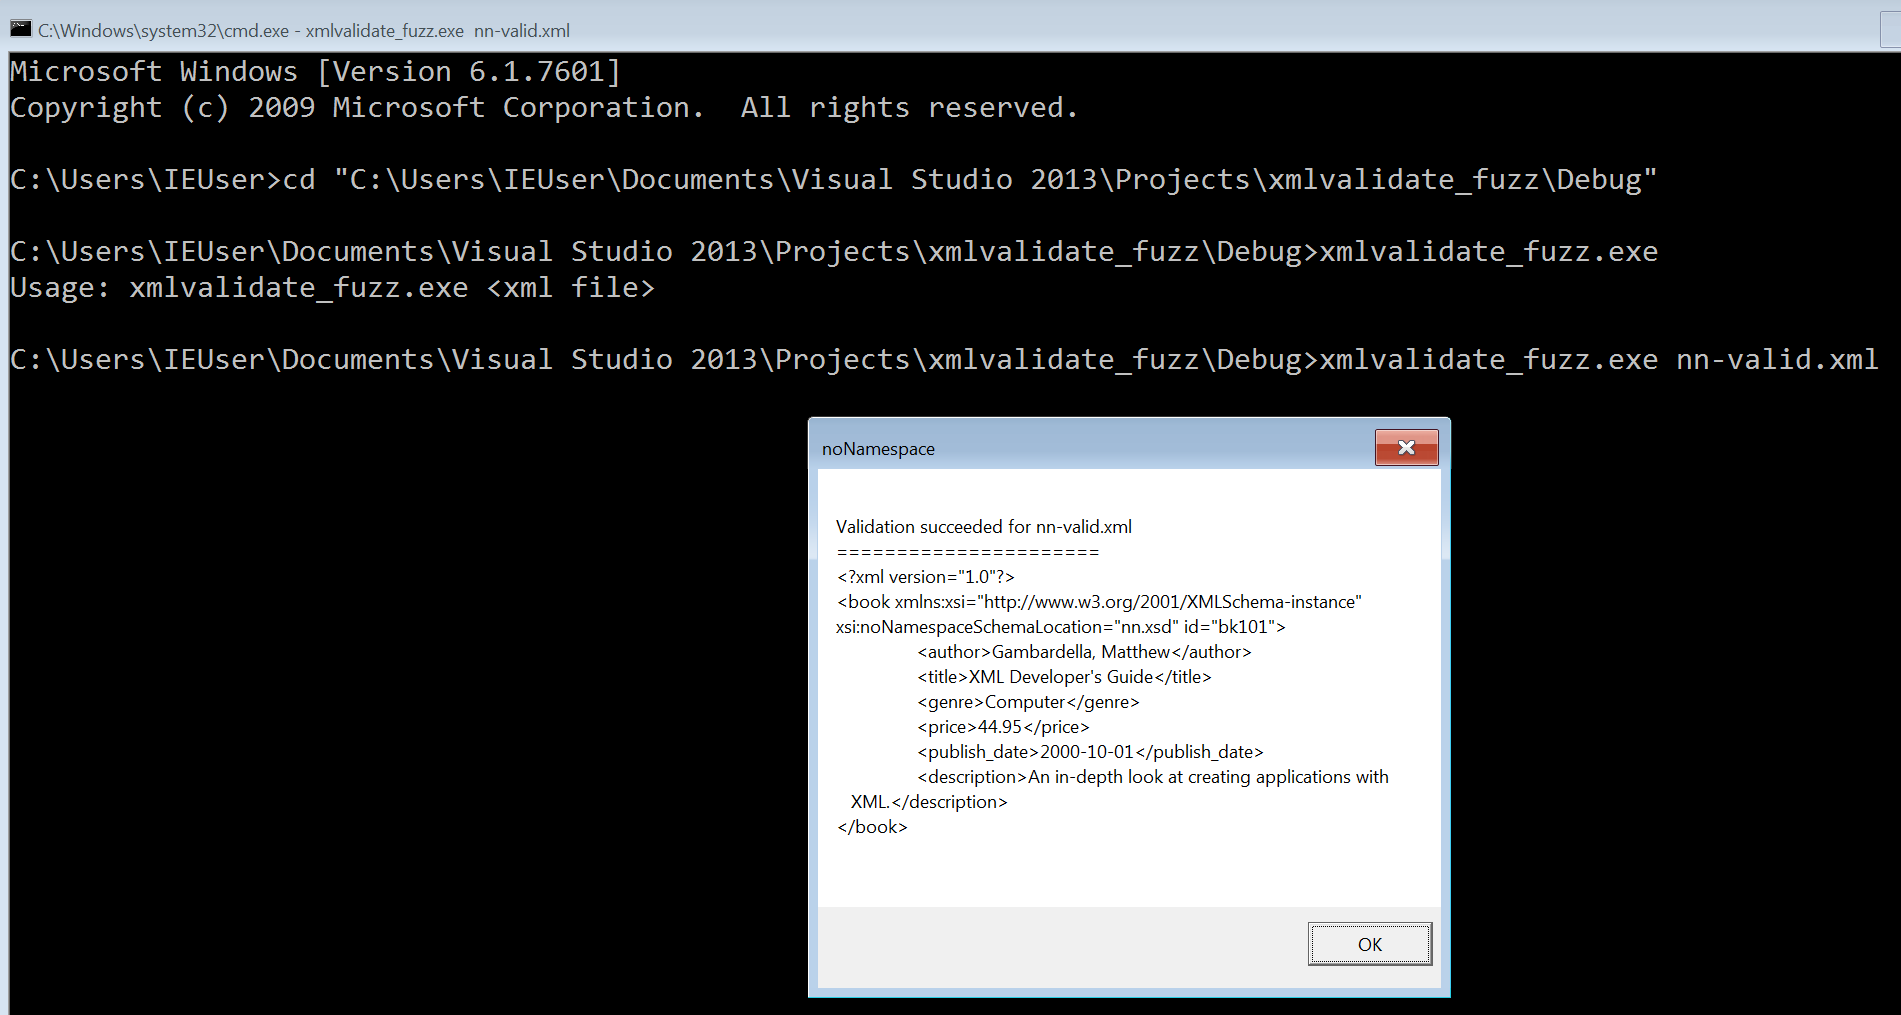
Code Coverage
WinAFL
Since the library is closed source, we will be using DynamoRIO’s code coverage library feature via the WinAFL:
C:\DRIO\bin32\drrun.exe -c winafl.dll -debug -coverage_module msxml6.dll -target_module xmlvalidate.exe -target_method main -fuzz_iterations 10 -nargs 2 -- C:\xml_fuzz_initial\xmlvalidate.exe C:\xml_fuzz_initial\nn-valid.xml
WinAFL will start executing the binary ten times. Once this is done, navigate back to the winafl folder and check the log file:
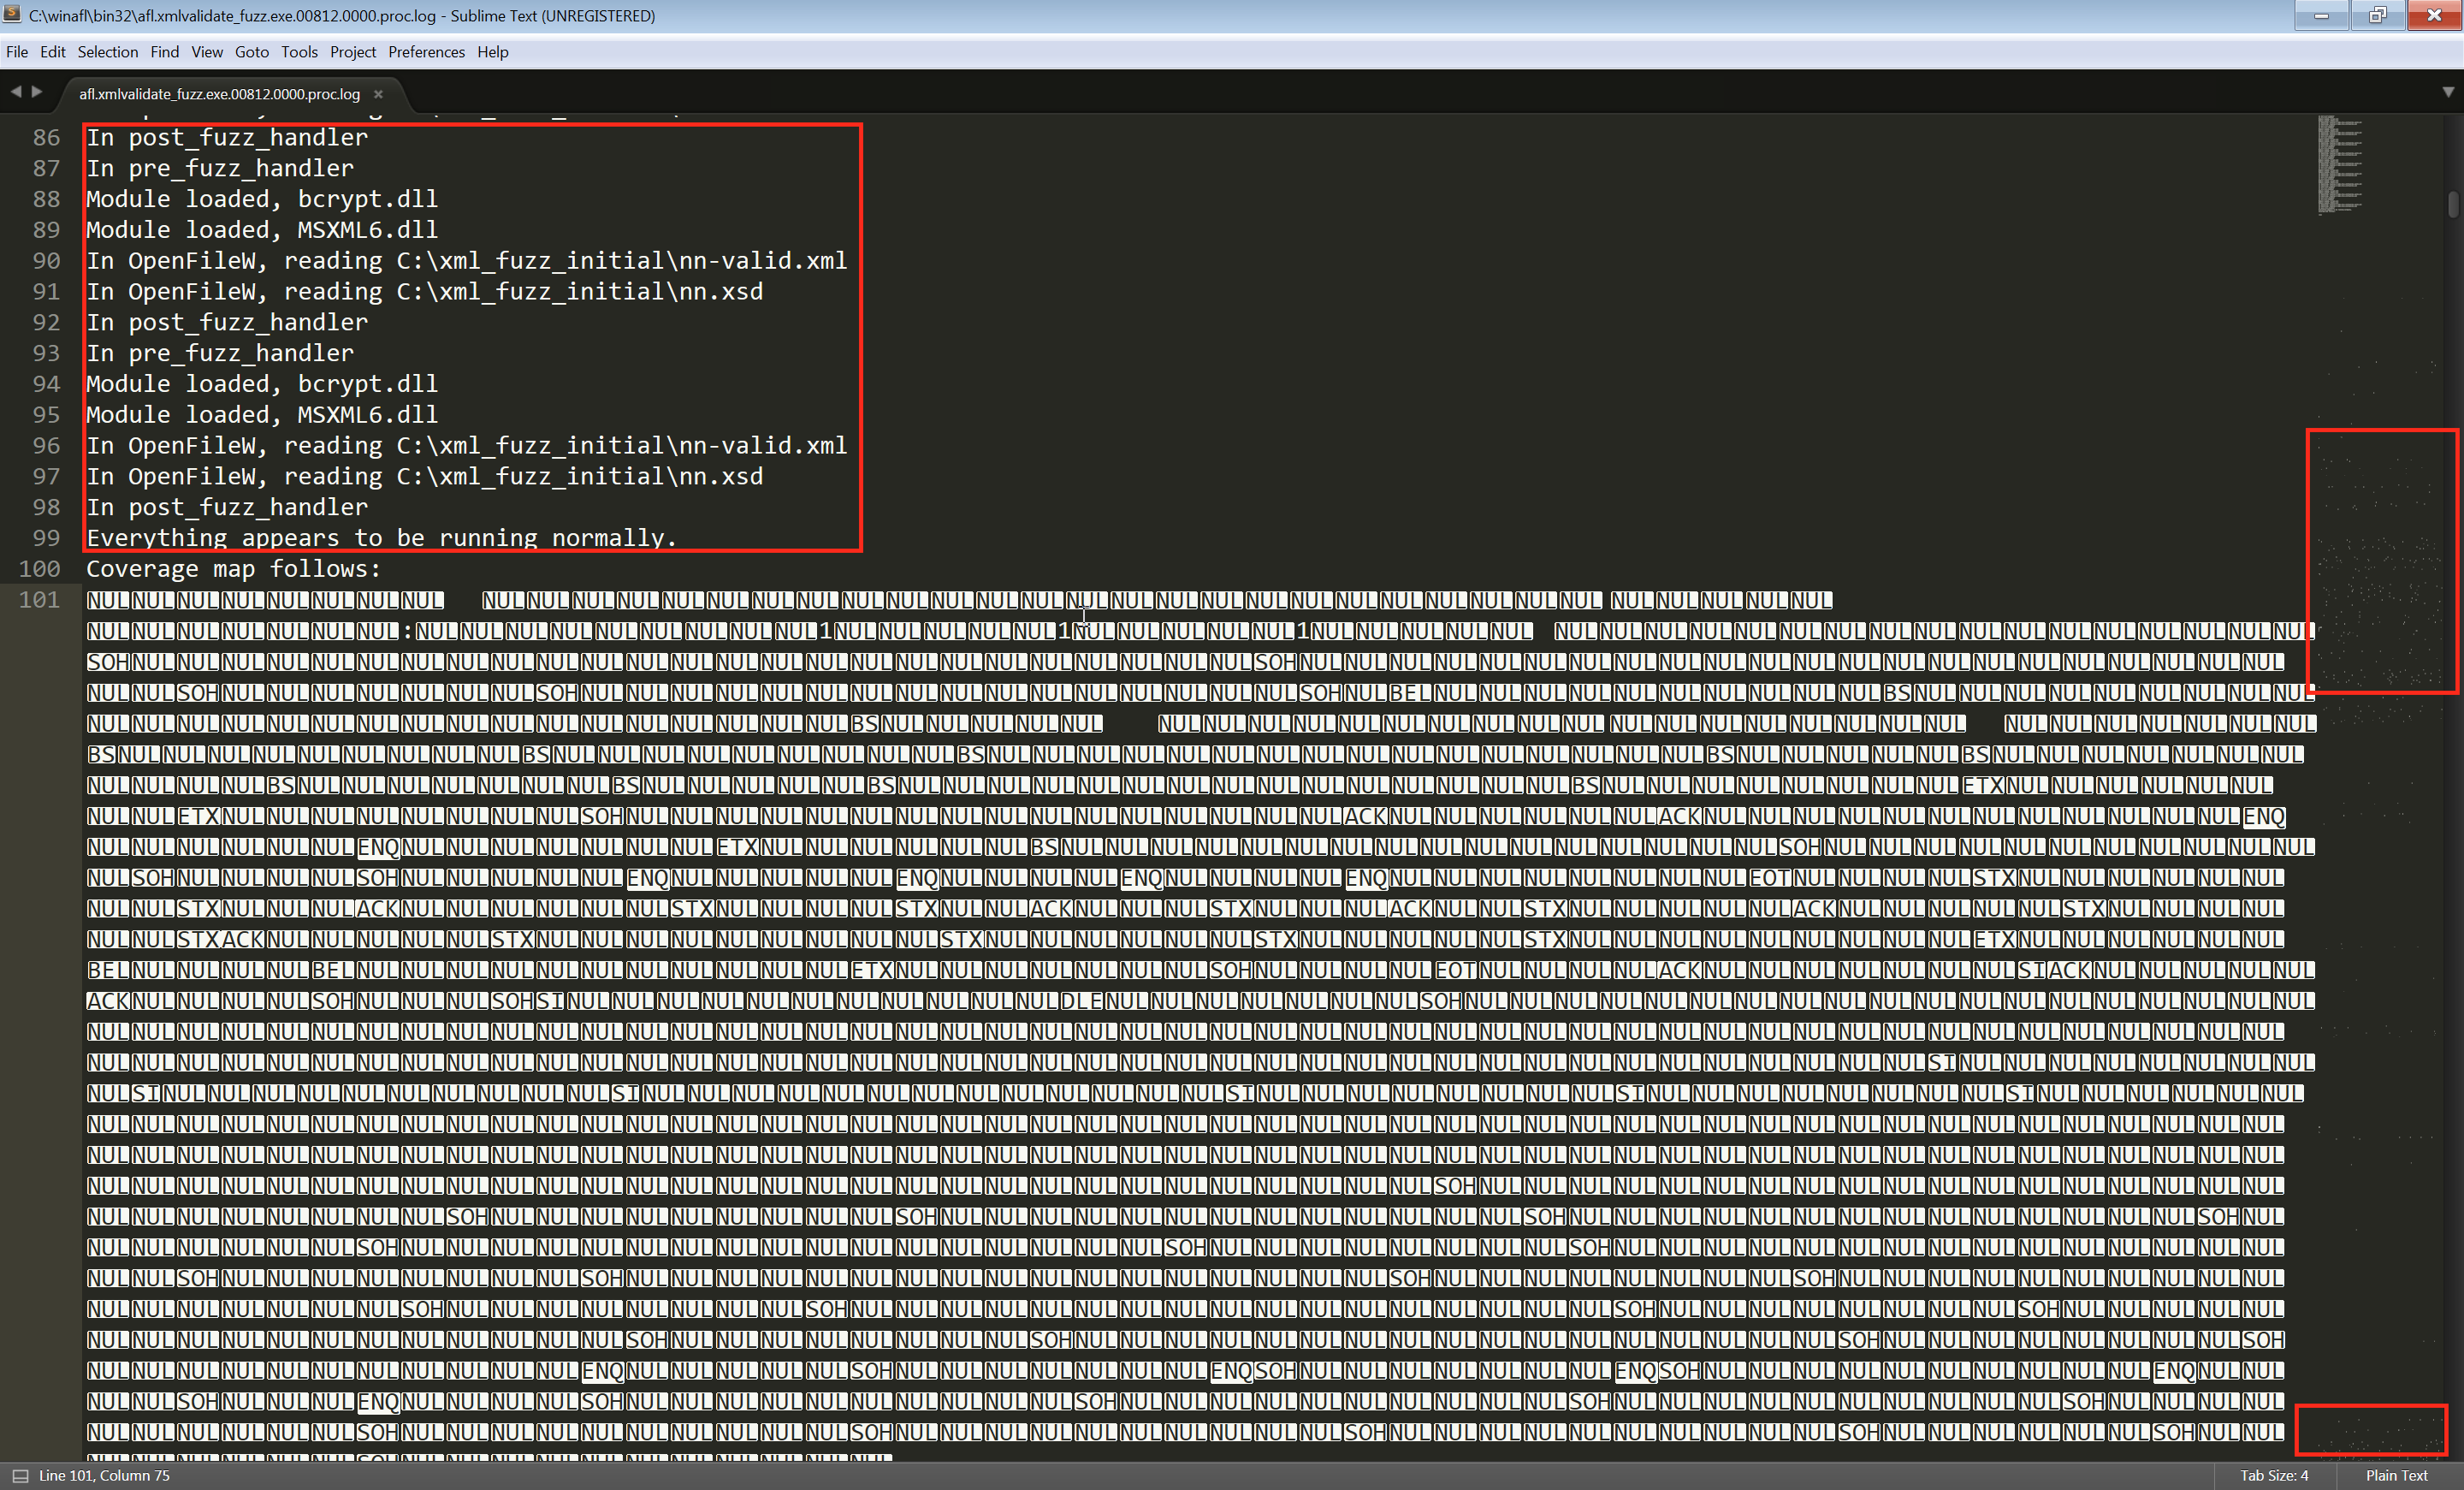
From the output we can see that everything appears to be running normally! On the right side of the file, the dots depict the coverage of the DLL, if you scroll down you’ll see that we did hit many function as we are getting more dots throughout the whole file. That’s a very good indication that we are hiting a lot of code and we properly targeting the MSXML6 library.
Lighthouse - Code Coverage Explorer for IDA Pro
This plugin will help us understand better which function we are hitting and give a nice overview of the coverage using IDA. It’s an excellent plugin with very good documentation and has been developed by Markus Gaasedelen (@gaasedelen) Make sure to download the latest DynamoRIO version 7, and install it as per instrcutions here. Luckily, we do have two sample test cases from the documentation, one valid and one invalid. Let’s feed the valid one and observe the coverage. To do that, run the following command:
C:\DRIO7\bin64\drrun.exe -t drcov -- xmlvalidate.exe nn-valid.xml
Next step fire up IDA, drag the msxml6.dll and make sure to fetch the symbols! Now, check if a .log file has been created and open it on IDA from the File -> Load File -> Code Coverage File(s) menu. Once the coverage file is loaded it will highlight all the functions that your test case hit.
Case minimisation
Now it’s time to grab some XML files (as small as possible). I’ve used a slightly hacked version of joxean’s find_samples.py script. Once you get a few test cases let’s minimise our initial seed files. This can be done using the following command:
python winafl-cmin.py --working-dir C:\winafl\bin32 -D C:\DRIO\bin32 -t 100000 -i C:\xml_fuzz\samples -o C:\minset_xml -coverage_module msxml6.dll -target_module xmlvalidate.exe -target_method fuzzme -nargs 1 -- C:\xml_fuzz\xmlvalidate.exe @@
You might see the following output:
corpus minimization tool for WinAFL by <0vercl0k@tuxfamily.org>

Based on WinAFL by <ifratric@google.com>

Based on AFL by <lcamtuf@google.com>

[+] CWD changed to C:\winafl\bin32.

[*] Testing the target binary...

[!] Dry-run failed, 2 executions resulted differently:

  Tuples matching? False

  Return codes matching? True
I am not quite sure but I think that the winafl-cmin.py script expects that the initial seed files lead to the same code path, that is we have to run the script one time for the valid cases and one for the invalid ones. I might be wrong though and maybe there’s a bug which in that case I need to ping Axel.
Let’s identify the ‘good’ and the ‘bad’ XML test cases using this bash script:
$ for file in *; do printf "==== FILE: $file =====\n"; /cygdrive/c/xml_fuzz/xmlvalidate.exe $file ;sleep 1; done
The following screenshot depicts my results:
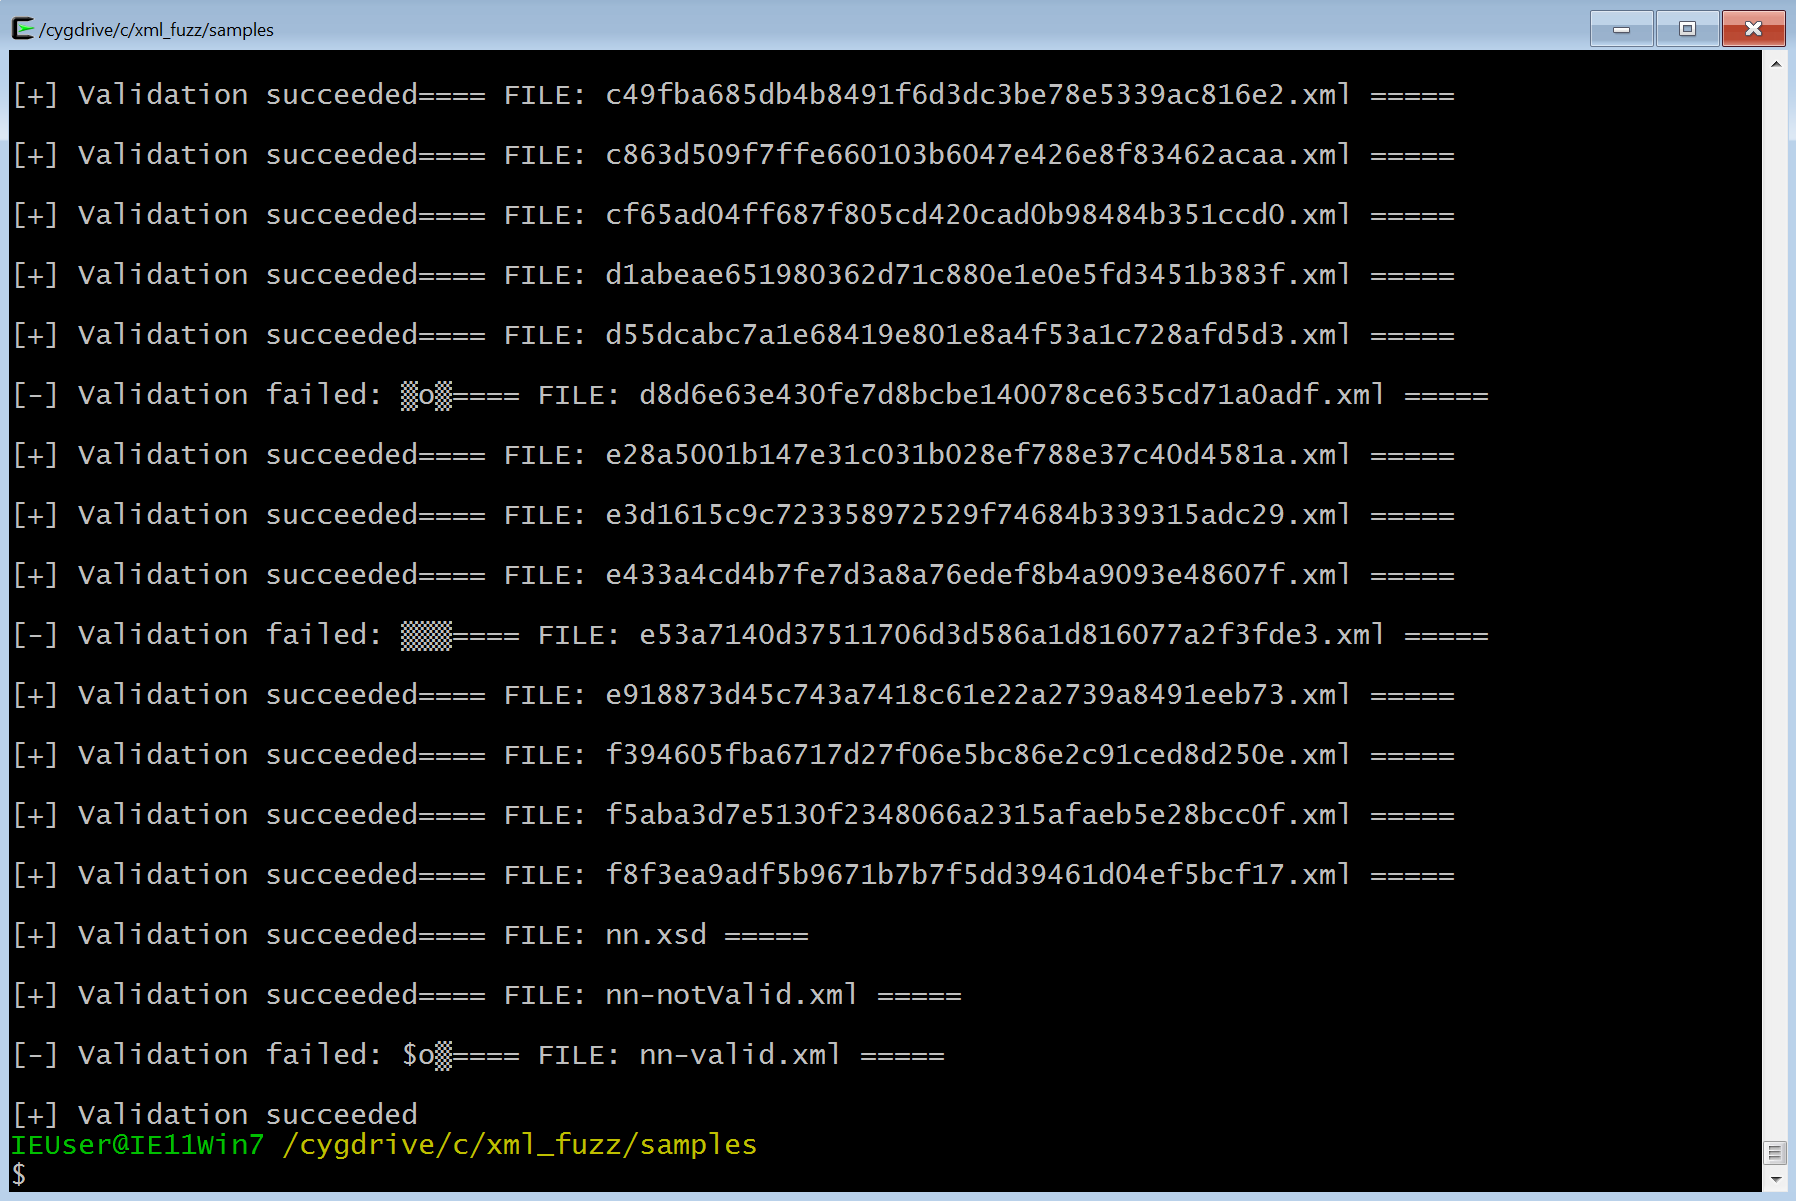
Feel free to expirement a bit, and see which files are causing this issue - your mileage may vary. Once you are set, run again the above command and hopefully you’ll get the following result:
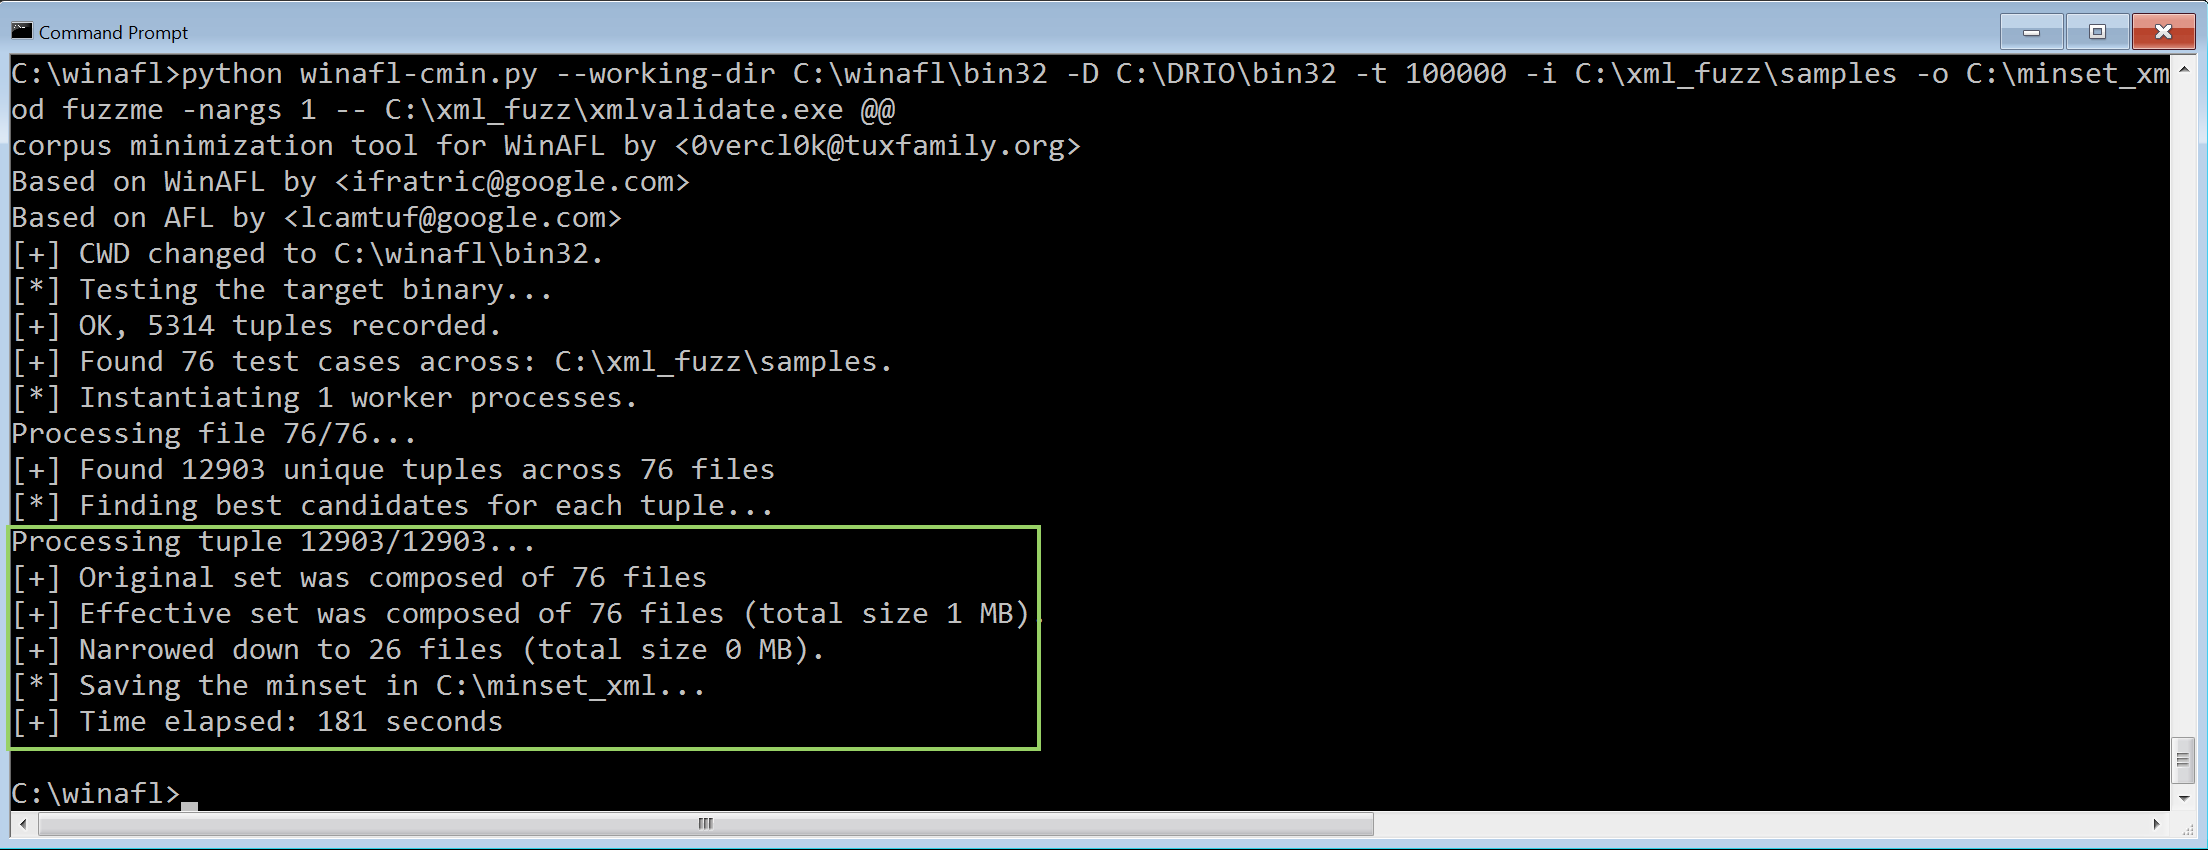
So look at that! The initial campaign included 76 cases which after the minimisation it was narrowed down to 26.
Thank you Axel!
With the minimised test cases let’s code a python script that will automate all the code coverage:
import sys
import os

testcases = []
for root, dirs, files in os.walk(".", topdown=False):
    for name in files:
        if name.endswith(".xml"):
            testcase =  os.path.abspath(os.path.join(root, name))
            testcases.append(testcase)

for testcase in testcases:
    print "[*] Running DynamoRIO for testcase: ", testcase
    os.system("C:\\DRIO7\\bin32\\drrun.exe -t drcov -- C:\\xml_fuzz\\xmlvalidate.exe %s" % testcase)
The above script produced the following output for my case:
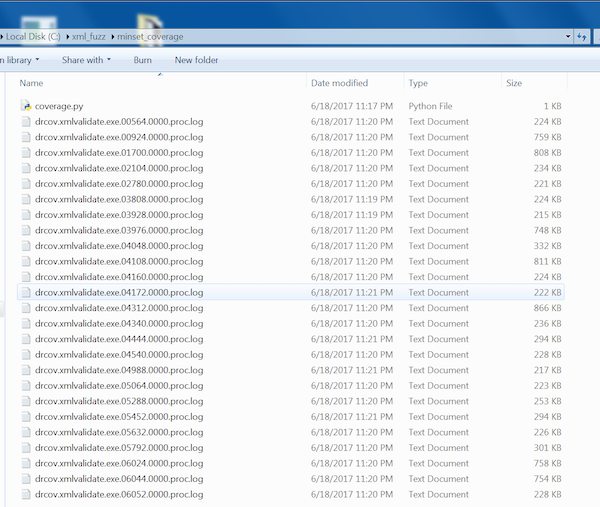
As previously, using IDA open all those .log files under File -> Load File -> Code Coverage File(s) menu.
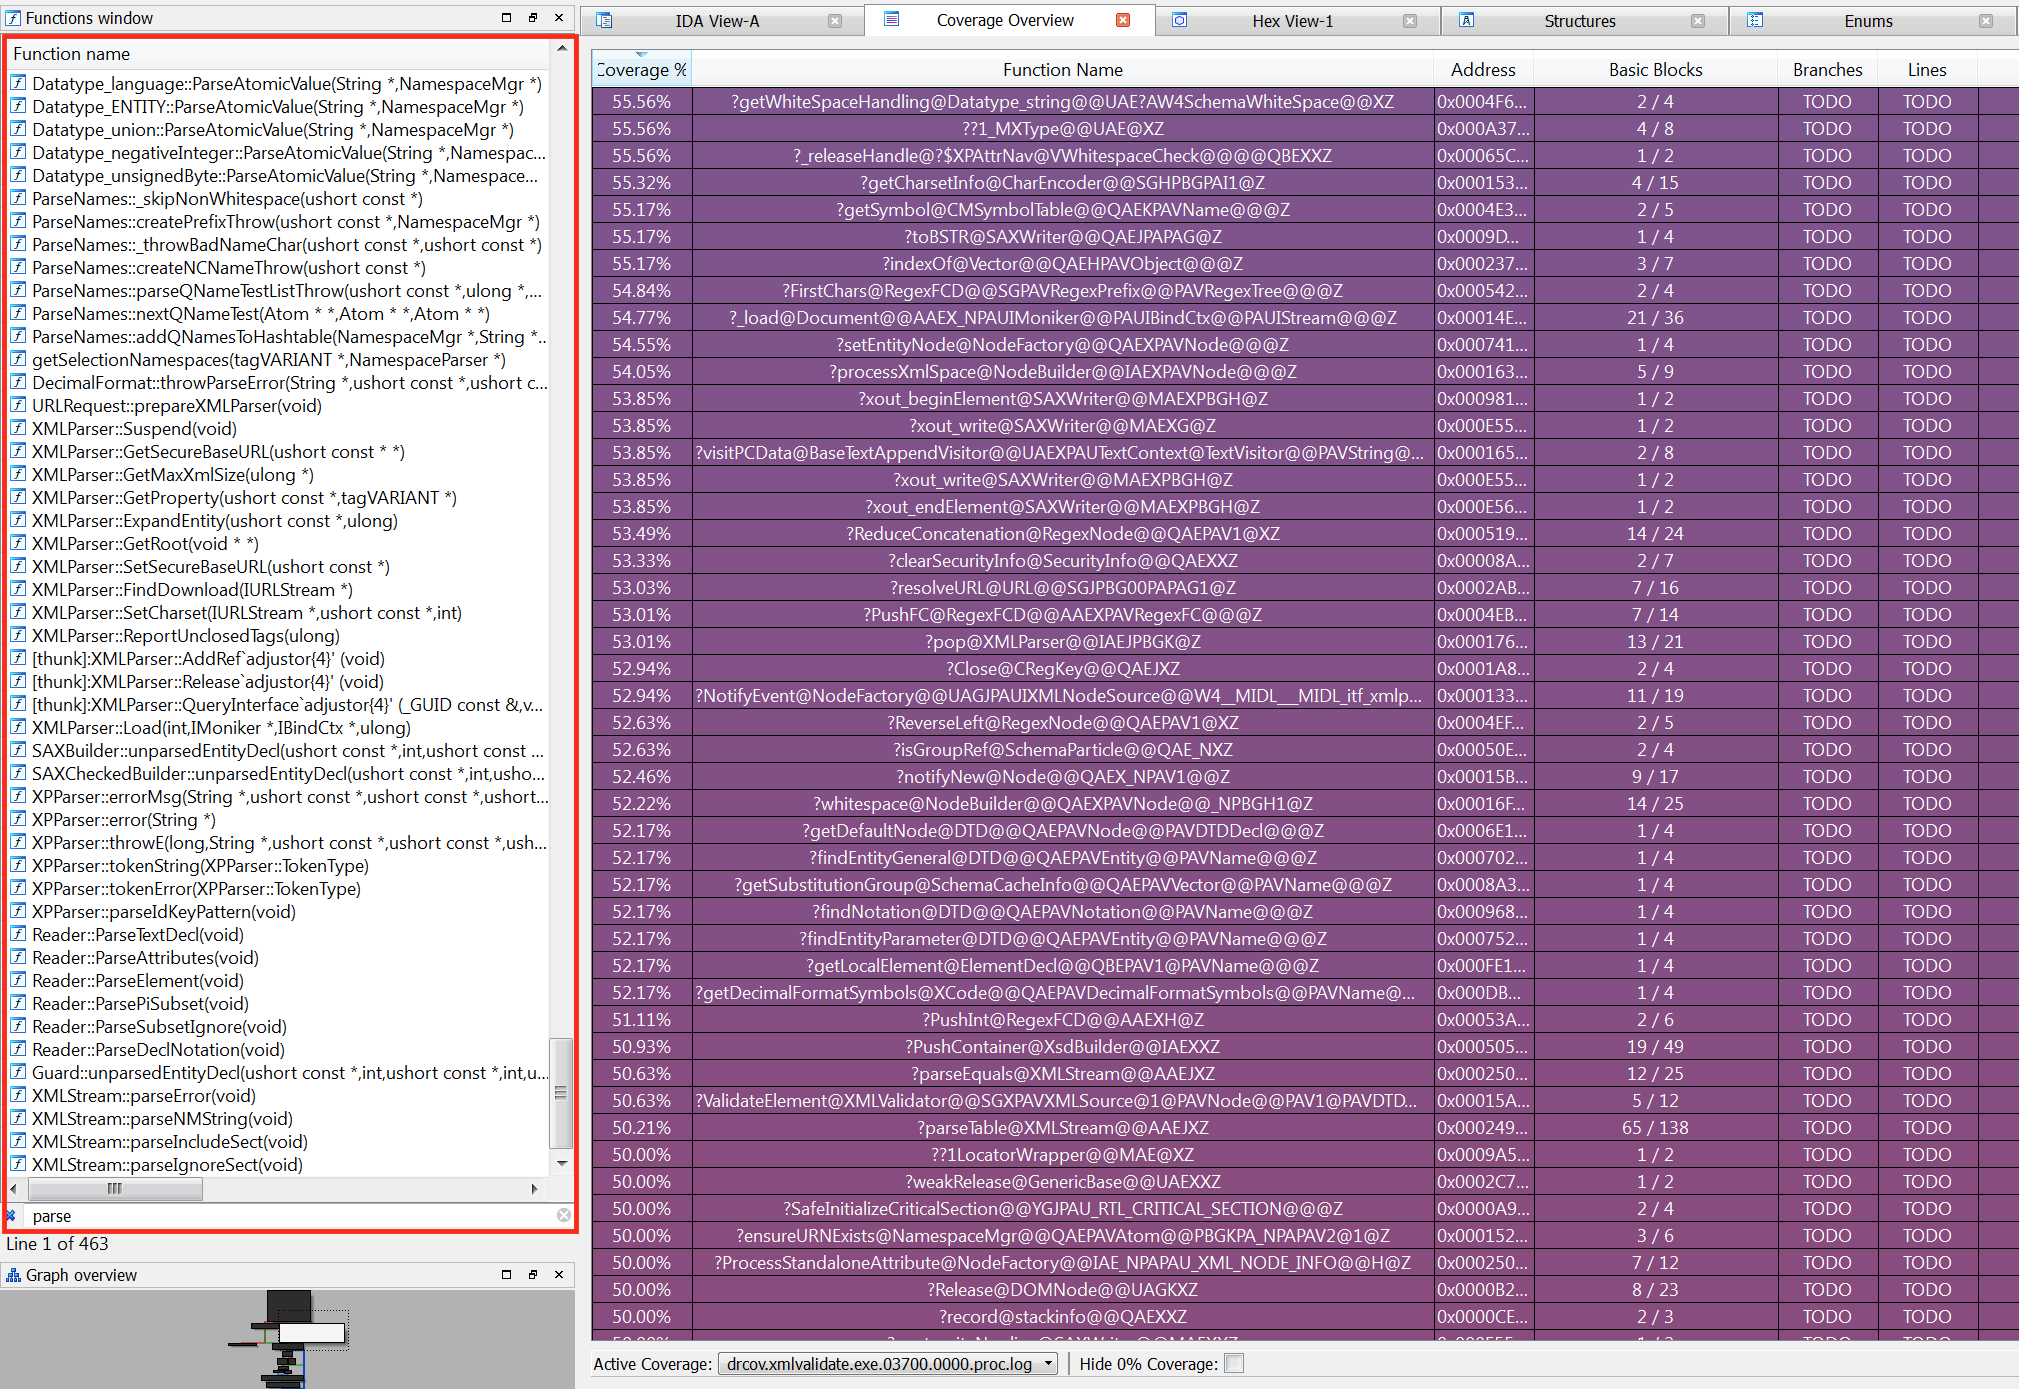
Interestingly enough, notice how many parse functions do exist, and if you navigate around the coverage you’ll see that we’ve managed to hit a decent amount of interesting code.
Since we do have some decent coverage, let’s move on and finally fuzz it!
All I do is fuzz, fuzz, fuzz
Let’s kick off the fuzzer:
afl-fuzz.exe -i C:\minset_xml -o C:\xml_results -D C:\DRIO\bin32\ -t 20000 -- -coverage_module MSXML6.dll -target_module xmlvalidate.exe -target_method main -nargs 2 -- C:\xml_fuzz\xmlvalidate.exe @@
Running the above yields the following output:
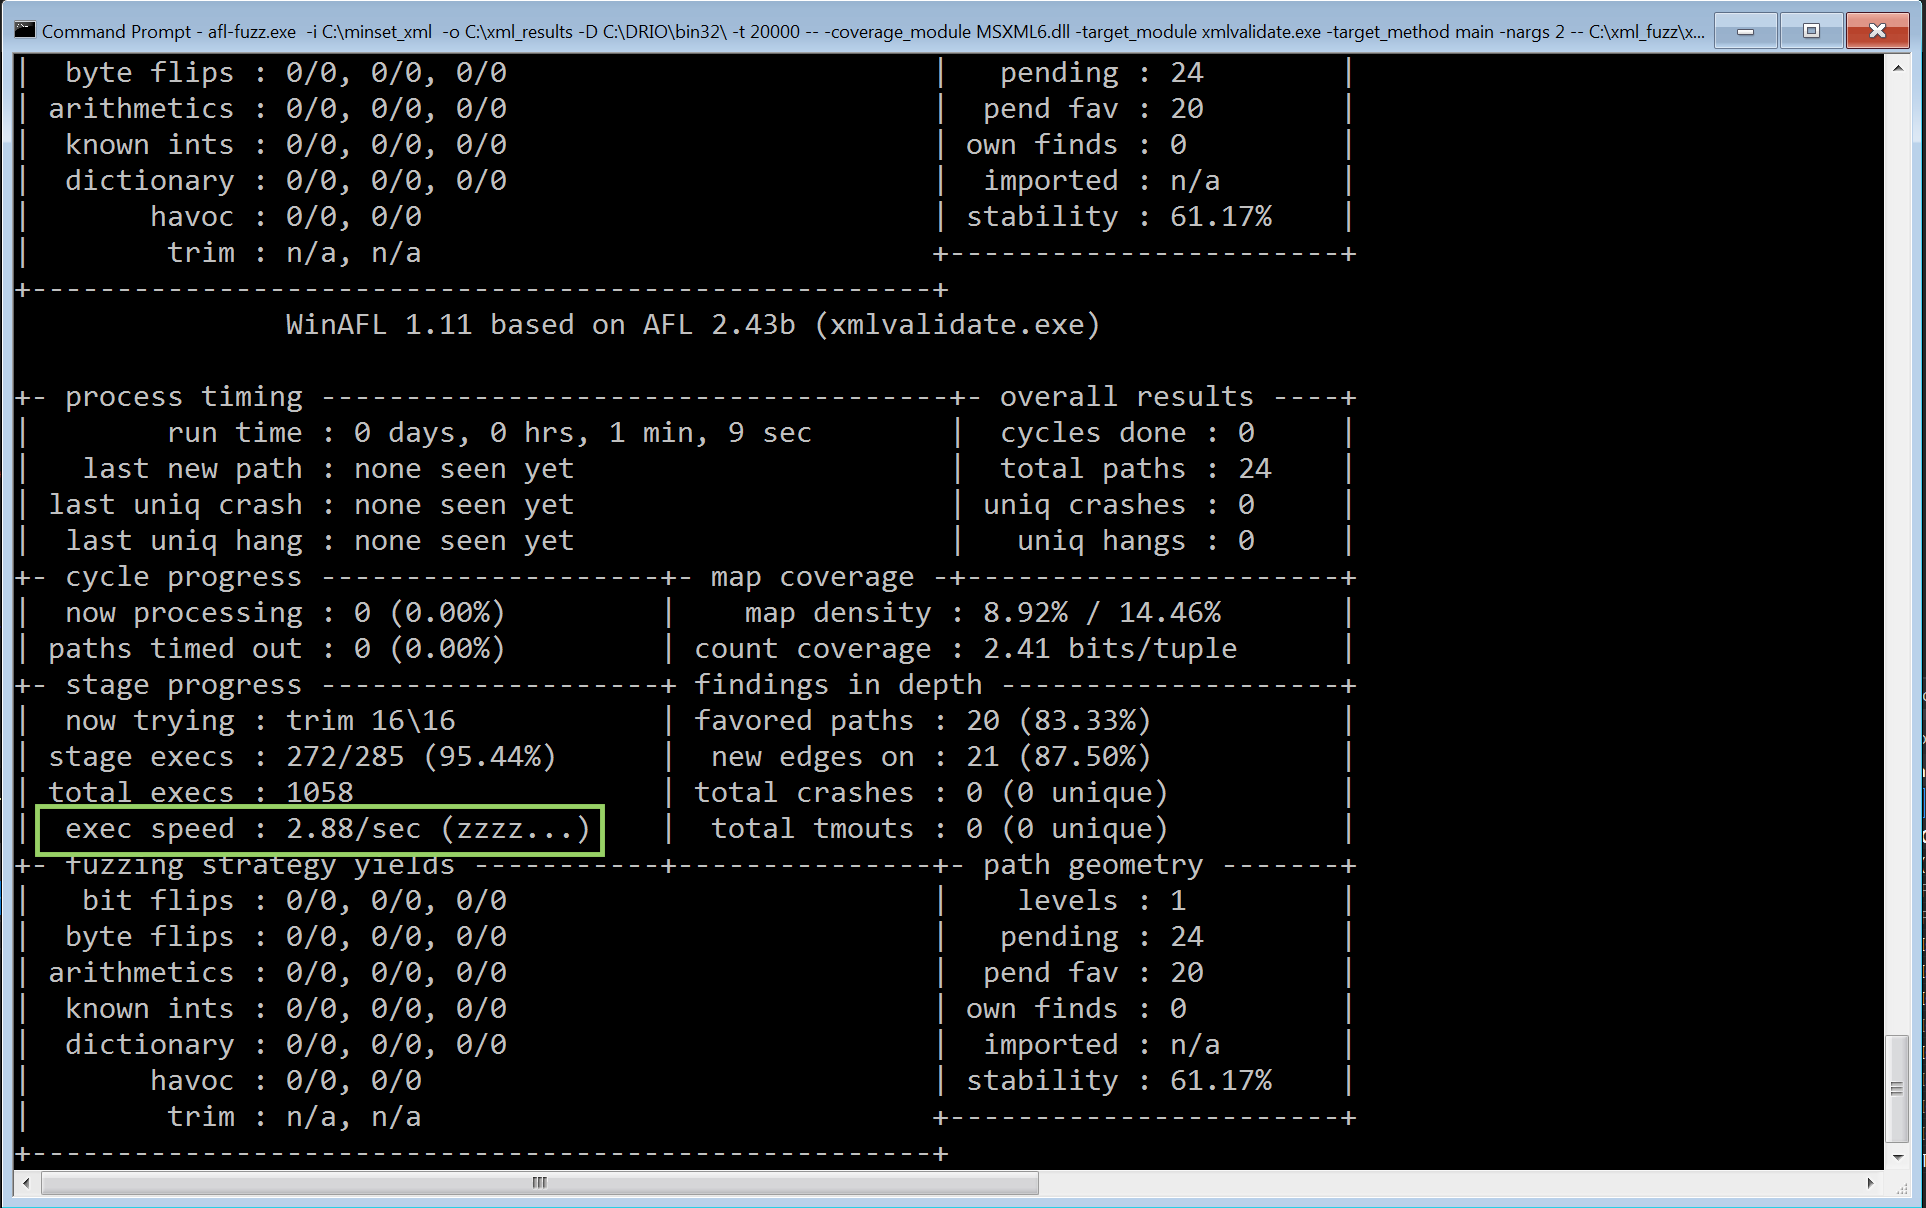
As you can see, the initial code does that job - however the speed is very slow. Three executions per second will take long to give some proper results. Interestingly enough, I’ve had luck in the past and with that speed (using python and radamsa prior the afl/winafl era) had success in finding bugs and within three days of fuzzing!
Let’s try our best though and get rid of the part that slows down the fuzzing. If you’ve done some Windows programming you know that the following line initialises a COM object which could be the bottleneck of the slow speed:
This line probably is a major issue so in fact, let’s refactor the code, we are going to create a fuzzme method which
is going to receive the filename as an argument outside the COM initialisation call. The refactored code should look like this:
--- cut ---

extern "C" __declspec(dllexport) _bstr_t fuzzme(wchar_t* filename);

_bstr_t fuzzme(wchar_t* filename)
{
    _bstr_t bstrOutput = validateFile(filename);
    //bstrOutput += validateFile(L"nn-notValid.xml");
    //MessageBoxW(NULL, bstrOutput, L"noNamespace", MB_OK);
    return bstrOutput;

}
int main(int argc, char** argv)
{
    if (argc < 2) {
        printf("Usage: %s <xml file>\n", argv[0]);
        return 0;
    }

    HRESULT hr = CoInitialize(NULL);
    if (SUCCEEDED(hr))
    {
        try
        {
            _bstr_t bstrOutput = fuzzme(charToWChar(argv[1]));
        }
        catch (_com_error &e)
        {
            dump_com_error(e);
        }
        CoUninitialize();
    }
    return 0;
}
--- cut ---
You can grab the refactored version here. With the refactored binary let’s run one more time the fuzzer and see if we were right. This time, we will pass the fuzzme target_method instead of main, and use only one argument which is the filename. While we are here, let’s use the lcamtuf’s xml.dic from here.
afl-fuzz.exe -i C:\minset_xml -o C:\xml_results -D C:\DRIO\bin32\ -t 20000 -x xml.dict -- -coverage_module MSXML6.dll -target_module xmlvalidate.exe -target_method fuzzme -nargs 1 -- C:\xml_fuzz\xmlvalidate.exe @@
Once you’ve run that, here’s the output within a few seconds of fuzzing on a VMWare instance:
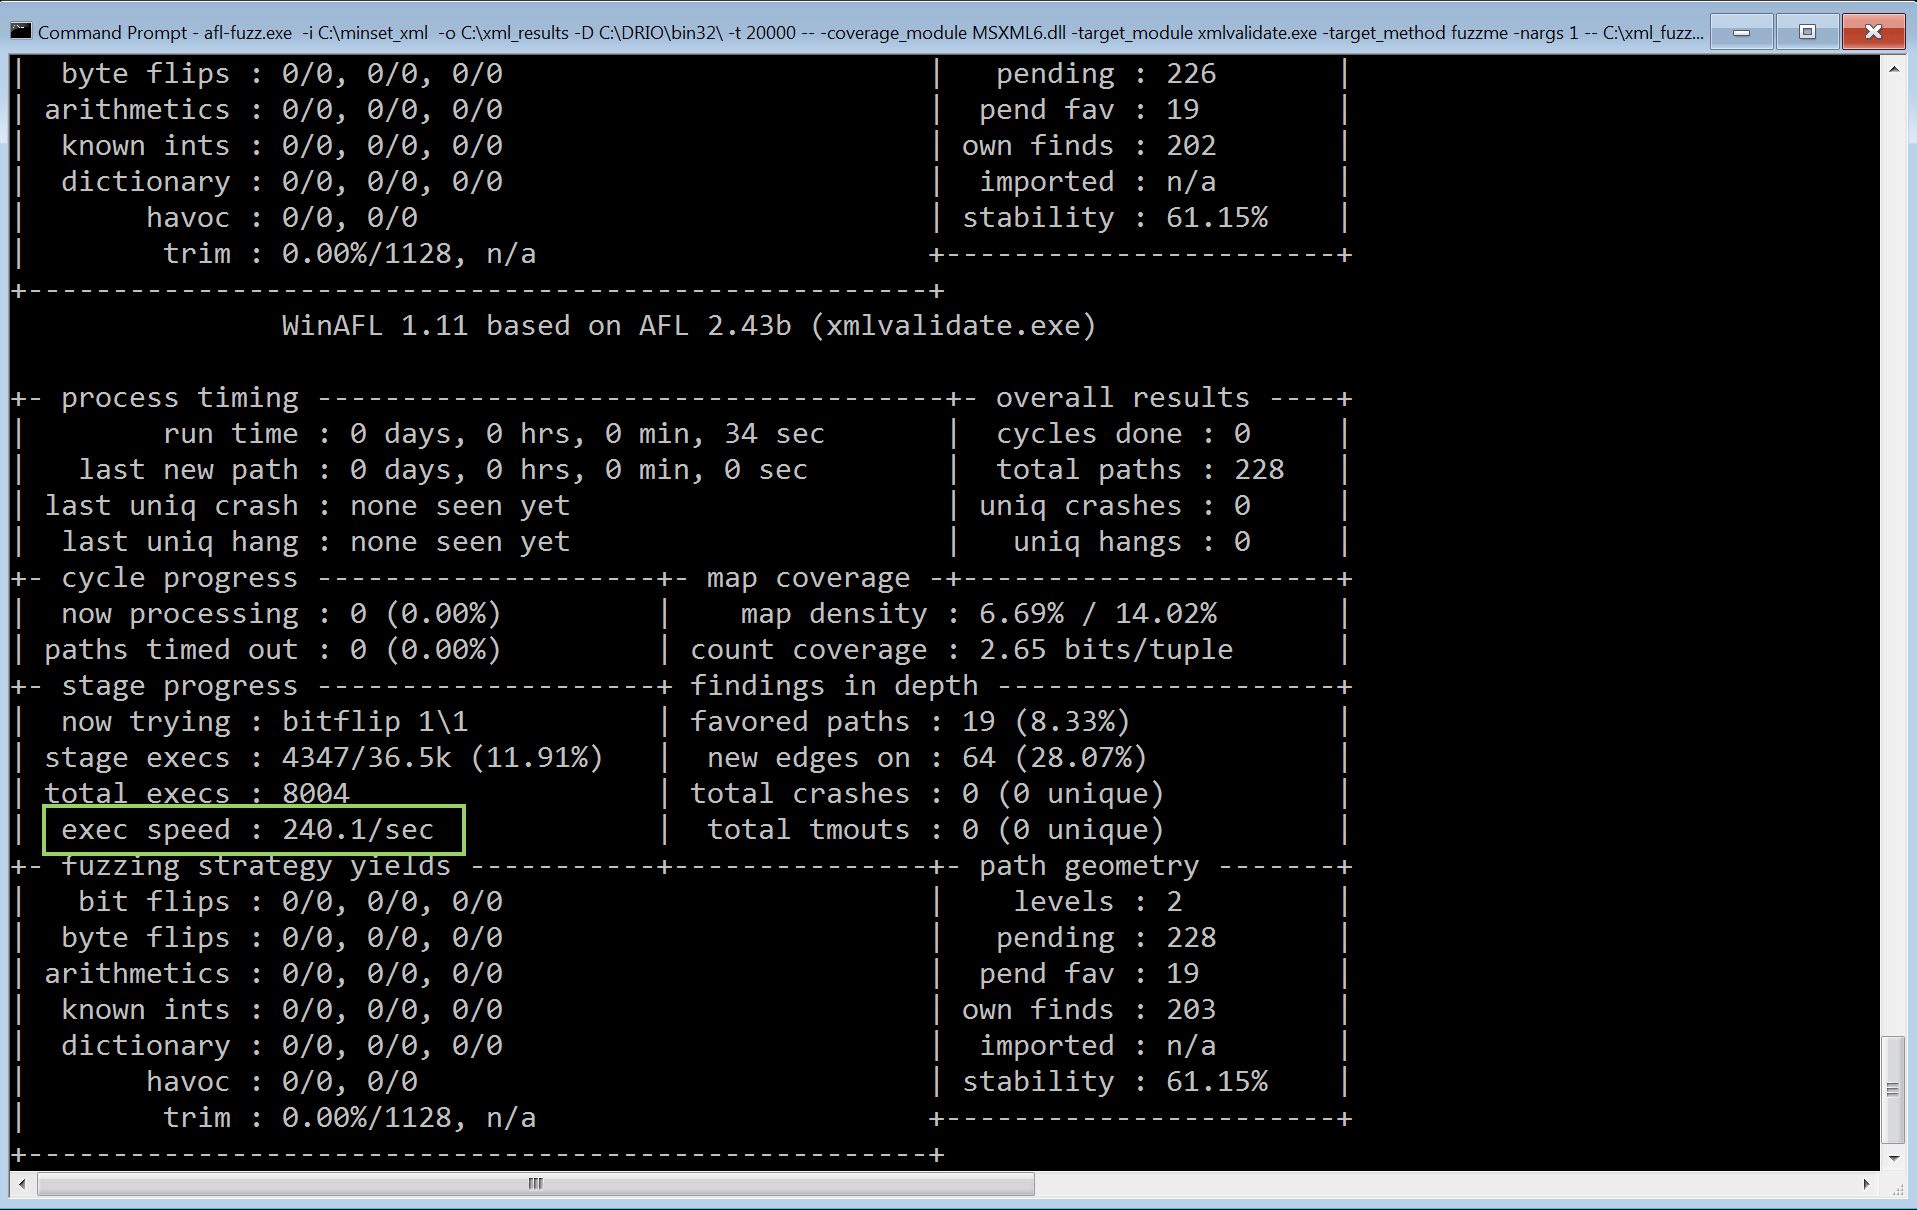
Brilliant! That’s much much better, now let it run and wait for crashes!
The findings - Crash triage/analysis
Generally, I’ve tried to fuzz this binary with different test cases, however unfortunately I kept getting the NULL pointer dereference bug. The following screenshot depicts the findings after a ~ 12 days fuzzing campaign:
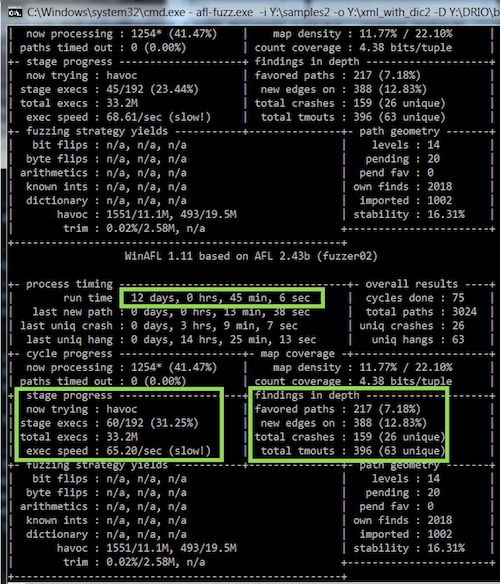
Notice that a total of 33 million executions were performed and 26 unique crashes were discovered!
In order to triage these findings, I’ve used the BugId tool from SkyLined, it’s an excellent tool which will give you a detailed report regarding the crash and the exploitability of the crash.
Here’s my python code for that:
import sys
import os


sys.path.append("C:\\BugId")

testcases = []
for root, dirs, files in os.walk(".\\fuzzer01\\crashes", topdown=False):
    for name in files:
        if name.endswith("00"):
            testcase =  os.path.abspath(os.path.join(root, name))
            testcases.append(testcase)

for testcase in testcases:
    print "[*] Gonna run: ", testcase
    os.system("C:\\python27\\python.exe C:\\BugId\\BugId.py C:\\Users\\IEUser\\Desktop\\xml_validate_results\\xmlvalidate.exe -- %s" % testcase)
The above script gives the following output:
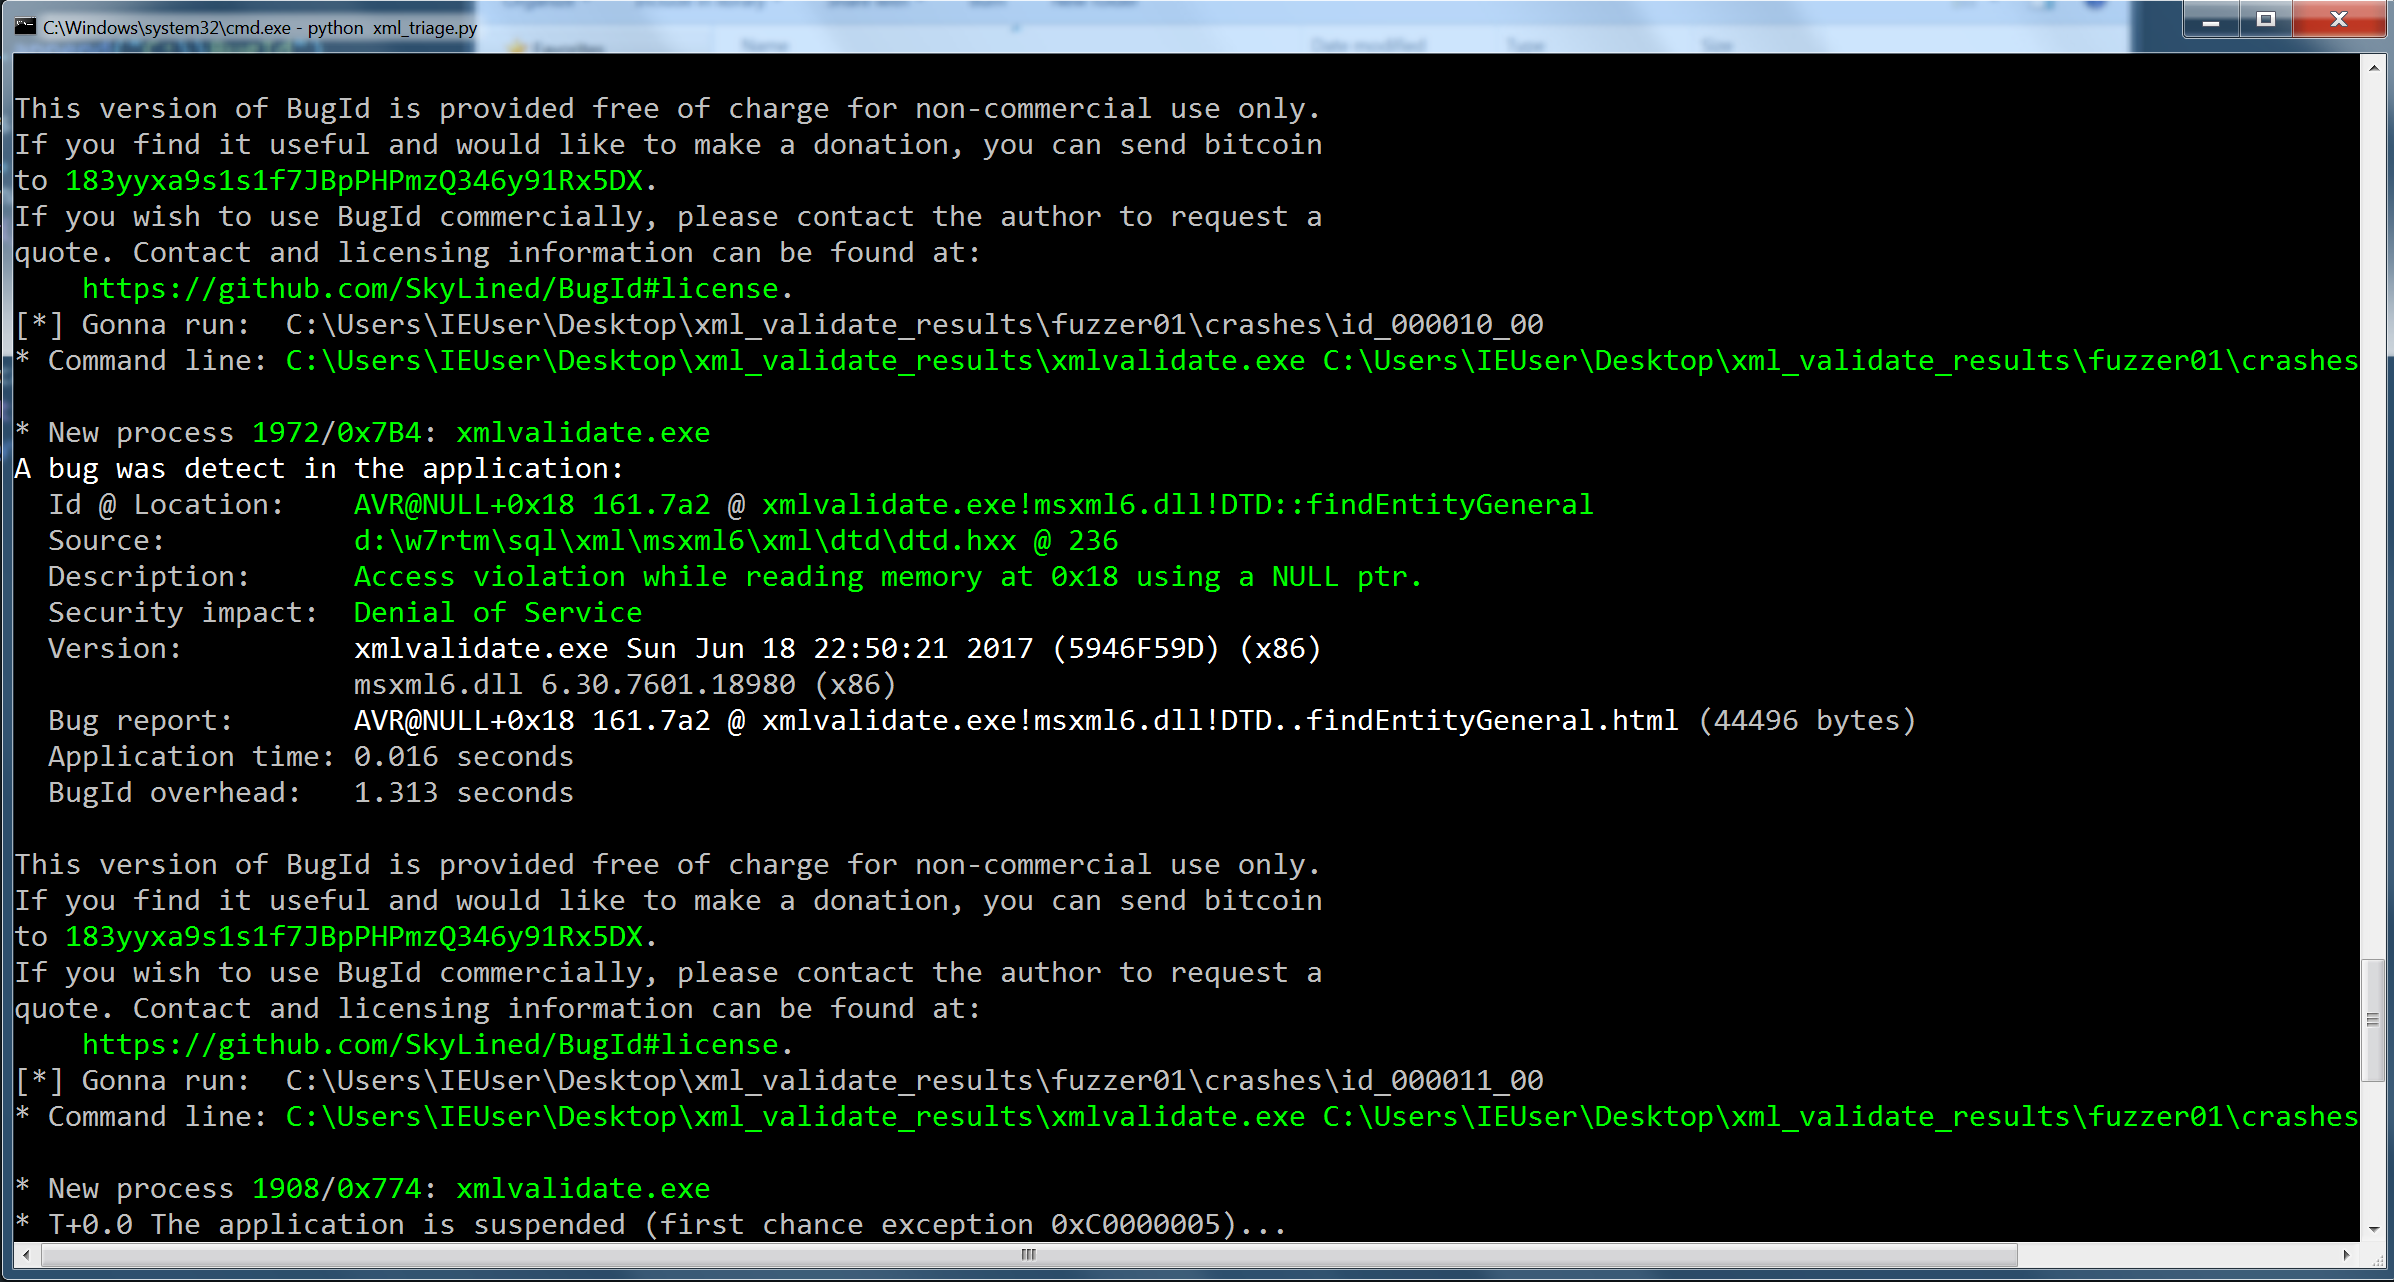
Once I ran that for all my crashes, it clearly showed that we’re hitting the same bug. To confirm, let’s fire up windbg:
0:000> g
(a6c.5c0): Access violation - code c0000005 (!!! second chance !!!)
eax=03727aa0 ebx=0012fc3c ecx=00000000 edx=00000000 esi=030f4f1c edi=00000002
eip=6f95025a esp=0012fbcc ebp=0012fbcc iopl=0         nv up ei pl zr na pe nc
cs=001b  ss=0023  ds=0023  es=0023  fs=003b  gs=0000             efl=00010246
msxml6!DTD::findEntityGeneral+0x5:
6f95025a 8b4918          mov     ecx,dword ptr [ecx+18h] ds:0023:00000018=????????
0:000> kv
ChildEBP RetAddr  Args to Child
0012fbcc 6f9de300 03727aa0 00000002 030f4f1c msxml6!DTD::findEntityGeneral+0x5 (FPO: [Non-Fpo]) (CONV: thiscall) [d:\w7rtm\sql\xml\msxml6\xml\dtd\dtd.hxx @ 236]
0012fbe8 6f999db3 03727aa0 00000003 030c5fb0 msxml6!DTD::checkAttrEntityRef+0x14 (FPO: [Non-Fpo]) (CONV: thiscall) [d:\w7rtm\sql\xml\msxml6\xml\dtd\dtd.cxx @ 1470]
0012fc10 6f90508f 030f4f18 0012fc3c 00000000 msxml6!GetAttributeValueCollapsing+0x43 (FPO: [Non-Fpo]) (CONV: stdcall) [d:\w7rtm\sql\xml\msxml6\xml\parse\nodefactory.cxx @ 771]
0012fc28 6f902d87 00000003 030f4f14 6f9051f4 msxml6!NodeFactory::FindAttributeValue+0x3c (FPO: [Non-Fpo]) (CONV: thiscall) [d:\w7rtm\sql\xml\msxml6\xml\parse\nodefactory.cxx @ 743]
0012fc8c 6f8f7f0d 030c5fb0 030c3f20 01570040 msxml6!NodeFactory::CreateNode+0x124 (FPO: [Non-Fpo]) (CONV: stdcall) [d:\w7rtm\sql\xml\msxml6\xml\parse\nodefactory.cxx @ 444]
0012fd1c 6f8f5042 010c3f20 ffffffff c4fd70d3 msxml6!XMLParser::Run+0x740 (FPO: [Non-Fpo]) (CONV: stdcall) [d:\w7rtm\sql\xml\msxml6\xml\tokenizer\parser\xmlparser.cxx @ 1165]
0012fd58 6f8f4f93 030c3f20 c4fd7017 00000000 msxml6!Document::run+0x89 (FPO: [Non-Fpo]) (CONV: thiscall) [d:\w7rtm\sql\xml\msxml6\xml\om\document.cxx @ 1494]
0012fd9c 6f90a95b 030ddf58 00000000 00000000 msxml6!Document::_load+0x1f1 (FPO: [Non-Fpo]) (CONV: thiscall) [d:\w7rtm\sql\xml\msxml6\xml\om\document.cxx @ 1012]
0012fdc8 6f8f6c75 037278f0 00000000 c4fd73b3 msxml6!Document::load+0xa5 (FPO: [Non-Fpo]) (CONV: thiscall) [d:\w7rtm\sql\xml\msxml6\xml\om\document.cxx @ 754]
0012fe38 00401d36 00000000 00000008 00000000 msxml6!DOMDocumentWrapper::load+0x1ff (FPO: [Non-Fpo]) (CONV: stdcall) [d:\w7rtm\sql\xml\msxml6\xml\om\xmldom.cxx @ 1111]
-- cut --
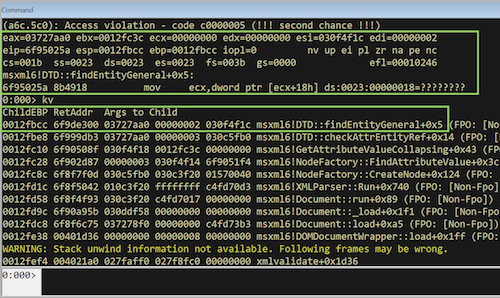
Let’s take a look at one of the crasher:
C:\Users\IEUser\Desktop\xml_validate_results\fuzzer01\crashes>type id_000000_00
<?xml version="&a;1.0"?>
<book xmlns:xsi="http://www.w3.org/2001/XMLSchema-instance"
      xsi:noNamespaceSchemaLocation="nn.xsd"
      id="bk101">
   <author>Gambardella, Matthew</author>
   <title>XML Developer's Guide</title>
   <genre>Computer</genre>
   <price>44.95</price>
   <publish_date>2000-10-01</publish_date>
   <description>An in-depth look at creating applications with
   XML.</description>
As you can see, if we provide some garbage either on the xml version or the encoding, we will get the above crash. Mitja also minimised the case as seen below:
<?xml version='1.0' encoding='&aaa;'?>
The whole idea of fuzzing this library was based on finding a vulnerability within Internet Explorer’s context and somehow trigger it. After a bit of googling, let’s use the following PoC (crashme.html) and see if it will crash IE11:
<!DOCTYPE html>
<html>
<head>
</head>
<body>
<script>

var xmlDoc = new ActiveXObject("Msxml2.DOMDocument.6.0");
xmlDoc.async = false;
xmlDoc.load("crashme.xml");
if (xmlDoc.parseError.errorCode != 0) {
   var myErr = xmlDoc.parseError;
   console.log("You have error " + myErr.reason);
} else {
   console.log(xmlDoc.xml);
}

</script>
</body>
</html>
Running that under Python’s SimpleHTTPServer gives the following:
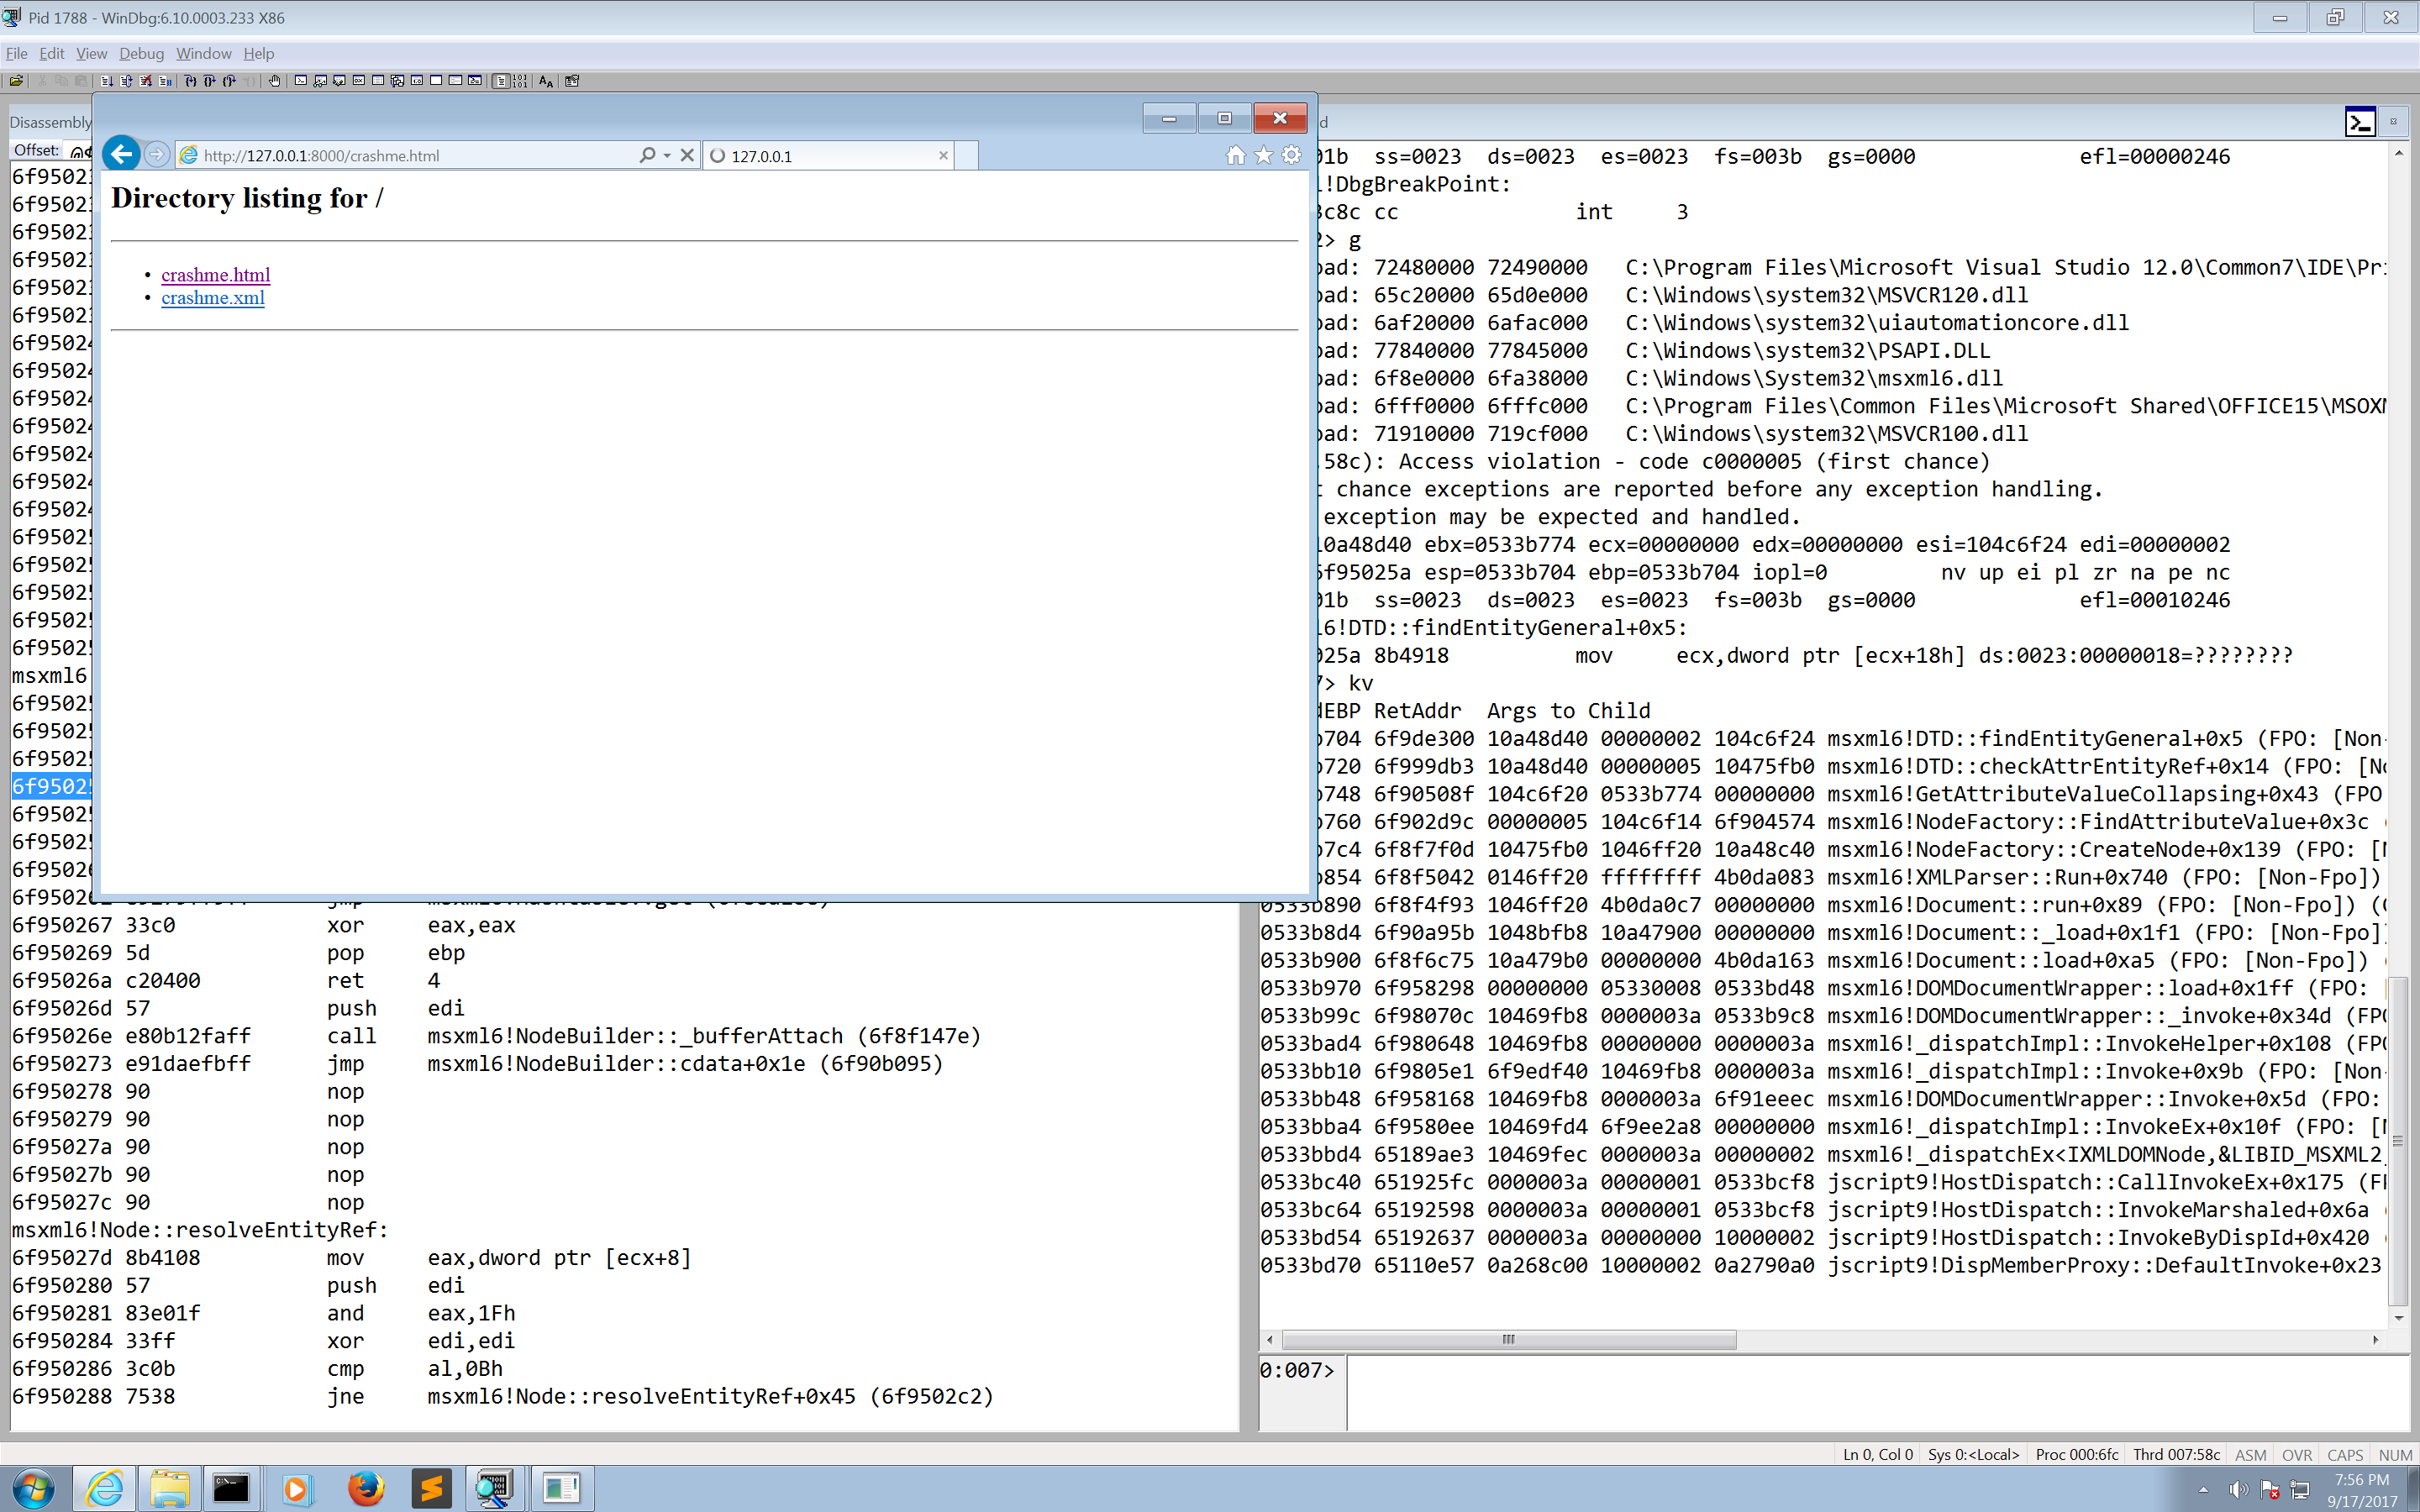
Bingo! As expected, at least with PageHeap enabled we are able to trigger exactly the same crash as with our harness. Be careful not to include that xml on Microsoft Outlook, because it will also crash it as well! Also, since it’s on the library itself, had it been a more sexy crash would increase the attack surface!
Patching
After exchanging a few emails with Mitja, he kindly provided me the following patch which can be applied on a fully updated x64 system:
;target platform: Windows 7 x64
;
RUN_CMD C:\Users\symeon\Desktop\xmlvalidate_64bit\xmlvalidate.exe C:\Users\symeon\Desktop\xmlvalidate_64bit\poc2.xml
MODULE_PATH "C:\Windows\System32\msxml6.dll"
PATCH_ID 200000
PATCH_FORMAT_VER 2
VULN_ID 9999999
PLATFORM win64


patchlet_start
 PATCHLET_ID 1
 PATCHLET_TYPE 2

 PATCHLET_OFFSET 0xD093D
 PIT msxml6.dll!0xD097D

 code_start

  test rbp, rbp ;is rbp (this) NULL?
  jnz continue
  jmp PIT_0xD097D
  continue:
 code_end
patchlet_end
Let’s debug and test that patch, I’ve created an account and installed the 0patch agent for developers, and continued by right clicking on the above .0pp file:
Once I’ve executed my harness with the xml crasher, I immediately hit the breakpoint:
From the code above, indeed rbp is null which would lead to the null pointer dereference.
Since we have deployed the 0patch agent though, in fact it’s going to jump to msxml6.dll!0xD097D and avoid the crash:
Fantastic! My next step was to fire up winafl again with the patched version which unfortunately failed. Due to the nature of 0patch (function hooking?) it does not play nice with WinAFL and it crashes it.
Nevertheless, this is a sort of “DoS 0day” and as I mentioned earlier I reported it to Microsoft back in June 2017 and after twenty days I got the following email:

I totally agree with that decision, however I was mostly interested in patching the annoying bug so I can move on with my fuzzing :o)
After spending a few hours on the debugger, the only “controllable” user input would be the length of the encoding string:
eax=03052660 ebx=0012fc3c ecx=00000011 edx=00000020 esi=03054f24 edi=00000002
eip=6f80e616 esp=0012fbd4 ebp=0012fbe4 iopl=0         nv up ei pl zr na pe nc
cs=001b  ss=0023  ds=0023  es=0023  fs=003b  gs=0000             efl=00000246
msxml6!Name::create+0xf:
6f80e616 e8e7e6f9ff      call    msxml6!Name::create (6f7acd02)
0:000> dds esp L3
0012fbd4  00000000
0012fbd8  03064ff8
0012fbdc  00000003

0:000> dc 03064ff8 L4
03064ff8  00610061 00000061 ???????? ????????  a.a.a...????????
The above unicode string is in fact our entity from the test case, where the number 3 is the length aparently
(and the signature of the function: Name *__stdcall Name::create(String *pS, const wchar_t *pch, int iLen, Atom *pAtomURN))
Conclusion
As you can see, spending some time on Microsoft’s APIs/documentation can be gold! Moreover, refactoring some basic functions and pinpointing the issues that affect the performance can also lead to massive improvements!
On that note I can’t thank enough Ivan for porting the afl to Windows and creating this amazing project. Moreover thanks to Axel as well who’s been actively contributing and adding amazing features.
Shouts to my colleague Javier (we all have one of those heap junkie friends, right?) for motivating me to write this blog, Richard who’s been answering my silly questions and helping me all this time, Mitja from the 0patch team for building this patch.